Overviews
An overview is a saved table of cases from one template. It has its own columns, filter and sorting, and shows only the cases you have rights to. To open overviews, click Overviews in the side menu. You see your own overviews and the overviews someone has shared with you (directly, through a role or through an organizational unit).
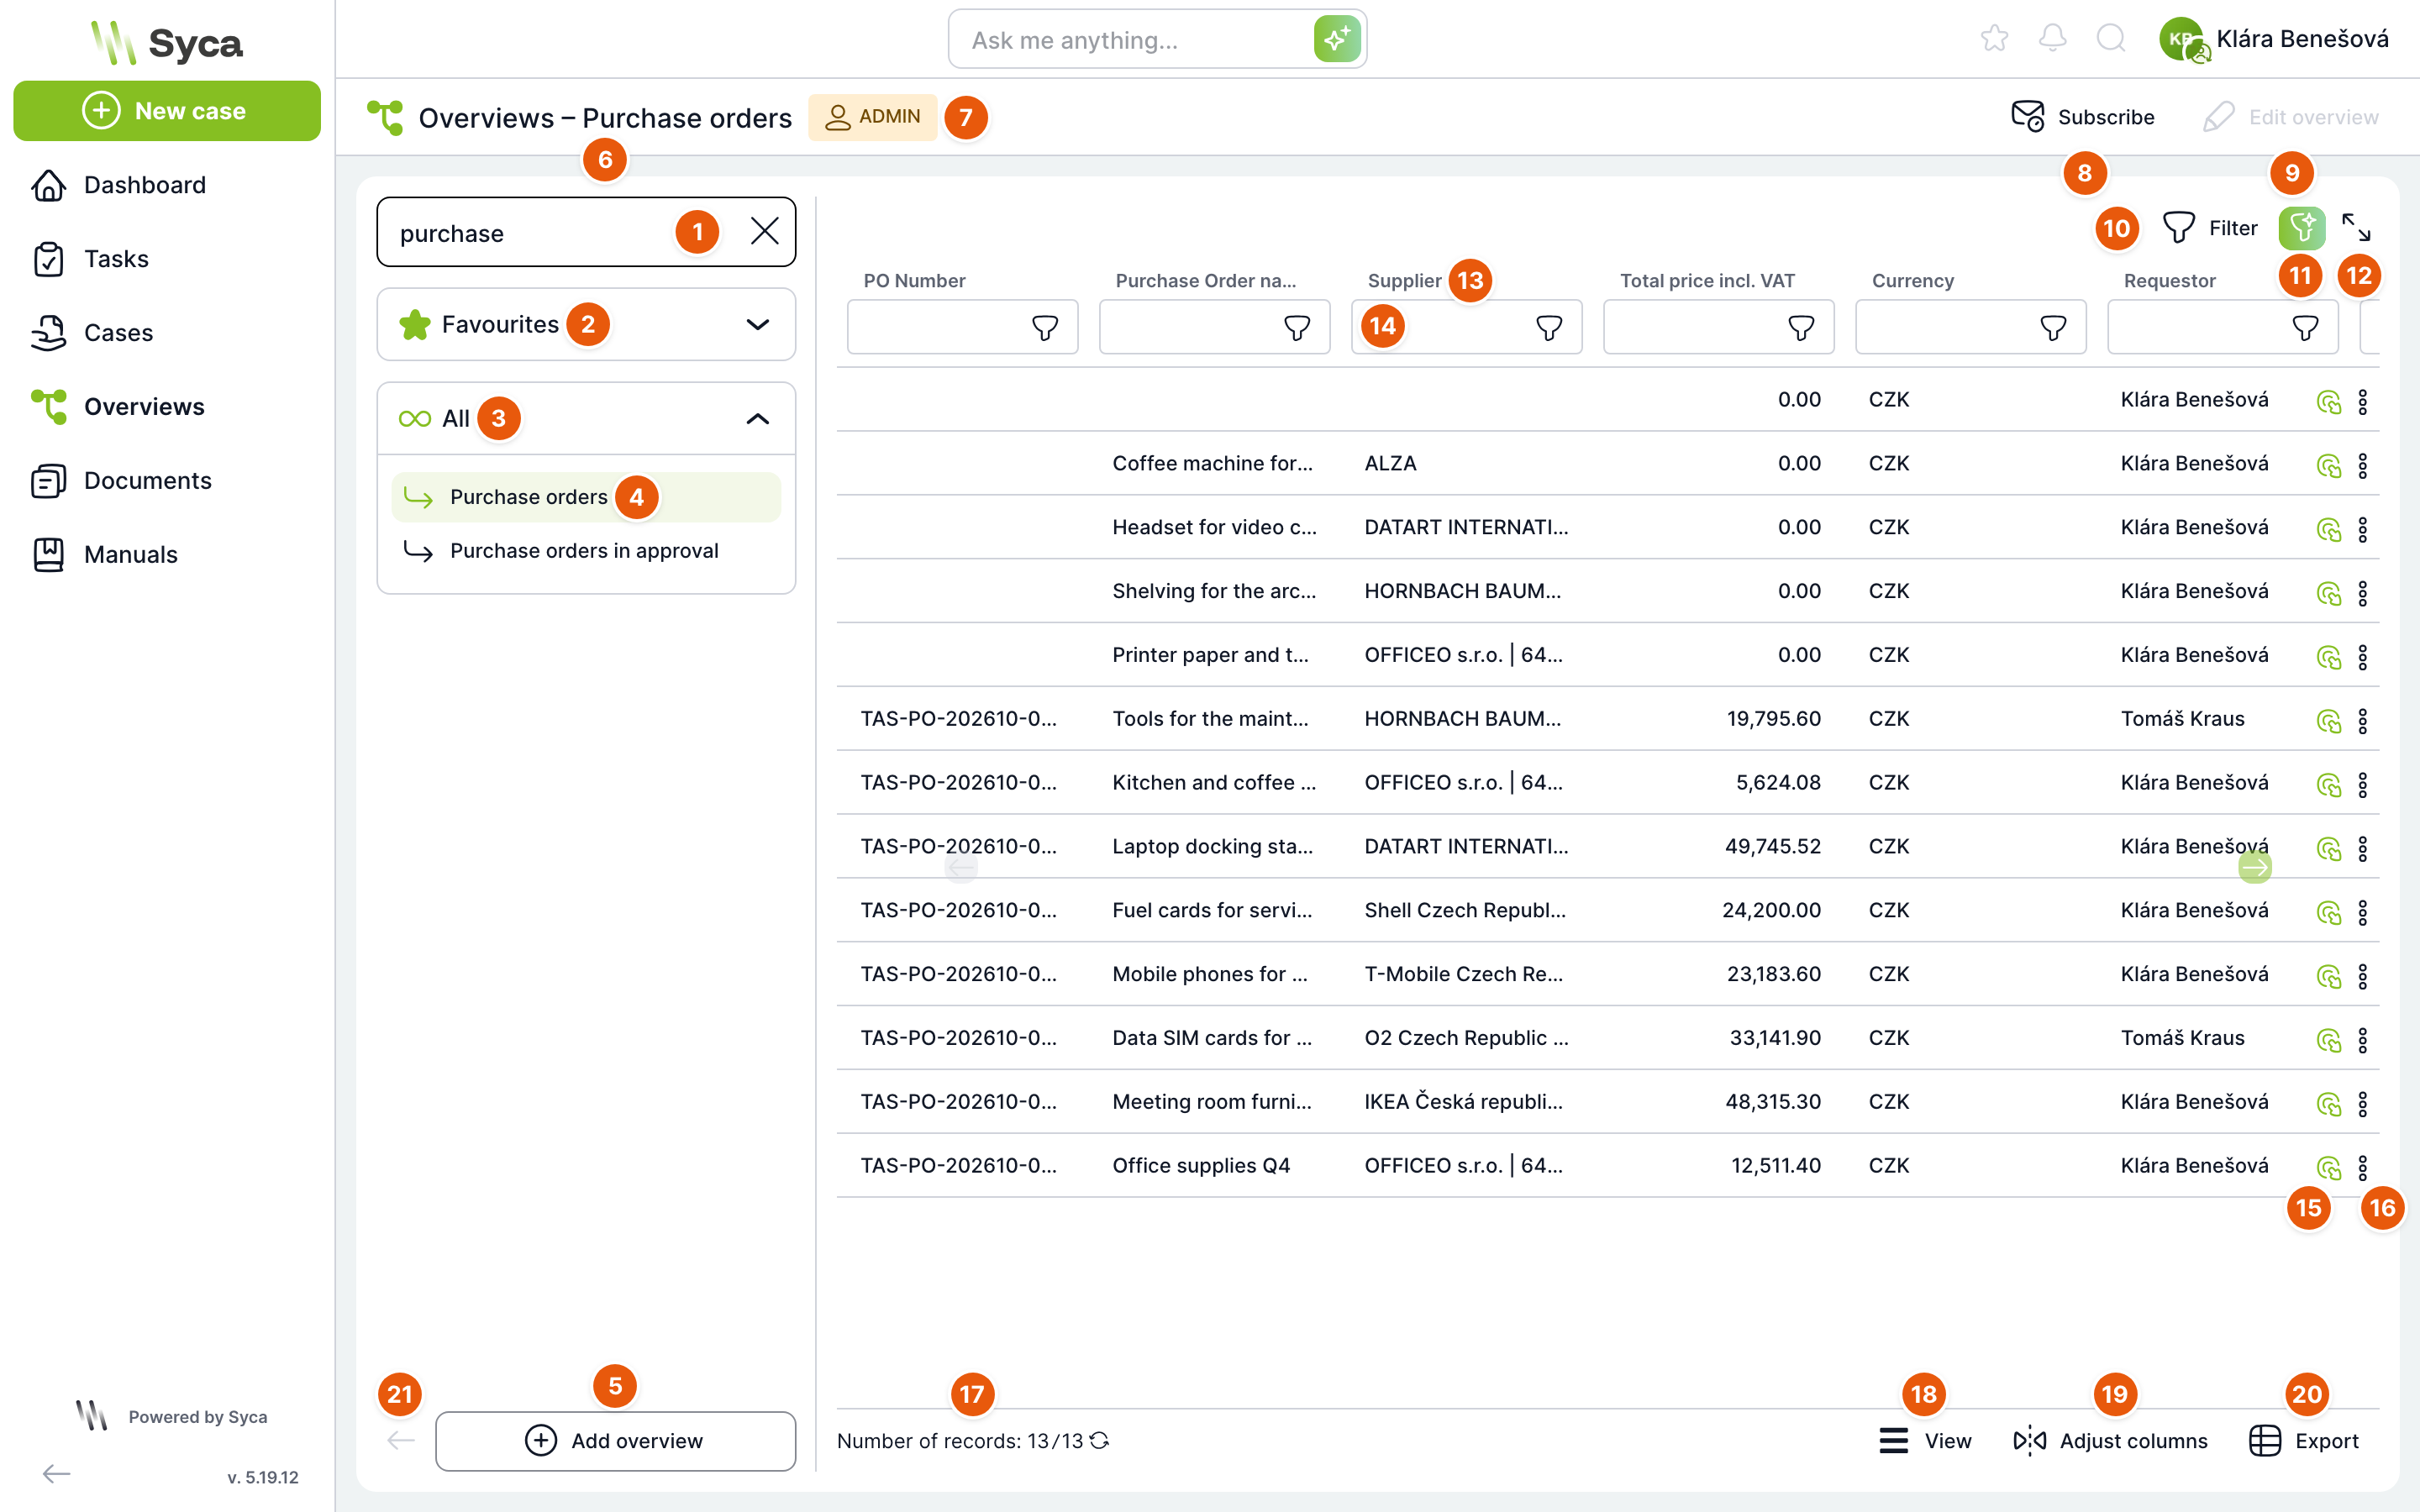
| No. | Element | Purpose |
|---|---|---|
| 1 | Search | Filters the overview tree by name. Matching overviews expand in the tree automatically. |
| 2 | Favourites | Overviews you have marked as favourites. The number shows how many there are. |
| 3 | All | All overviews you can see, except hidden ones. They are sorted alphabetically. |
| 4 | Overview in the tree | Click to open the overview. When you hover over it, a pencil (edit columns) and a three-dot menu appear. |
| 5 | Add overview | Opens the dialog for creating a new overview. See the article Creating and editing an overview. |
| 6 | Page title | Overviews – and the name of the open overview. |
| 7 | Owner label | My overview if the overview is yours. For someone else's overview, the owner's name, or Shared with me. |
| 8 | Subscribe | Sets up sending the overview by email. See the article Subscribing to an overview by email. |
| 9 | Edit overview | Switches the table to column editing mode. Active only for your own overviews (and for the administrator). |
| 10 | Filter | Opens a dialog for building a filter from multiple conditions. |
| 11 | AI filter assistant | You write the filter in your own words. Shown only if AI is enabled in the installation. |
| 12 | Full screen | Expands the table to the full screen. Press Esc to return. |
| 13 | Column header | Click a column name to sort the table. Below the name is the column filter field. |
| 14 | Column filter | Enter the value the column should contain. The funnel icon offers a condition (equals, contains, greater than…). |
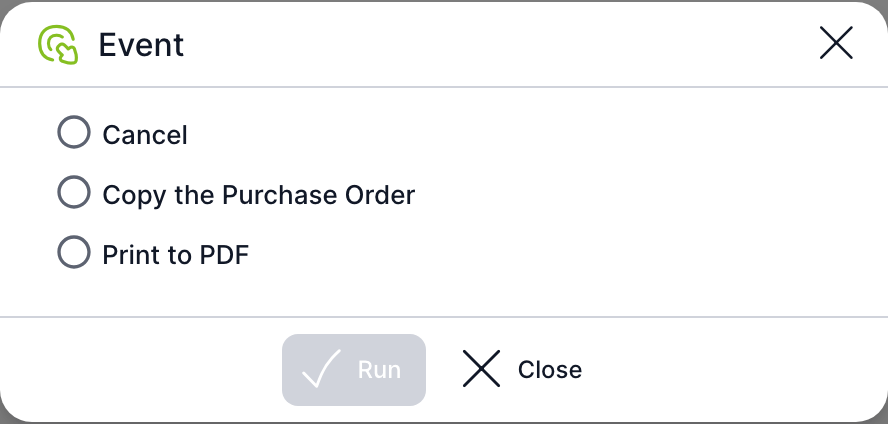
| 15 | Event | Runs an event on the case (for example copying or printing). See below. |
| 16 | More options | Menu of row actions. |
| 17 | Record count | How many rows are loaded and how many match the filter. Click the arrow to calculate the total count. |
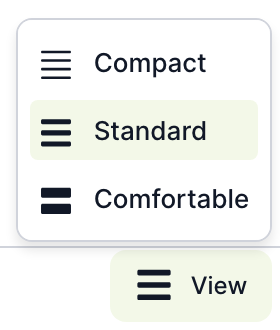
| 18 | View | Row density: Compact, Standard, Comfortable. |
| 19 | Fit columns | Resets column widths to their default values. |
| 20 | Export | Saves the table to a CSV or Excel file. |
| 21 | Collapse tree | Hides the overview tree panel and gives the table more space. |
Overview tree and folders
The tree has these sections:
- Favourites: overviews marked with a star. If you have none, you see the text “No favourite overviews”.
- All: all overviews except hidden ones.
- Hidden: shown only if you hide an overview. Collapsed by default.
- User: only for the $OverviewAdmin role. After opening it, you select a user and see their overviews.
You do not create folders in the tree separately. They are created from slashes in the overview name: an overview named “Invoices/All received invoices” appears in the Invoices folder. To move an overview to a different folder, rename it.
Overview menu
Hover over an overview in the tree and click the three dots.
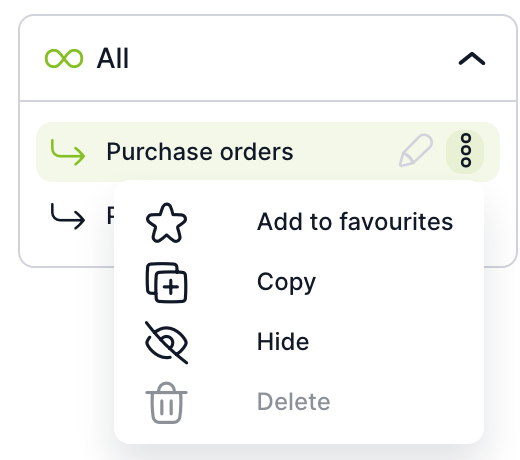
| Item | Purpose |
|---|---|
| Add to favourites / Remove from favourites | Adds the overview to the Favourites group or removes it. Favourites are your personal setting; other users do not see them. |
| Copy | Creates your own copy of the overview. See the article Creating and editing an overview. |
| Hide / Remove from hidden | Moves the overview to the Hidden group so it does not get in your way. Also works for shared overviews. |
| Delete | Deletes the overview. Active only for your own overviews (and for the administrator). TAS asks for confirmation before deleting. |
Overview table
The table columns are defined by the overview owner. Besides template variables, an overview can contain system fields: Case name, Description, Owner, Assigned, Deadline, In progress, Completed and Case status.
The table has no pages. More rows load as you scroll down.
Sorting and column filters
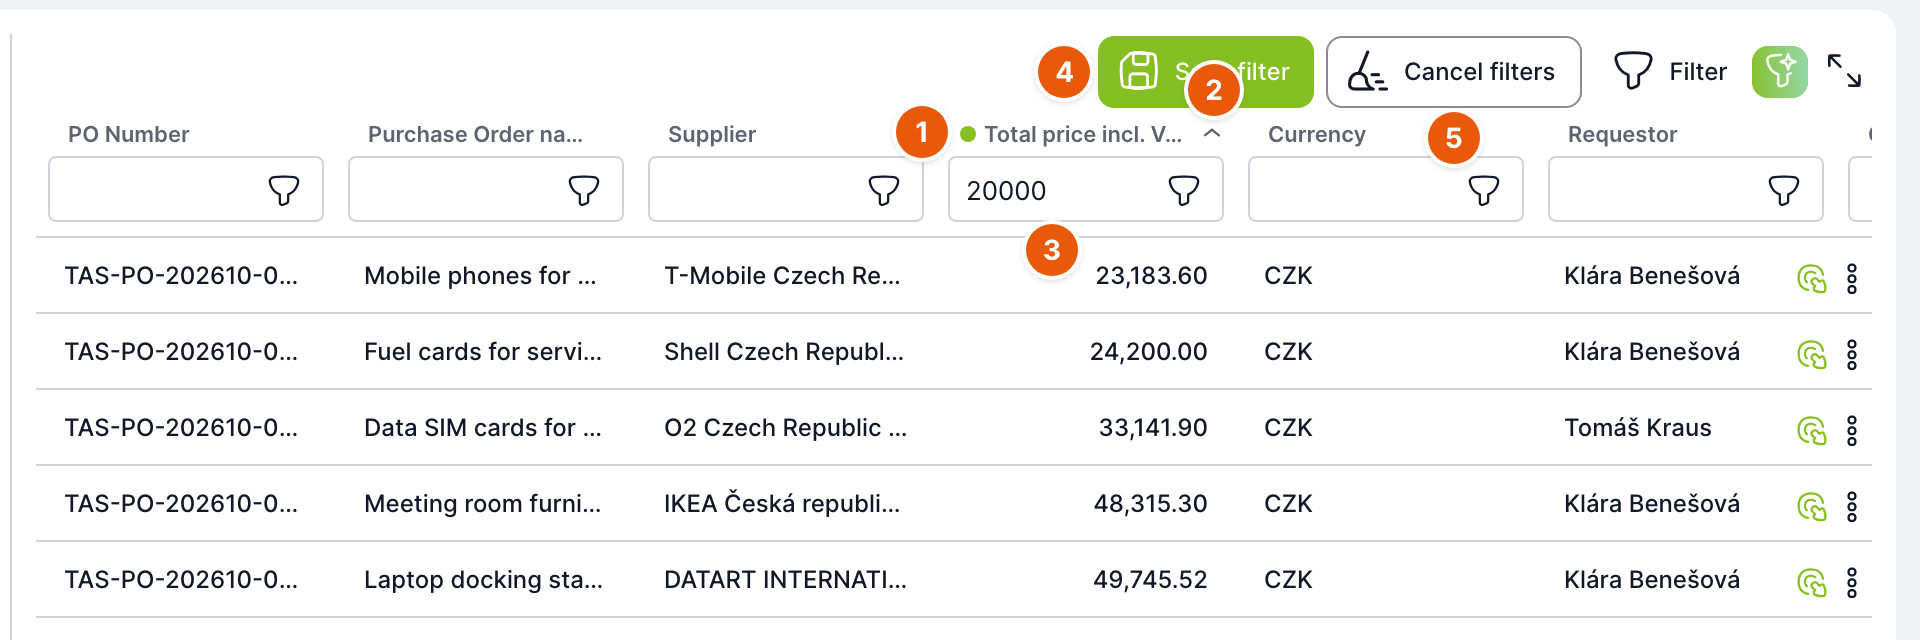
| No. | Element | Purpose |
|---|---|---|
| 1 | Green dot | The column has an active filter. |
| 2 | Sort arrow | The column the table is sorted by. Click the name again to reverse the direction. |
| 3 | Filter value | The value used for filtering. Number columns have conditions such as greater than, less than, from – to, and similar; date columns have quick options such as Today or Last 7 days. |
| 4 | Save filter | Saves the current filter under a name of your choice. |
| 5 | Clear filters | Clears all filters and shows all rows again. |
The filter type depends on the column type: text, number, date, or selection from a list of values (for lists and Yes/No checkboxes). Columns with multiple selection and dynamic rows cannot be filtered or sorted.
Filter dialog and saved filters
Click Filter to open a dialog where you build a filter from multiple conditions.
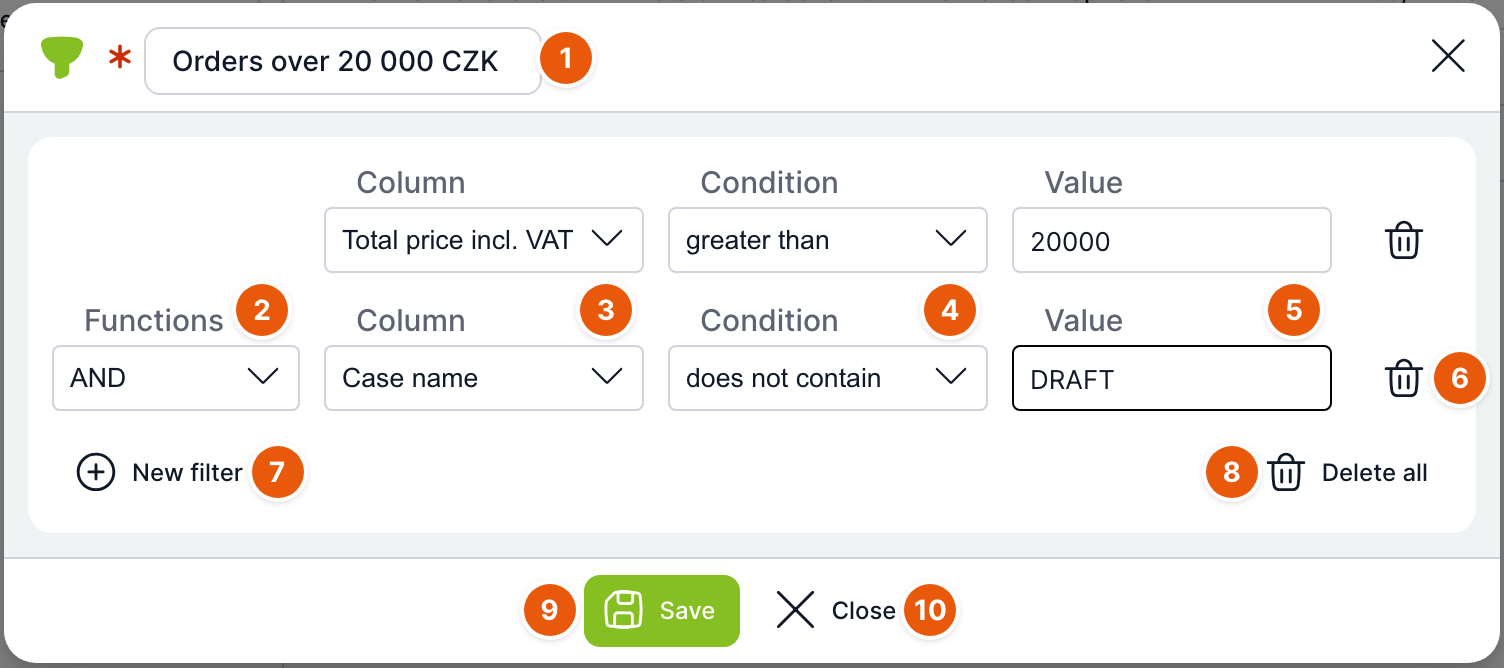
| No. | Element | Purpose |
|---|---|---|
| 1 | Filter name | The filter is saved under this name. Required. |
| 2 | Function | How the condition is combined with the previous one: AND (both must apply) or OR (one is enough). |
| 3 | Column | The column the condition applies to. |
| 4 | Condition | The comparison, for example contains, equals, greater than, is empty. |
| 5 | Value | The value to compare with. |
| 6 | Bin | Deletes this condition. |
| 7 | New filter | Adds another condition. |
| 8 | Delete all | Deletes all conditions. |
| 9 | Save | Applies the filter to the table and saves it as a label above the table. |
| 10 | Close | Closes the dialog without saving. |
A saved filter appears as a label above the table. Click the label to turn the filter on; click it again to turn it off. Click the funnel icon in the label to open the filter dialog again, where you can edit the filter or remove it with the Delete button.

Saved filters belong to you and the given overview. Other users the overview is shared with do not see them. A permanent filter for everyone is set by the overview owner when editing the overview.
Row actions
Double-click a row to open the case detail. Click with the middle mouse button or right-click to open it in a new browser tab.
The Event icon opens a dialog with the events you can run on the case. The events offered are defined by the template.
For a regular user, the More options menu contains the Detail item, which opens the case detail.
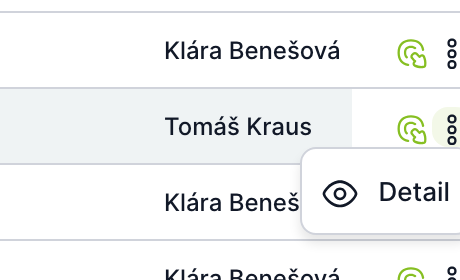
The administrator also has Suspend and Delete in the menu, and if archiving is enabled, also Archive (Unarchive in the overview of archived cases). These actions are described in the article on suspending, archiving and deleting cases.
View, column width and export
View changes the row density. The setting applies to all tables in the browser.
To change a column's width, drag the edge of its header. Your browser remembers the widths separately for each overview. Fit columns resets them to the default width.
Export saves the table data to a CSV or Excel file. The current columns are exported with the current filter and sorting. You can edit the file name before downloading.
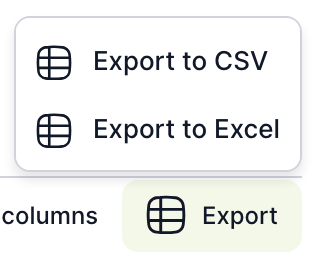
The administrator can limit in the configuration how many rows can be exported to CSV and to Excel. If the selection exceeds the limit, TAS does not start the export and asks you to narrow the filter.
Copy link and Expert mode
- Copy link is shown only on mobile devices. It copies the address of the open overview to the clipboard. On a computer, copy the address from the browser's address bar.
- Expert mode is visible only to the administrator. It opens the full overview settings with the Settings, Filter, Sorting and Sharing tabs. It is described in the article Creating and editing an overview.
Which cases an overview shows
An overview shows only the cases you have rights to. The exceptions are the system roles $Inspector, $GlobalSupervisor and $OverviewAdmin, and overviews with the Ignore case rights option enabled: these show all cases of the template. Two people can therefore see different rows in the same shared overview.
Related: Creating and editing an overview, Subscribing to an overview by email, Reports and charts.