Class diagram, object state import and alias candidates
The More menu on the Variables tab in the template editor contains tools for working with variables in bulk: importing a class diagram and object states from a modelling tool, transferring variable assignments to tasks between templates, and finding unused aliases for overviews. Only administrators can see Alias candidates.
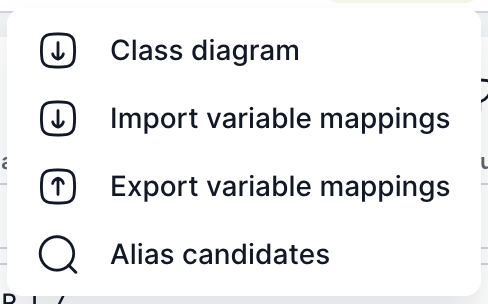
| Item | Purpose |
|---|---|
| Class diagram | Opens the Import variables window for importing a class diagram or object states. |
| Import variable assignment | Uploads variable assignments to tasks from a file. |
| Export variable assignment | Downloads the variable assignments for all tasks of the template to a JSON file. |
| Alias candidates | Administrators only. Finds variables whose overview alias is rarely or never used. |
Importing variables from a class diagram
A class diagram describes the process objects (for example employee, workplace) and their attributes. The import creates template variables from it and links each one to a class and attribute. You can see the link in the variable editor in the Class diagram section and in the variable list in the Class and attribute column.
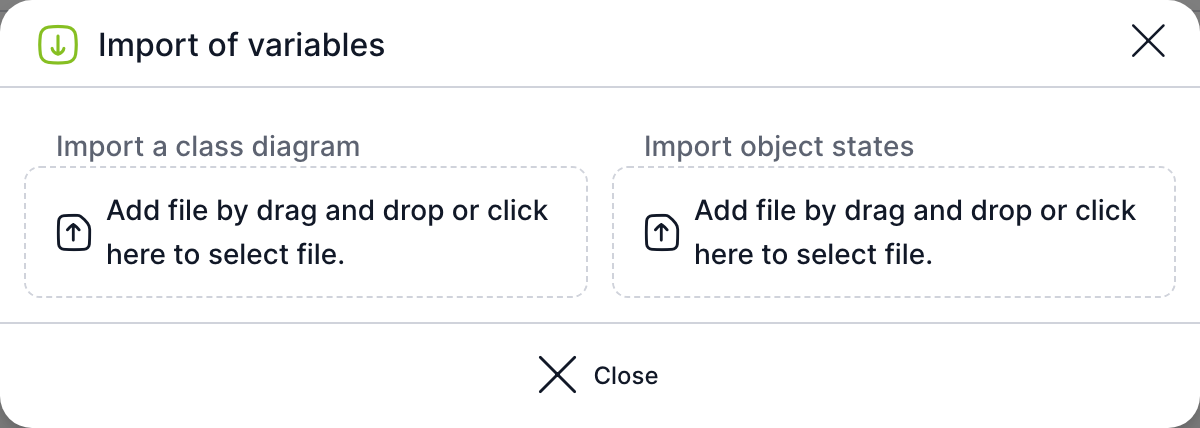
The Import variables window has two upload areas: Import class diagram and Import object states. Drag the file onto the area, or click it and select the file on your computer. Both files are in JSON format. The class diagram file contains a list of classes (classes), each with a name and a list of attributes. If the file is not valid JSON, TAS reports that the file is not in the correct format.
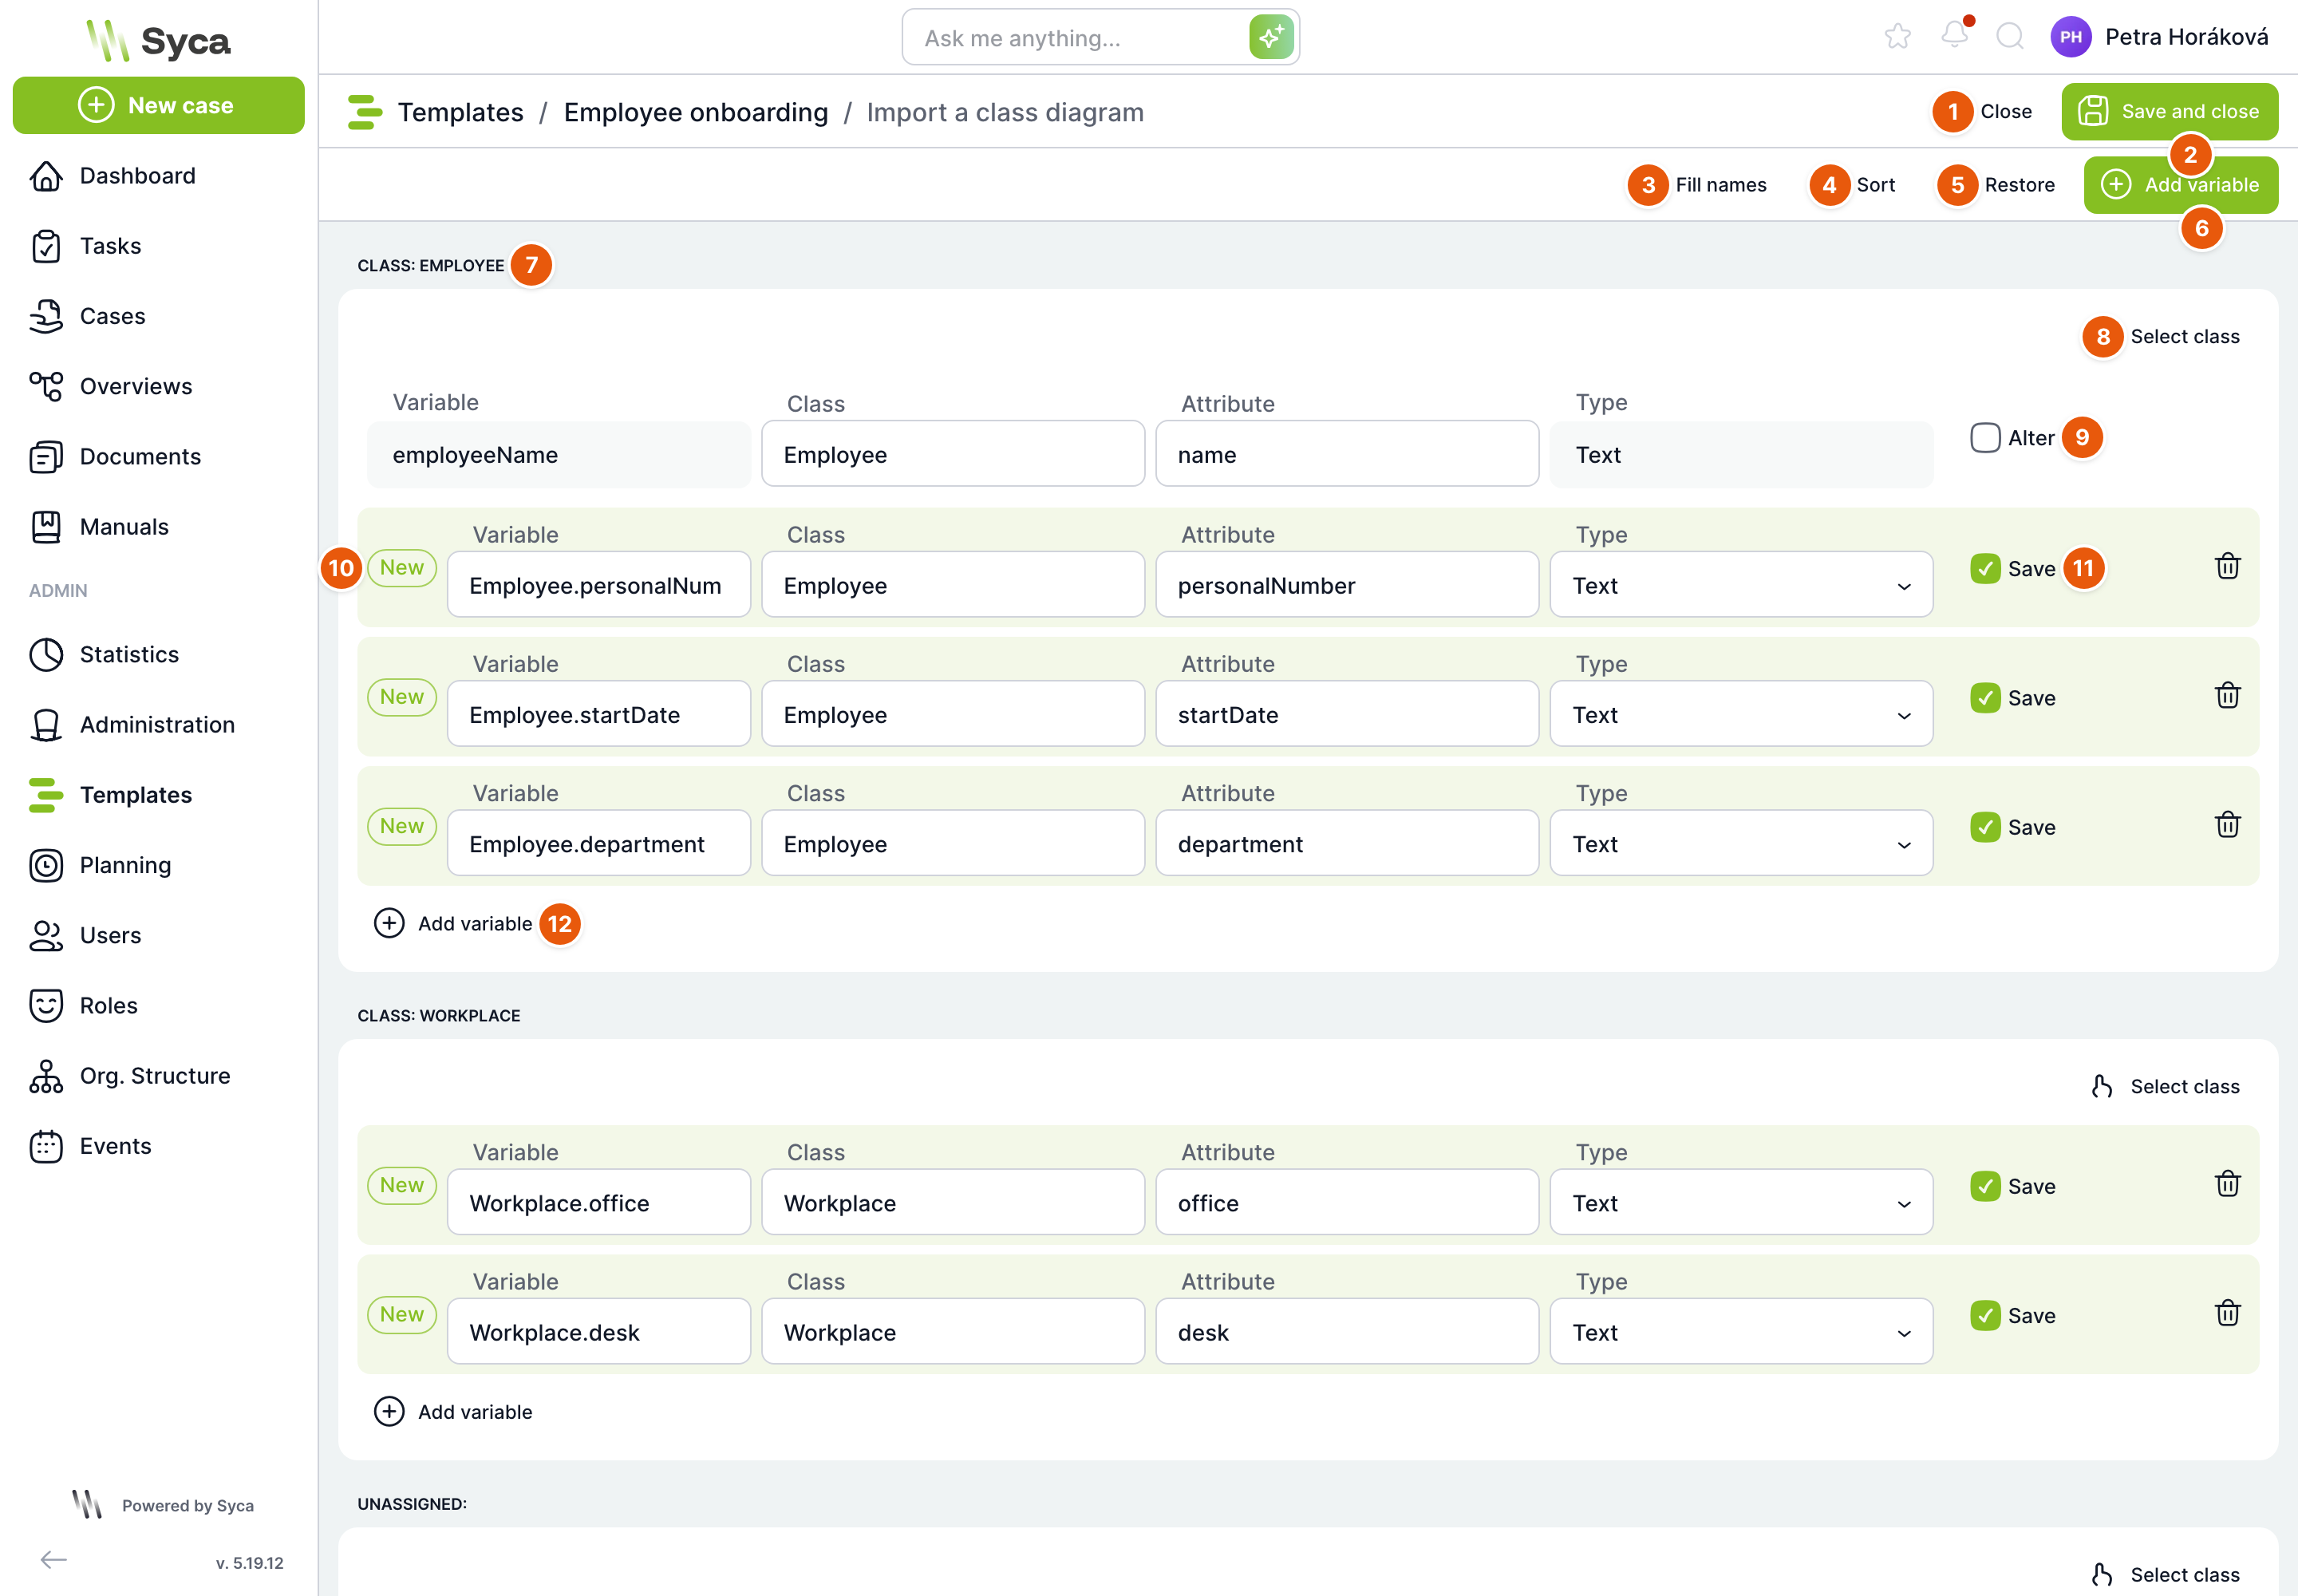
After you upload the class diagram, the Import class diagram page opens.
| No. | Element | Purpose |
|---|---|---|
| 1 | Close | Returns you to the variable list without saving. |
| 2 | Save and close | Creates the selected new variables, saves changes to the selected existing variables and returns you to the list. |
| 3 | Fill in names | Gives new variables without a name a name in the form Třída.atribut. |
| 4 | Sort | Regroups the rows by the class currently filled in. |
| 5 | Reset | After confirmation, returns the page to its state right after the file was uploaded. |
| 6 | Add variable | Adds a new variable to the Unassigned group. |
| 7 | Class | A group of variables for one class from the diagram. At the end of the page there is an Unassigned group with template variables that have no class. |
| 8 | Select class | Selects or clears all rows of the group at once. |
| 9 | Change | A row for an existing template variable. When you tick it, you can change its class and attribute. The name and type of an existing variable cannot be changed here. |
| 10 | New | A row for a new variable. TAS suggests one for each attribute that does not yet have a variable in the template. The name is in the form Třída.atribut and the type is Text. You can edit the name, class, attribute and type. |
| 11 | Save | Whether the new variable is created on save. The bin icon removes the row. |
| 12 | Add variable | Adds a new variable directly to the class group. |
You select the class and attribute from the values in the diagram, or type them in. New variables are created with only a name, type, class and attribute. Add labels, type settings and task assignments in the variable editor.
Importing object states
A state diagram describes the states an object goes through (for example candidate, onboarding, active, departure). The import saves the states of each diagram to a dynamic table and, in the second step, creates variables of type Dynamic Table that hold the state (State variable).
Upload the file to the Import object states area in the Import variables window. The file contains a list of diagrams (diagrams), each with a name, a suggested table name and the states in CSV format.
| No. | Element | Purpose |
|---|---|---|
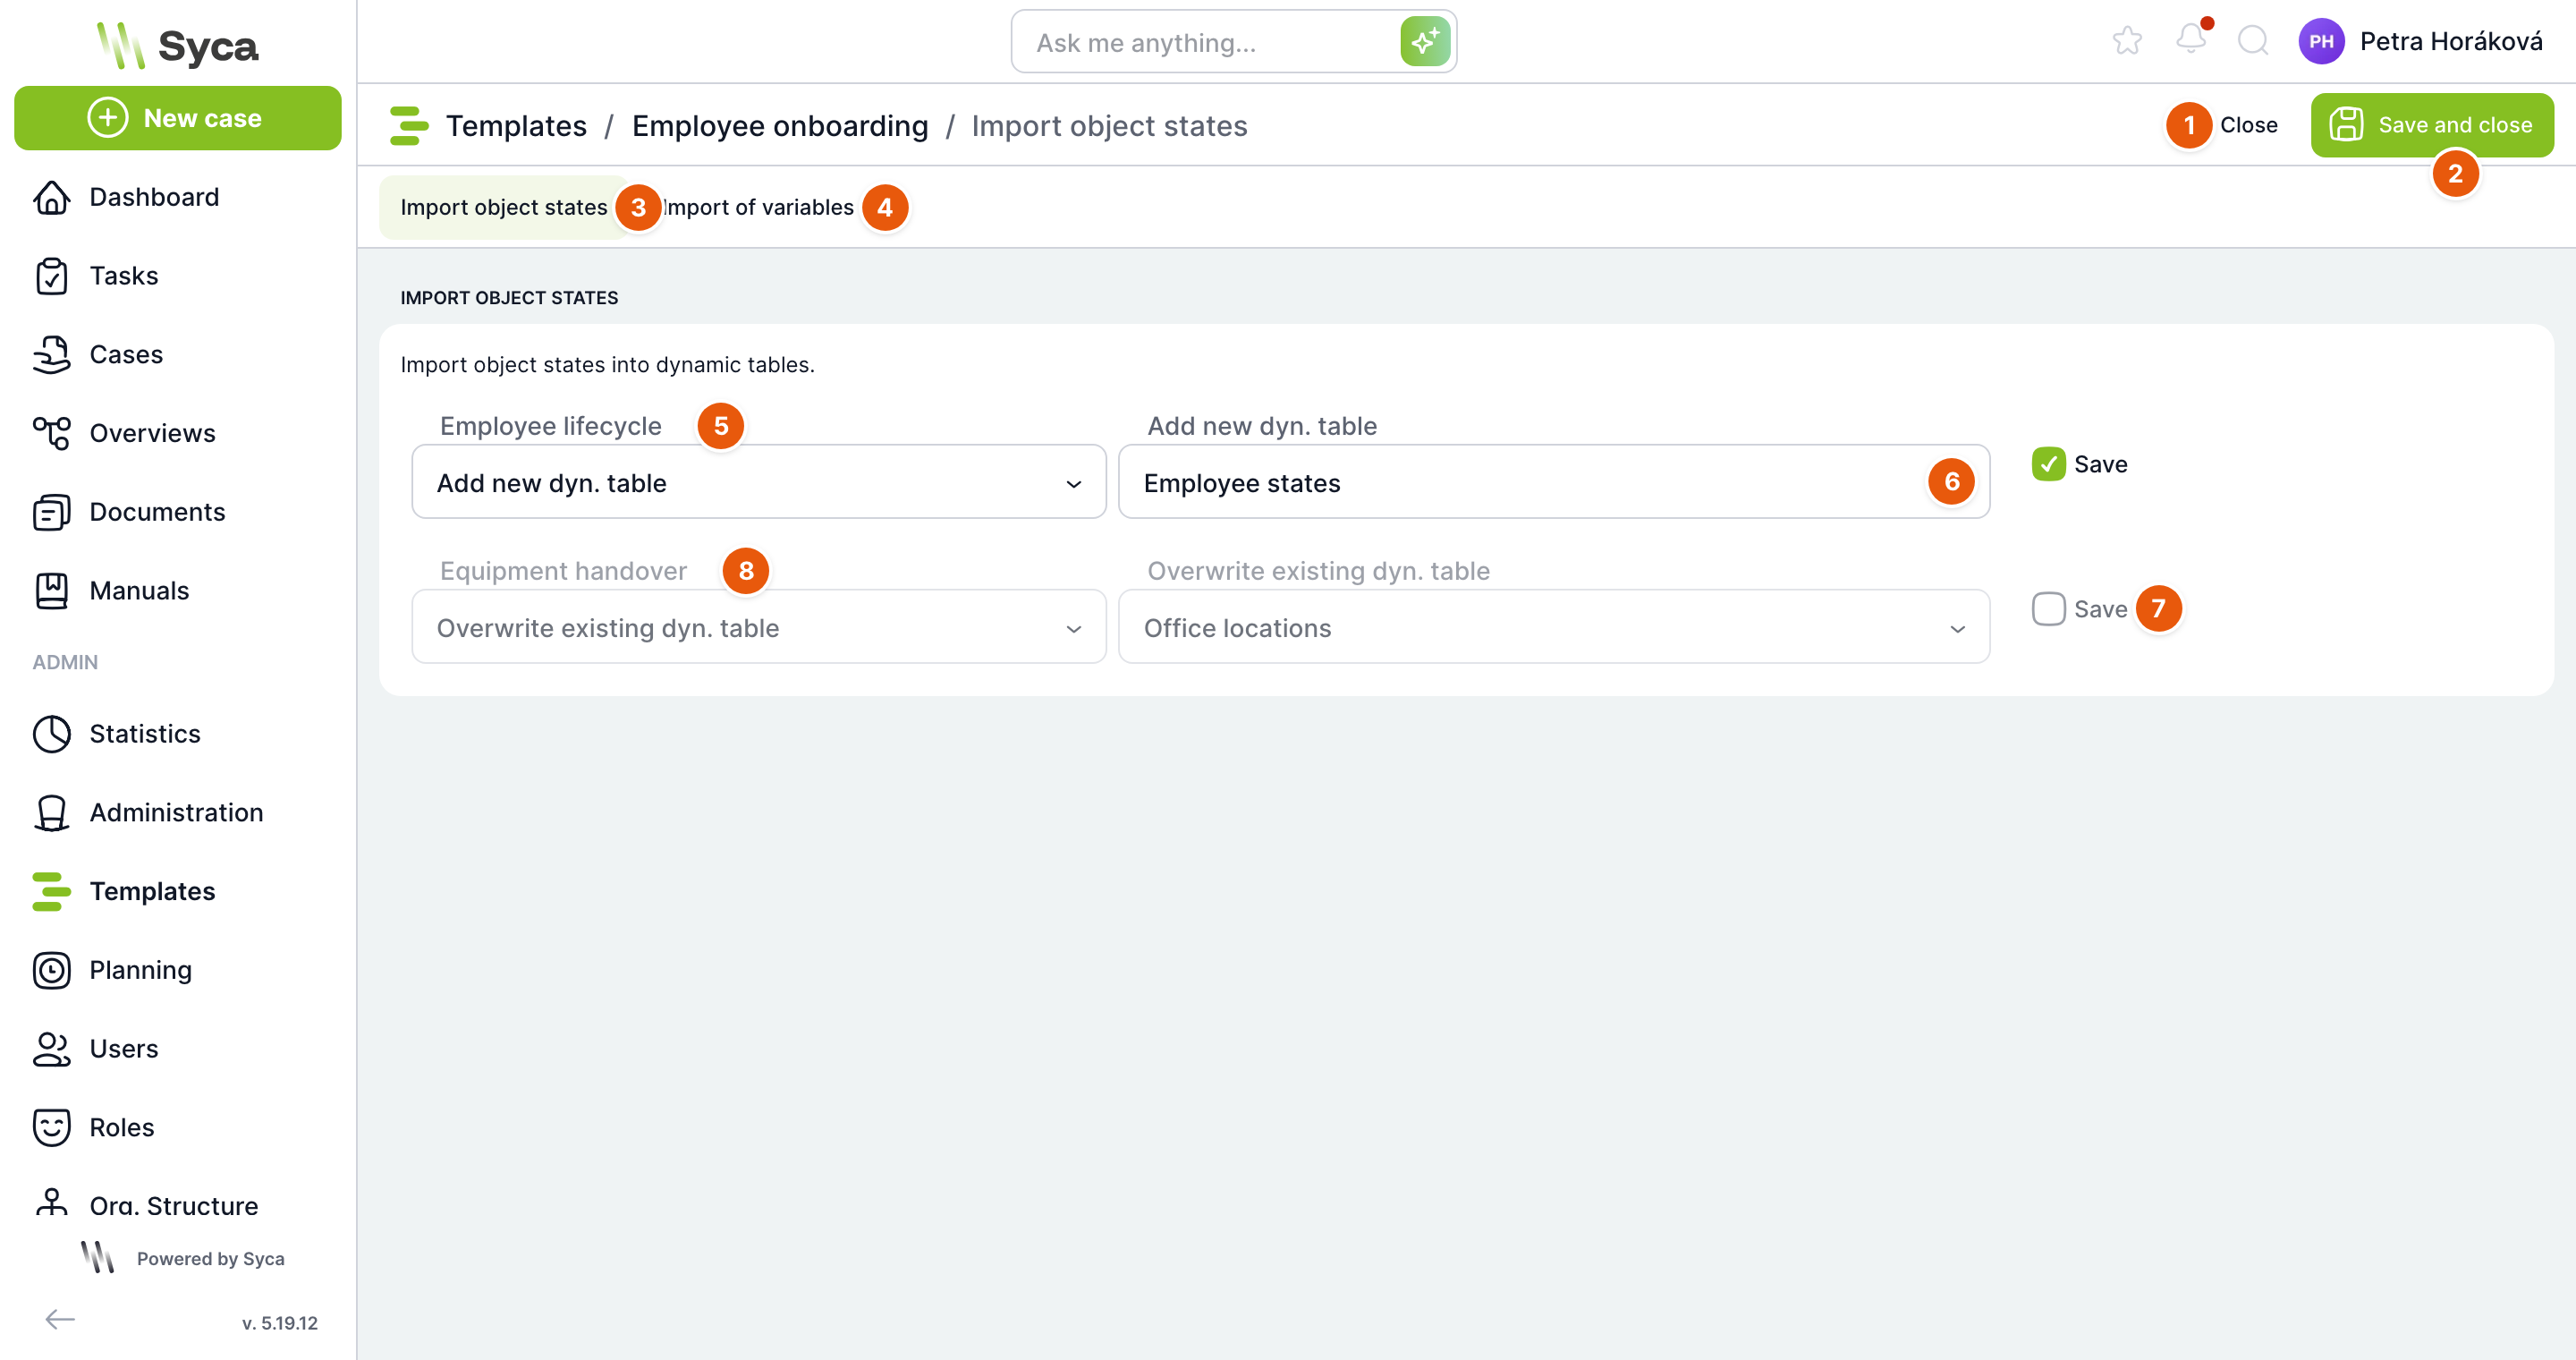
| 1 | Close | Ends the import. TAS asks whether you really want to cancel the import. |
| 2 | Save and close | In the first step, saves the selected diagrams to dynamic tables and moves to the Import variables step. In the second step, saves the variables and returns you to the variable list. |
| 3 | Import object states | First step: diagrams and their tables. |
| 4 | Import variables | Second step: variables that hold the state. If you click it before saving the first step, TAS offers to save the first step. Once the tables have been imported, you cannot go back to the first step. |
| 5 | Diagram | The diagram name from the file and the choice of what to do with it: Add new dyn. table or Overwrite existing dyn. table. If a table with the suggested name exists, TAS preselects overwriting. |
| 6 | Table name | For a new table, its name; for overwriting, a selection of an existing table. |
| 7 | Save | Whether the diagram is imported. Unselected rows are skipped. |
| 8 | Another diagram | Each diagram from the file has its own row. |
A new table is created as public and the states are loaded into it from the CSV. When overwriting, the content of the existing table is replaced. Two rows must not target the same table and a new table must not have the name of an existing table, otherwise the import ends with an error.
The Overwrite existing dyn. table option replaces all rows of the table with the states from the diagram. If other templates use the table, check the impact first, or choose a new table.
The second step, Import variables, has two parts. Template variables shows the existing state variables; after ticking Change, you can select a different table for them. New variables contains a suggested variable for each imported table that does not yet have a state variable. For each one, enter a name and a table (State). The Fill in names, Reset and Add variable buttons work the same way as for the class diagram. The variables are created as type Dynamic Table with State variable ticked and display the first column of the table.
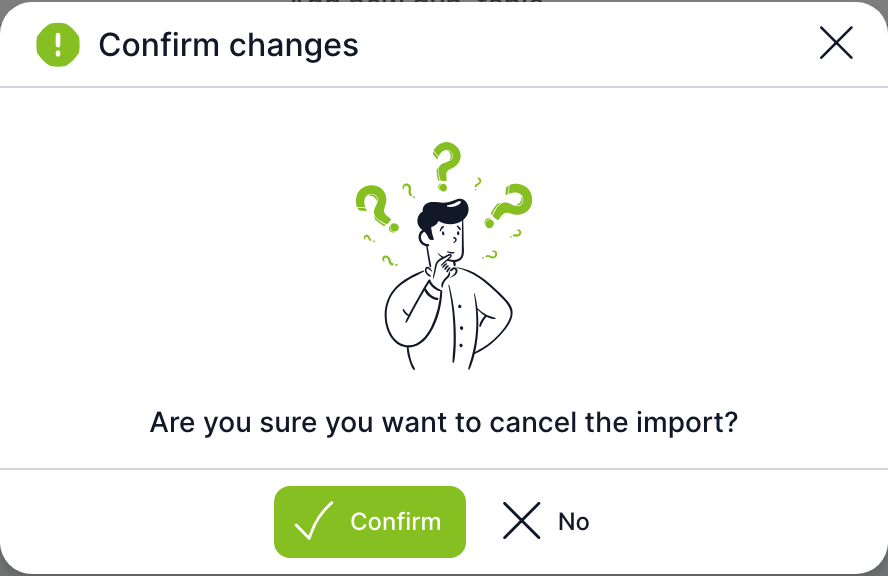
When you close the wizard, TAS always asks for confirmation. In the first step, Confirm cancels the import and No keeps you in the wizard.
Importing and exporting variable assignments
An assignment defines which variables are on the task form, where, and in which mode (read-only, write, mandatory). Exporting and importing assignments is useful when you build a similar form in several templates.
Export variable assignment downloads the file variables_mapping_export_<server>_<šablona>.json with the assignments for all tasks of the template, including the form sections and variable positions.
Import variable assignment opens a window for uploading such a file.
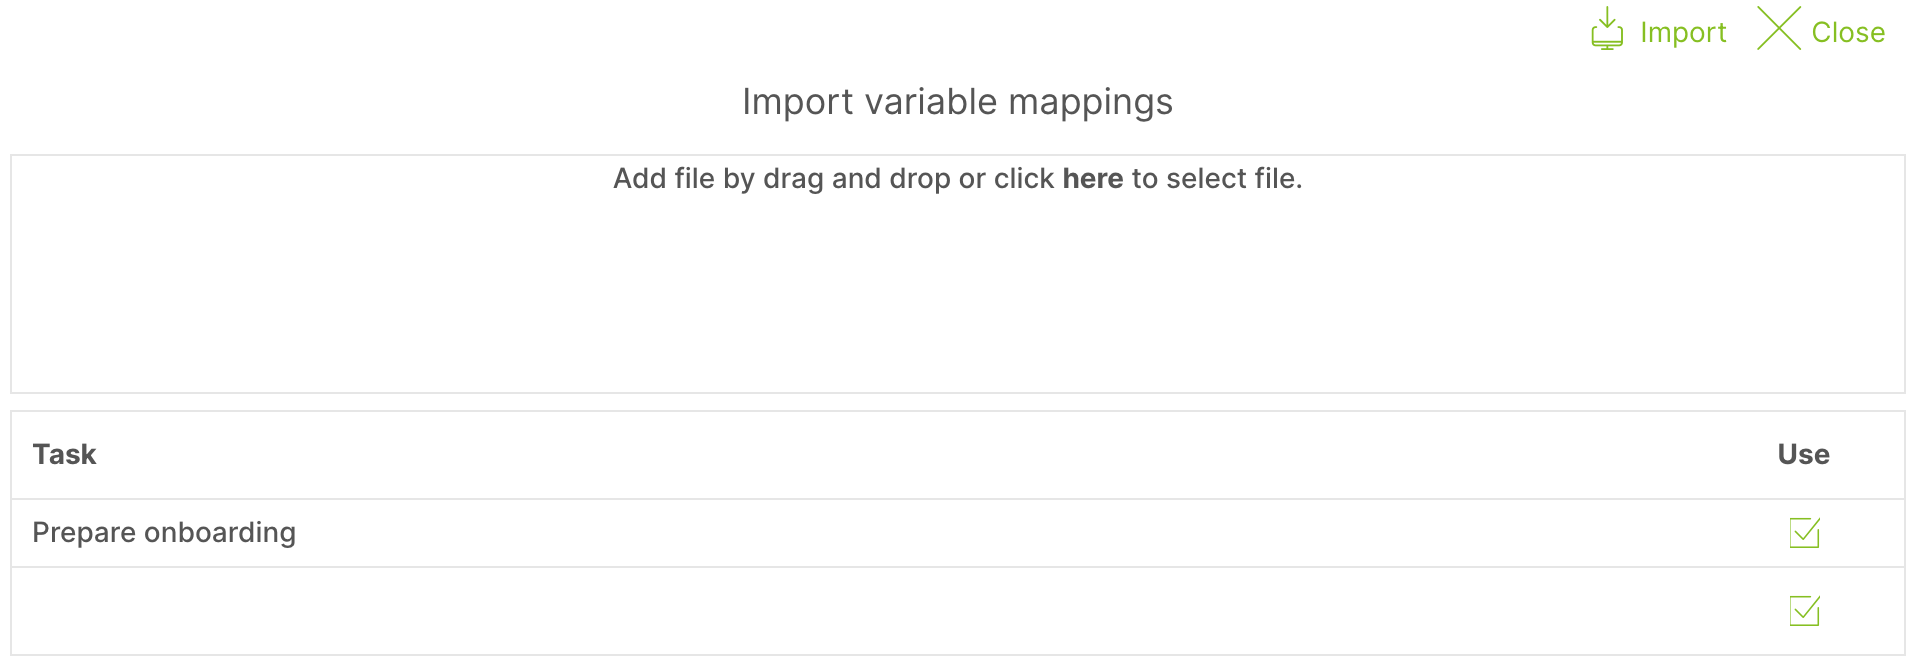
| Element | Purpose |
|---|---|
| File area | Drag the file here, or click “here” and select it. |
| Task | Tasks from the file. Assignments are matched by task name. |
| Use | Whether the assignment of the task is imported. The icon in the last row of the table selects or clears all tasks. |
| Import | Loads the assignments of the selected tasks into the template. |
| Close | Closes the window without importing. |
Variables are matched by their default name. If a variable from the file is missing in the template, TAS imports the assignment without it and reports that the import was only partially successful. Create the missing variables first and repeat the import.
Alias candidates
Every variable that you want to display in overviews needs an alias, i.e. one of a limited number of columns for texts, numbers and dates. In large templates, the free aliases can run out. The Alias candidates tool shows which variables hold an alias but are barely or never used, so you can free up their alias.
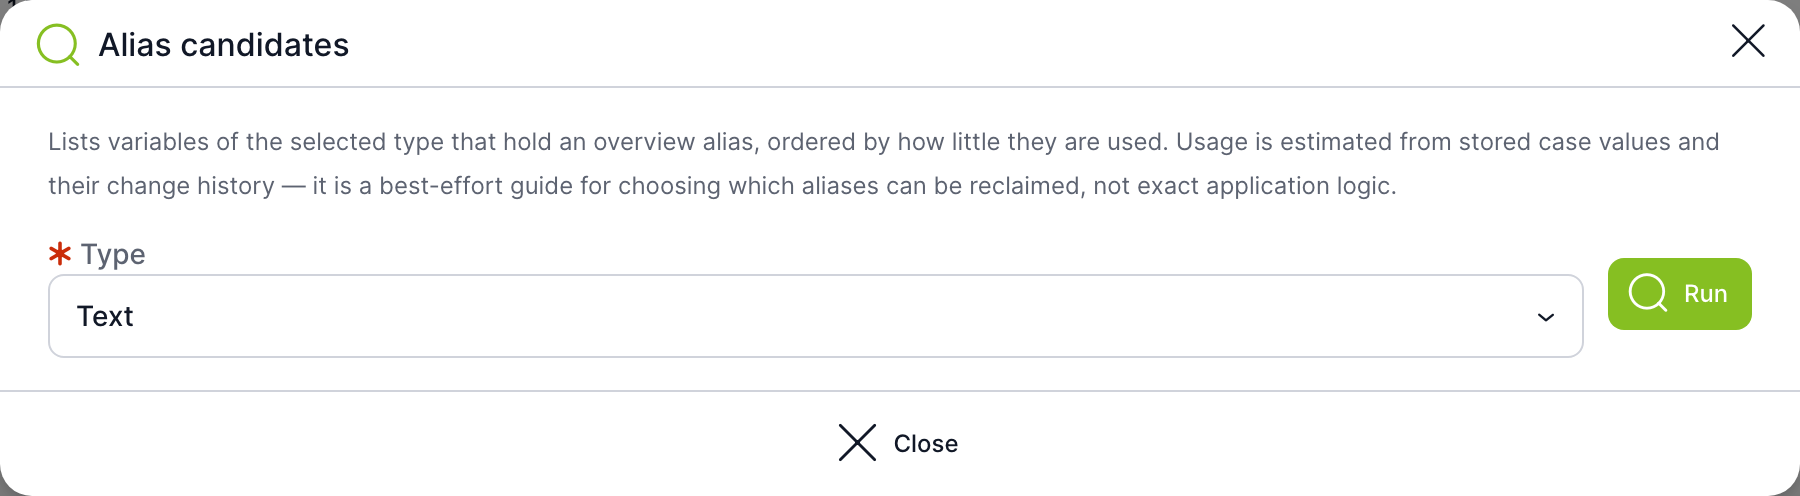
| Element | Purpose |
|---|---|
| Type | Kind of aliases: Text, Number or Date. |
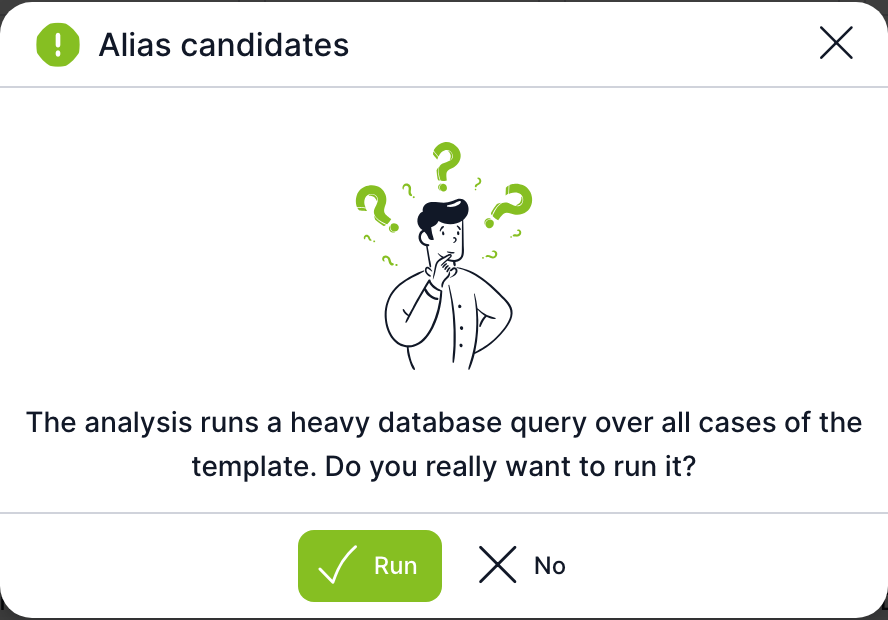
| Run | Runs the analysis. TAS first asks whether you really want to run a demanding query across all cases of the template. |
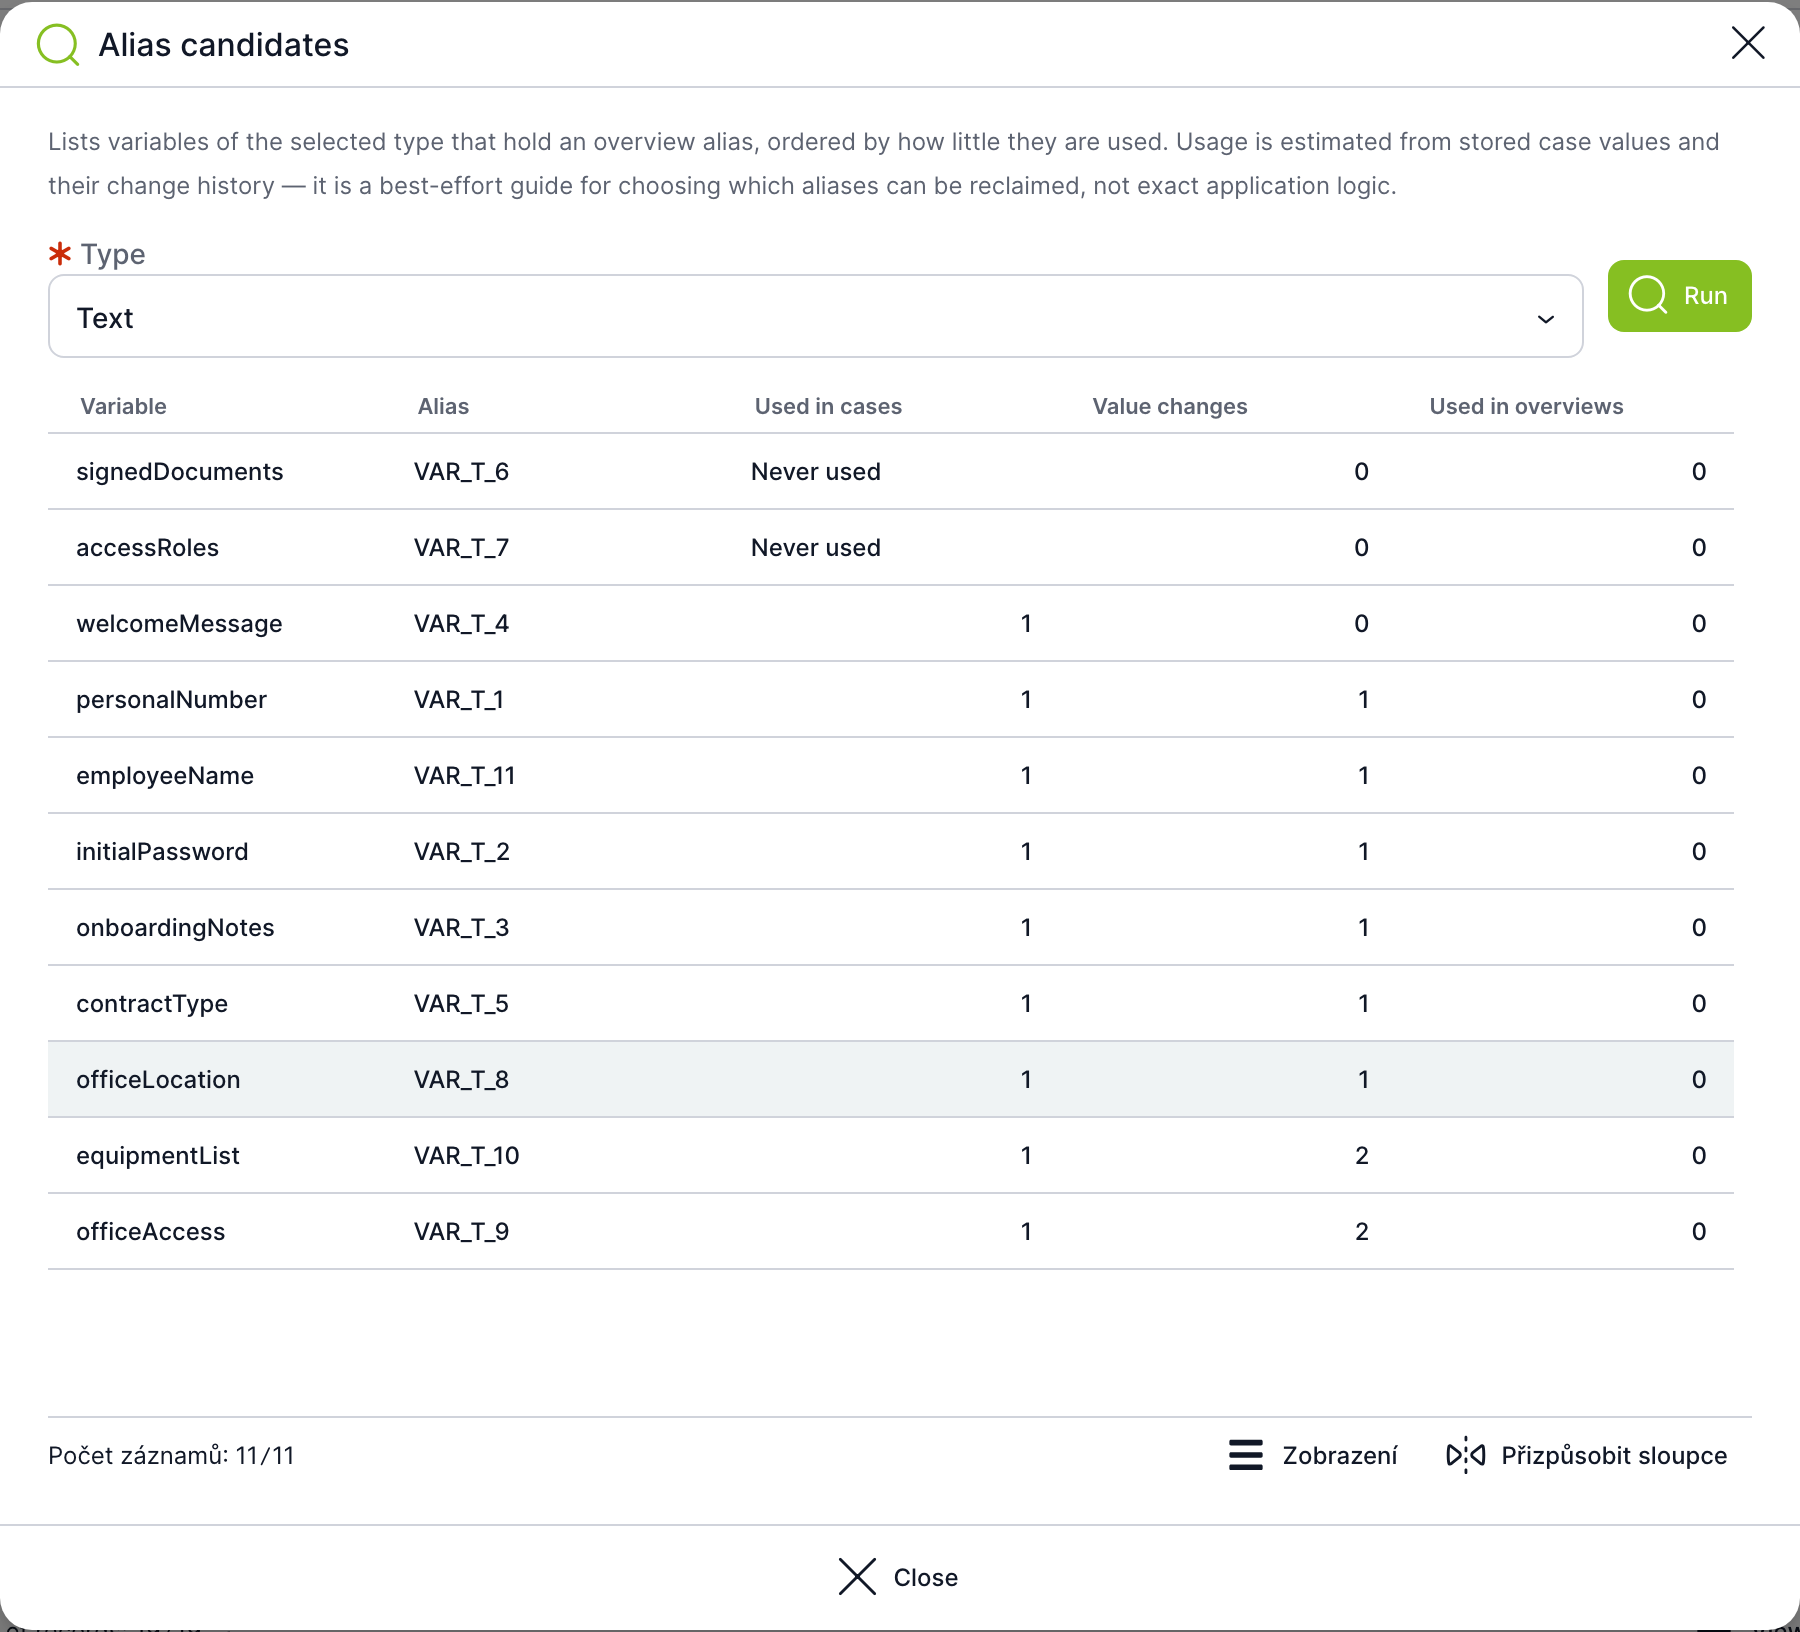
| Column | Meaning |
|---|---|
| Variable | Default name of the variable. |
| Alias | The alias the variable holds. |
| Used in cases | In how many cases the variable has a value. “Never used” means it has no value in any case or in the change history. |
| Value changes | Number of value changes in the case history. |
| Used in overviews | In how many overviews the variable is used in columns or filters. |
The list is sorted from the least used: never-used variables first, then by the number of cases and changes. The result is an approximate estimate, not an exact calculation.
How to free up an alias
- Run Alias candidates for the kind you need (for example Text).
- Choose a variable that is not used in any overview and whose values you do not need in overviews.
- In the variable list, select Remove alias in the row menu for that variable and confirm. The values in the overview column are deleted.
- For the variable that needs the alias, select Assign alias, or directly Take over alias from another variable and select the variable from step 2.
After an alias is assigned, existing case values are not added to overviews. They appear in the overview only after the value is saved again in the case. An alias cannot be removed or taken over while any overview uses it.
Related: Variables: overview and common settings, Dynamic Table, Dynamic tables, Overviews.