User guide
Quick Start Guide
Dashboard
Overviews
Case detail (Caseoverview)
Case - event
Tasks
Case notes
Documents
User settings
Favorites
Table component
FAQ
News/Announcements in Team assistant
Mobile app settings
Administrator Guide
Platform guide
Administration
Crons
Authentication and Synchronization
Mobile App Setup for Your Environment
Scheme
Dynamic tables
Archiving
Scripts
Service console
Scheduled Tasks
HR Agenda
Sequences
CSP Headers
Logs
Access Token Settings & Session Expiration
Template
Roles
Planning
Users
Organizational structure
Events
Translations
NFC Integration
AXIOS API
Calculations & Functions
Integrations
TAS Forms
TAS Forms
Activating the module on the environment
TAS Forms - secret creation guide for Docker Swarm
Advanced Features & Tips
Product
Technical Changelog
Business Changelog
Version Upgrade Guide
Upgrading to 5.7
Lodash upgrade v4.17.x (>v5.5)
Main changes and deprecated features (v5.3 > v5.7)
Highlighting variables in Read-only status (>v5.7.58)
Using validation functions
Upgrading to 5.3
Dynamic conditions migration
PDF printing adjustment
Editing Task Description vs Task Instructions
Transpiling forEach to a for loop
Rendering HTML on Caseoverview
Differences between TAS4 and TAS5 - a complete overview
Best Practices for Upgrading from v4 to v5
Technical details
News / Important information
Getting Started
- All Categories /
- Administrator Guide
- Integrations
- MS Graph /
- MS Graph - preparing the mailbox
MS Graph - preparing the mailbox
In general
TAS can connect to the Microsoft Graph API through our integration. This integration allows downloading and moving emails and attachments into defined mailboxes, which are then handled according to set business rules.
In order for TAS to successfully connect and manipulate the contents of these mailboxes, the integration must be granted sufficient permissions for the mailboxes (whether your own or shared).
Ensuring authorization
- Sign in to https://portal.azure.com/#home .
- Select Azure Active Directory from the menu.
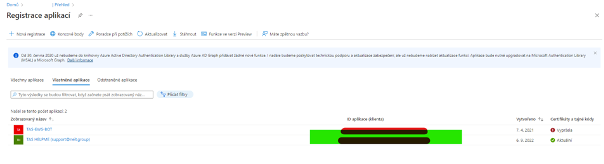
- Select Add - Application Registration to start the application registration (TASu).
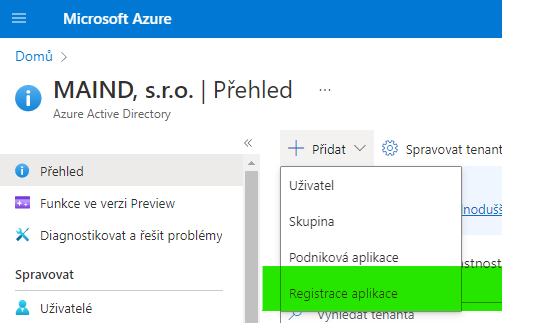
- Enter a Name and leave the Only accounts in this directory option checked. Complete the registration by clicking Register .
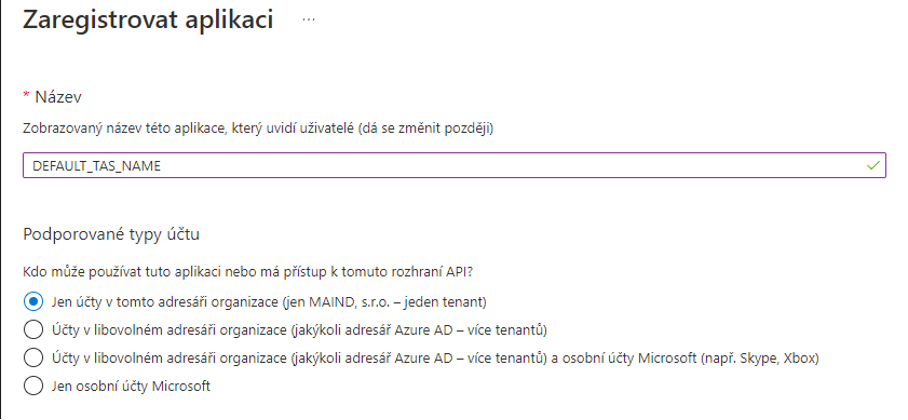
- For email read permissions, select API Permissions in the left menu.
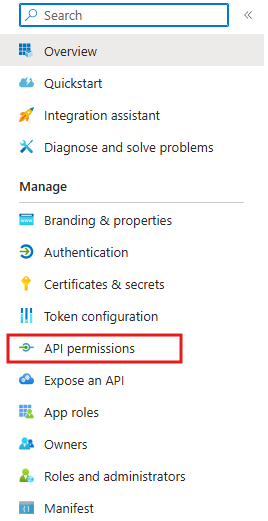
- In the Request API Permissions window, click Add Permissions and under Microsoft APIs , select Microsoft Graph .
- Then, in Request API permission, select Delegated permissions .

- Here you need to assign permissions to the MS Graph application, see the image.

- Confirm by clicking Add Permissions .
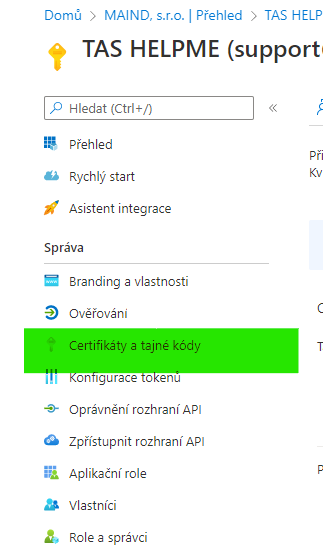
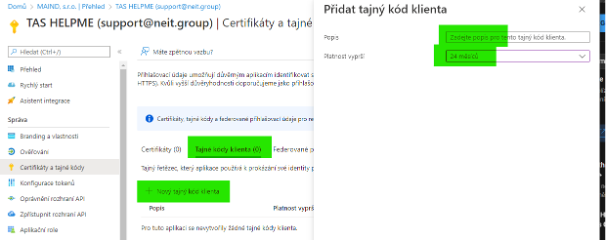
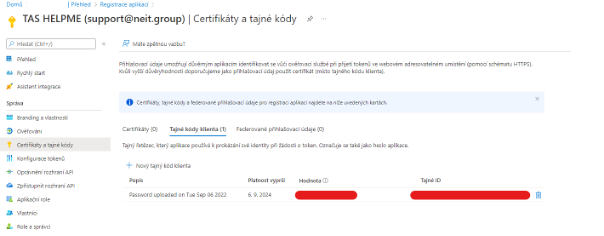
- Select Certificates and Secrets .
- In the Client Secret Codes tab (0), select New Client Secret Code . Enter the required information and add the code by clicking the Add button . Note: after this code expires, you must add a new one, otherwise the application (TAS) will lose access to the mailbox.
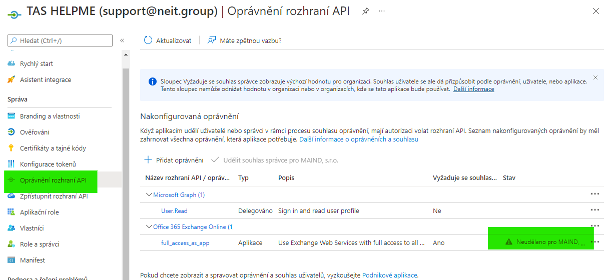
- Permission approval by the administrator. Once approved, the warning triangle next to API Permissions changes.
- Restrict access to a specific mailbox
The permission set above gives the application access to all mailboxes in the domain. To restrict access to only the intended mailbox, you must set access rules using PowerShell.Connect-ExchangeOnline -UserPrincipalName admin@domain.xyz
New-ApplicationAccessPolicy -AppId CLIENT_ID -PolicyScopeGroupId email@domain.xyz -AccessRight RestrictAccess -Description "Restrict this app to email@domain.xyz."If you are setting up access to a shared mailbox, you must first create the appropriate Security Principal. For this purpose, a Mail-enabled Security Group must be created, and the shared mailbox must be set up as a member of it. In the example above, the name of the created group is then used in the PolicyScopeGroupId. - Then, you can change the login script in cron in the application (TASu).
"auth": {
 "emailAddress": "faktury@firma.cz",
 "tenantId": "123-abc-456-def",
 "clientId": "987-cba-321-ijk",
 "clientSecret": "xxx-yyy-zzz",
 "type": "secret"
}- You can find
tenant_idhere:
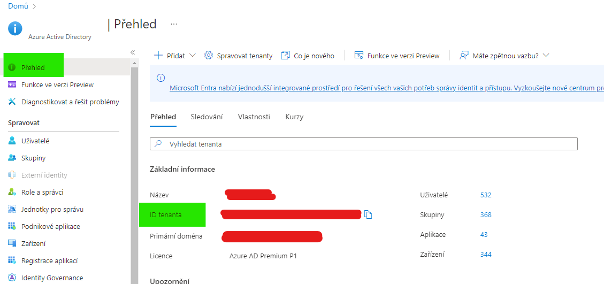
- You can find
client_idhere:
client_secretalias secret code:
- You can find
Entering the configuration
Specifying the cron configuration for handling incoming emails is explained in this manual .
