Vault
The Vault securely stores passwords, API keys, certificates and key pairs that calculations and smart events need. Values are encrypted in the database, and templates refer to them only by name, so secrets are never displayed anywhere. The Vault is available to administrators. Open it in Administration › Vault.
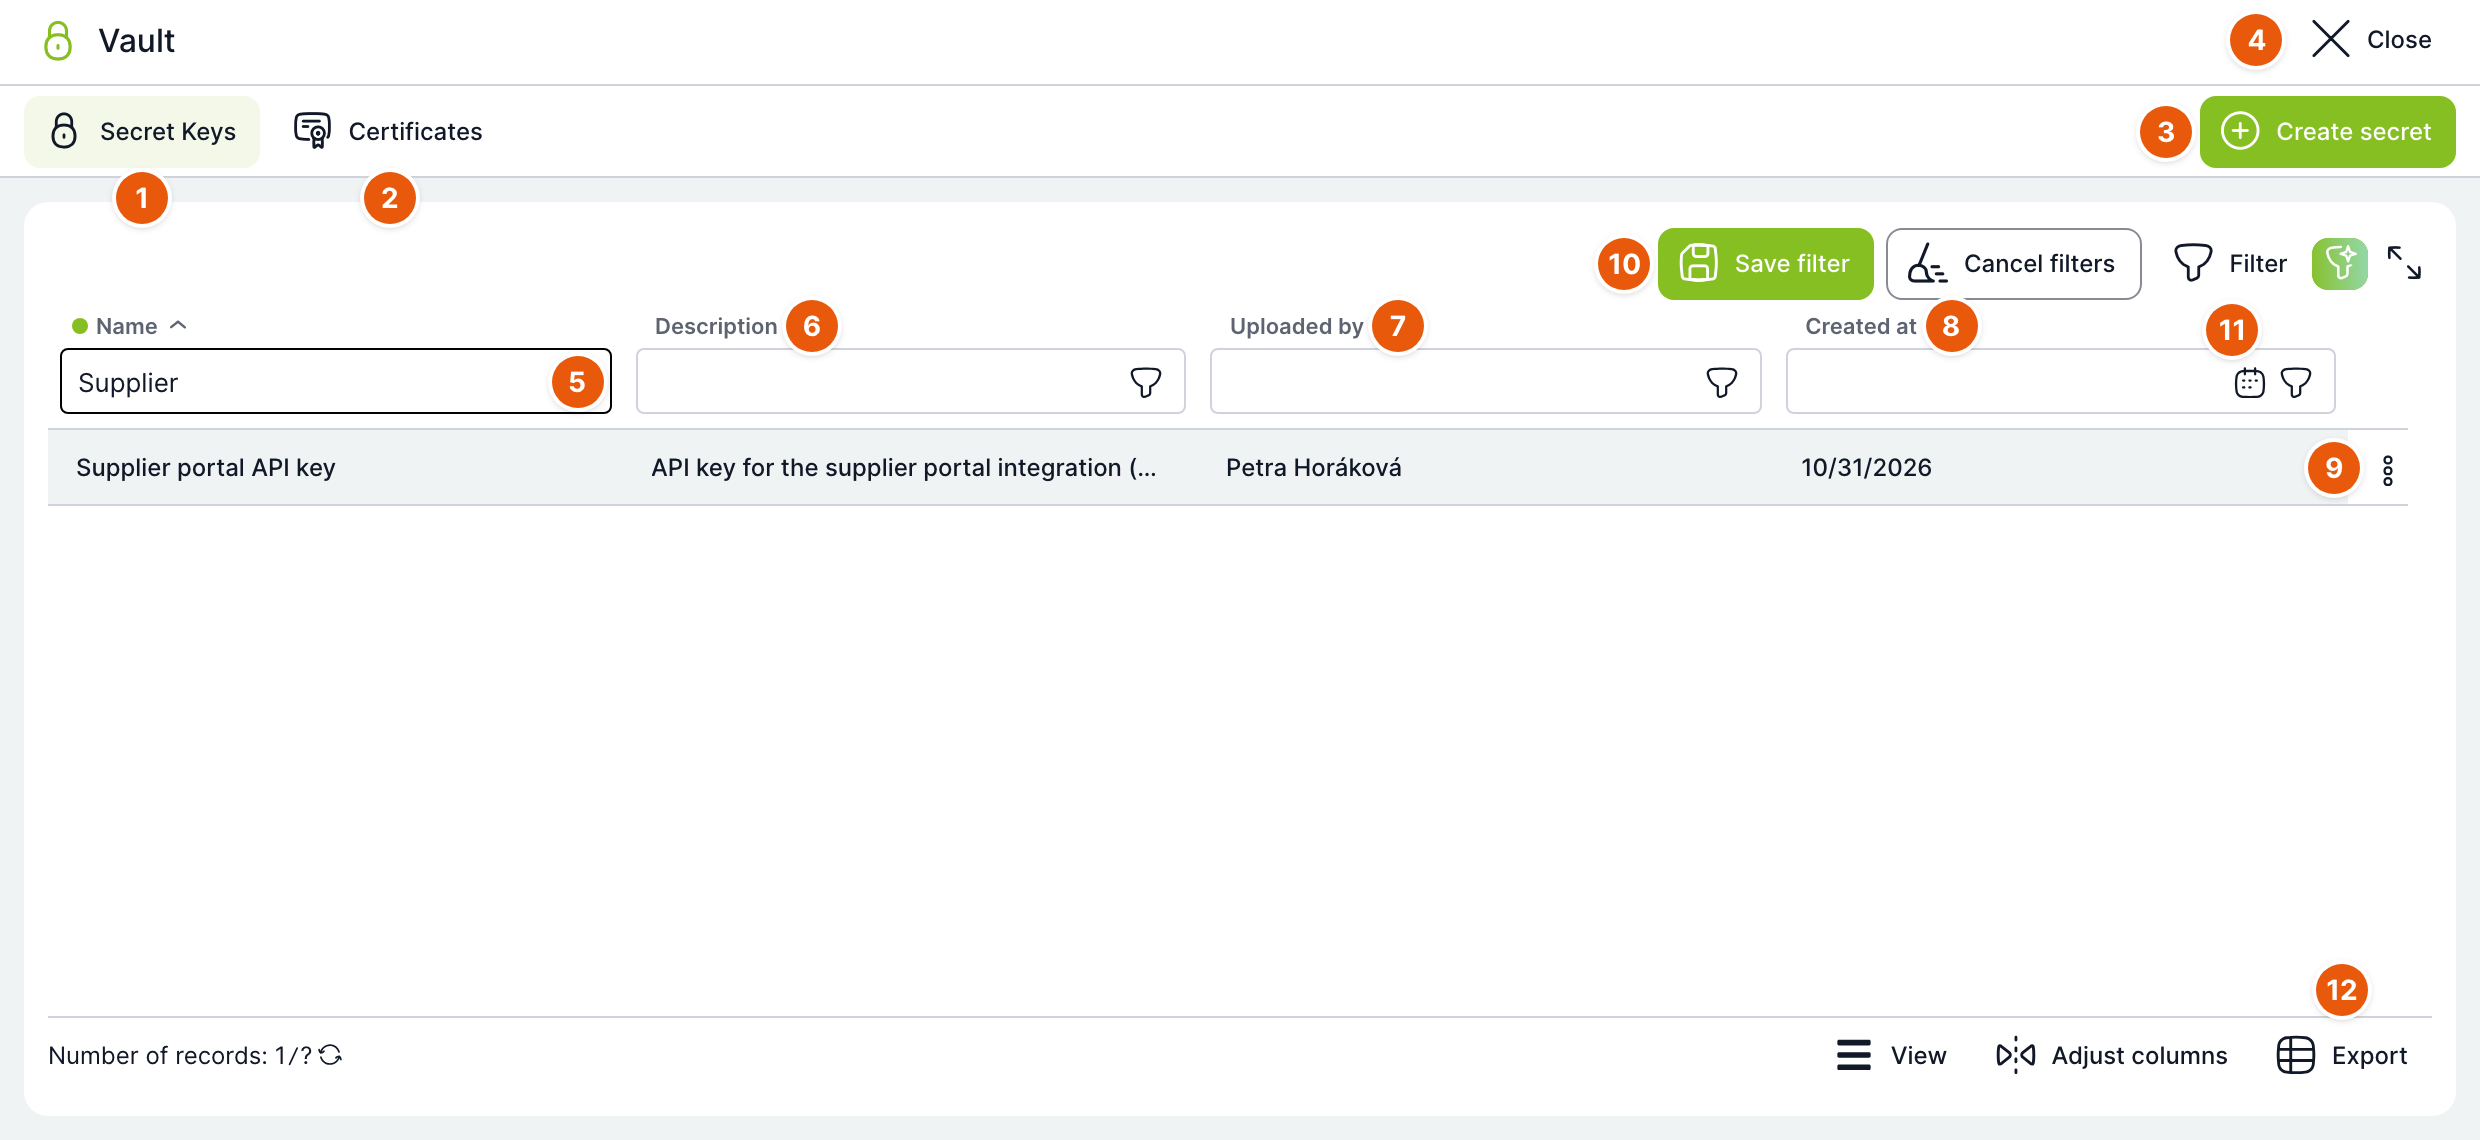
| No. | Element | Purpose |
|---|---|---|
| 1 | Secrets | Tab with the list of secrets (passwords, tokens, API keys). |
| 2 | Certificates | Tab with uploaded certificates and generated key pairs. A superadministrator also sees the External sources tab here. |
| 3 | Create secret | Opens the dialog for a new secret. The button is only on the Secrets tab. |
| 4 | Close | Returns you to the Administration menu. |
| 5 | Column filter | The field below the column name filters the list. In the screenshot, the list is filtered by name. |
| 6 | Description | Optional description of what the secret is used for. |
| 7 | Inserted by | The administrator who created the secret or last changed its value. |
| 8 | Inserted | Date the secret was created. |
| 9 | Row actions | Menu with Show, Edit and Delete. It appears only for secrets you created. A superadministrator has it for all secrets. |
| 10 | Save filter, Clear filters | Appear as soon as you filter. You can save the filter or clear all filters. |
| 11 | Filter | Table controls: filter, AI filter and full-screen view. |
| 12 | Export | Bottom bar of the table: number of records, view and column settings, and list export. |
All administrators can see the list of secrets and certificates. However, only the person who added a secret to the Vault and the superadministrator can show its value, change it or delete the secret. TAS logs every time a value is shown.
Secrets
Creating a secret
- On the Secrets tab, click Create secret.
- Fill in the name, the value and optionally a description.
- Click Create.
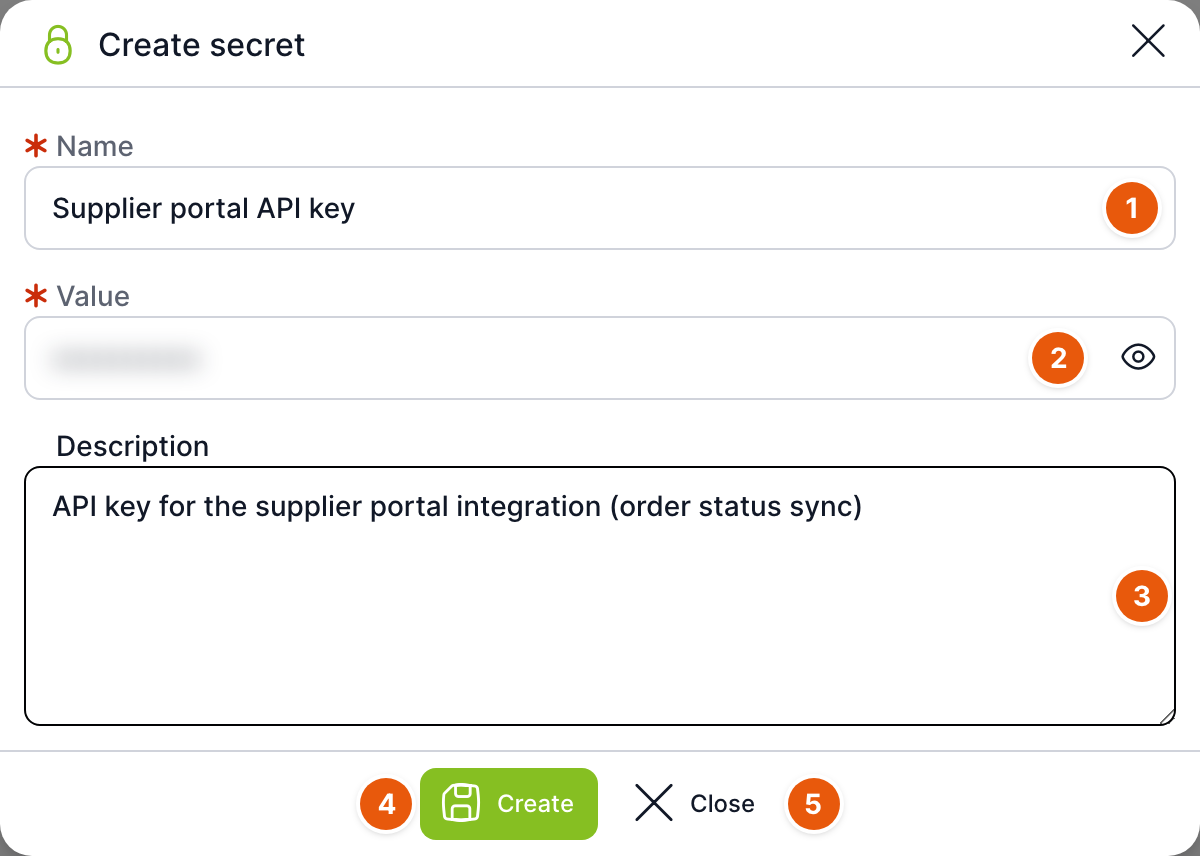
| No. | Field | Purpose |
|---|---|---|
| 1 | Name | Required. The name you use to refer to the secret in calculations and smart events. It must not match the name of a secret from external sources. |
| 2 | Value | Required. The secret value, for example a password or an API key. It is hidden while you type; you can briefly reveal it with the eye icon. |
| 3 | Description | Optional. What the secret is used for, so other administrators can understand it too. |
| 4 | Create | Saves the secret to the Vault. The value is stored encrypted. |
| 5 | Close | Closes the dialog without saving. |
If a secret with the same name already exists in the Vault, TAS does not create a new one. It overwrites the value of the existing secret and lists you as the author. Before creating a secret, filter the list by name.
Secret actions
Open the menu with the three-dot icon at the end of the row.
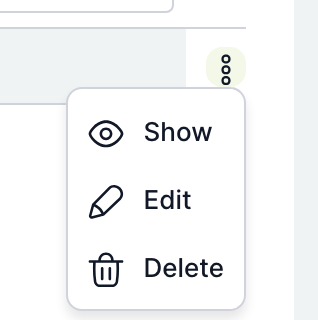
| Action | Purpose |
|---|---|
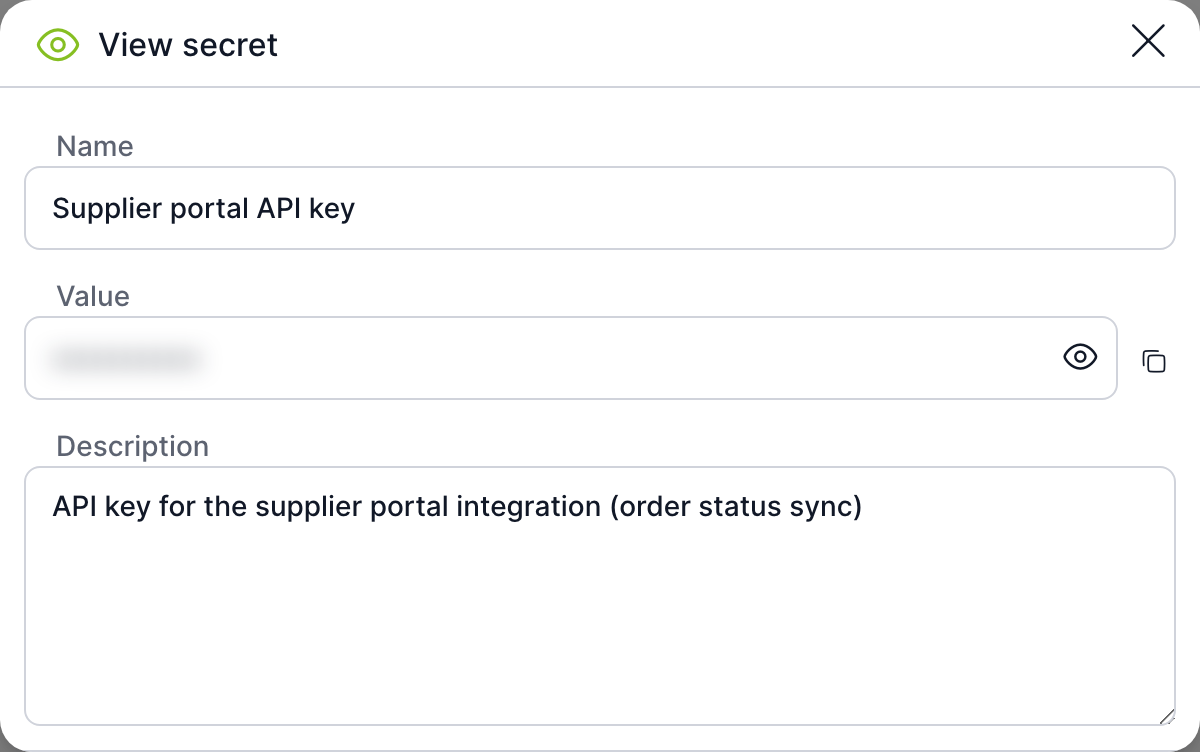
| Show | Opens a dialog with the name, value and description of the secret. |
| Edit | Opens a dialog for changing the value of the secret. |
| Delete | Removes the secret from the Vault after confirmation. |
Showing the value
In the Show secret dialog, the value is hidden. Reveal it with the eye icon, or copy it to the clipboard with the button next to the field. The dialog does not save anything; close it with the cross.
Changing the value
In the Edit secret dialog, you can change only the value. The name and description are read-only. The original value is not displayed; the Value field is empty and required. Enter the new value and click Save. Calculations and smart events that use the secret start using the new value immediately; you do not need to change anything else.
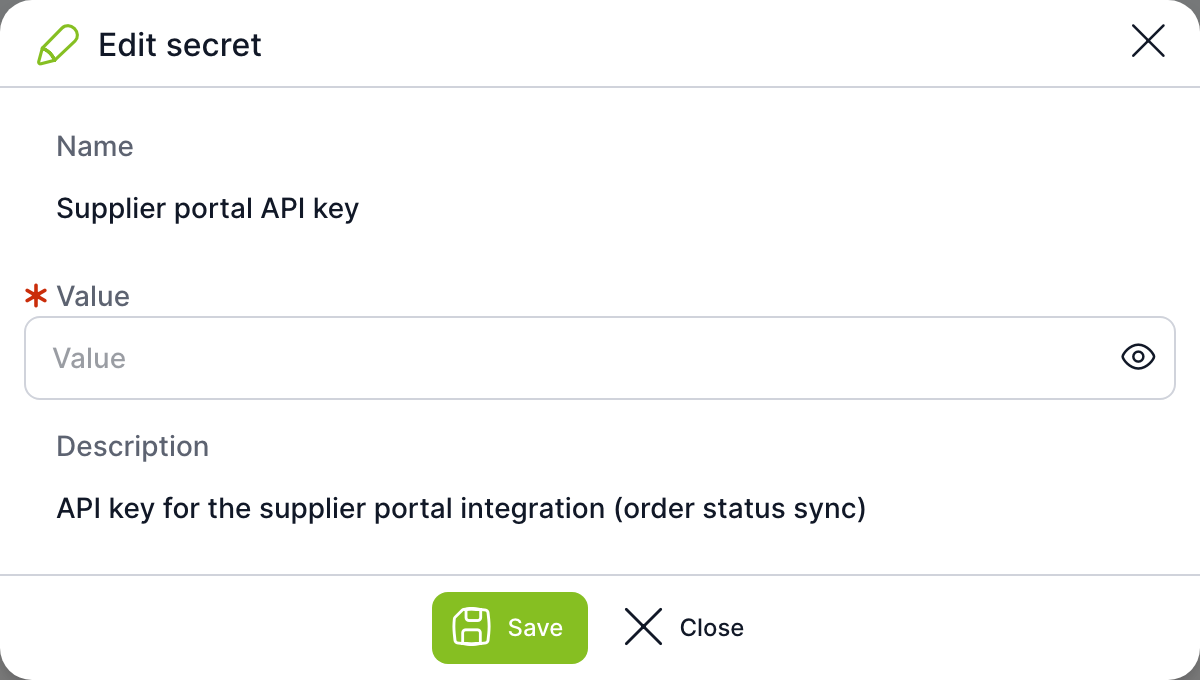
If you need to change the name or description, create a new secret and delete the old one.
Deleting a secret
After you select Delete, TAS displays the confirmation “Do you really want to delete the vault item…”. A secret that is still in use cannot be deleted. TAS checks task calculations in all templates and smart event parameters. If it finds the secret anywhere, it refuses the deletion with a message that the secret is still in use. First remove all references to the secret, then delete it.
Using secrets in templates
You refer to a secret by its name; you never write the value into the template.
| Where | Syntax | What happens |
|---|---|---|
| Task calculation | vault.get('Supplier portal API key') | Returns a reference to the secret, not the value itself. The reference cannot be printed or stored in a variable. You can use it only in functions that accept it, for example when setting an HTTP request header or an FTP password. |
| Smart event parameters | {{vault:Supplier portal API key}} | TAS replaces the placeholder with the secret value only when the smart event runs. |
Both syntaxes work for secrets, certificates and secrets from external sources.
Certificates
The Certificates tab contains uploaded certificates and key pairs generated in the Vault. All administrators can see it.
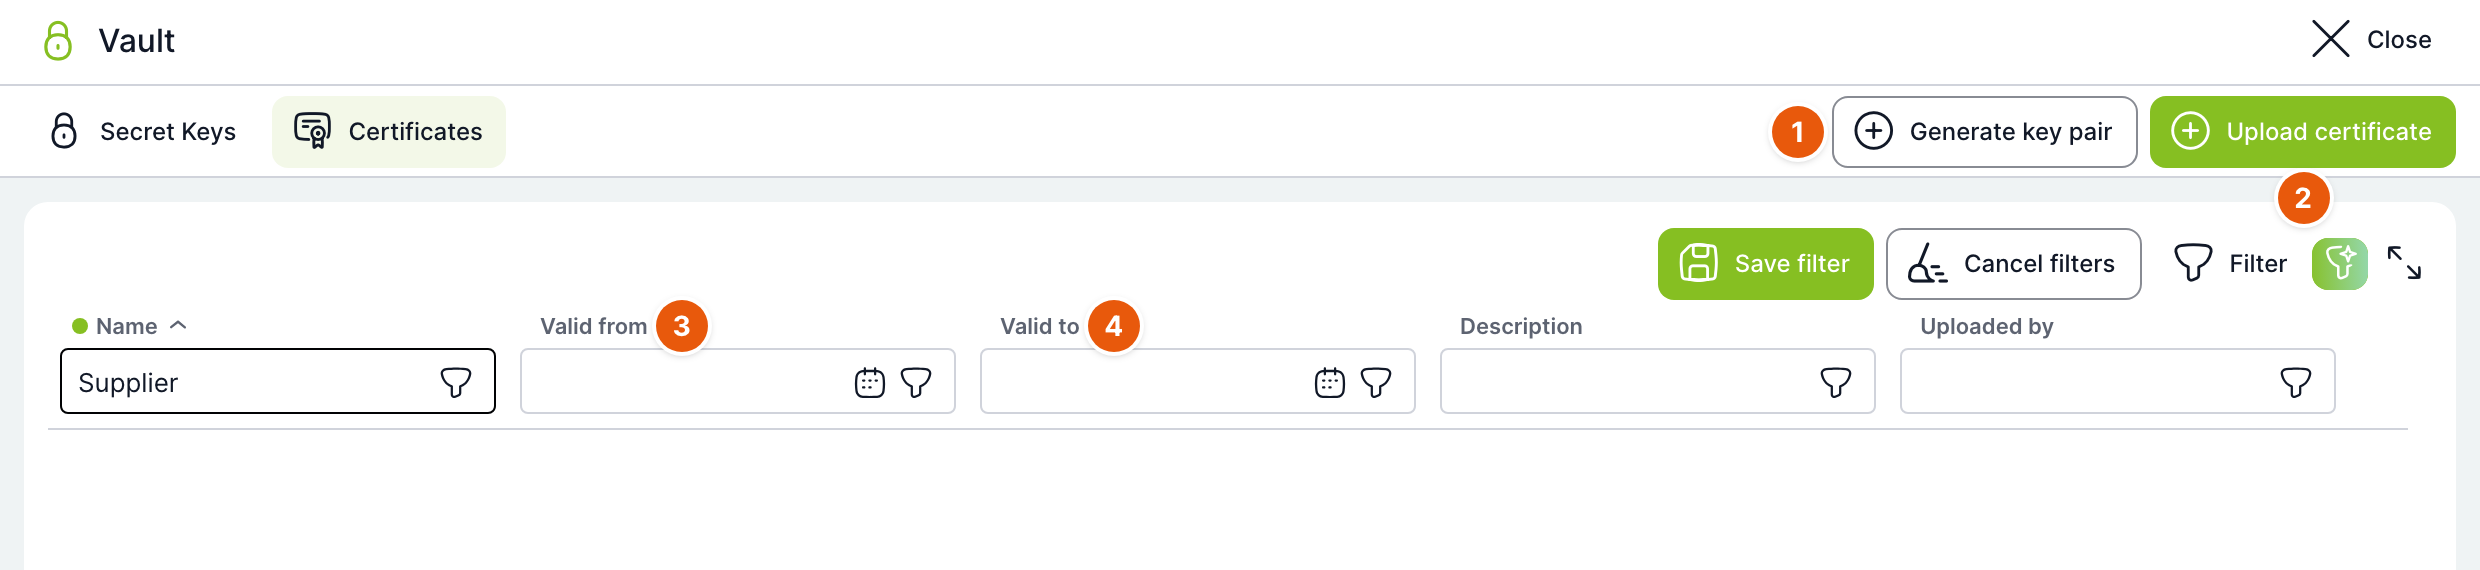
| No. | Element | Purpose |
|---|---|---|
| 1 | Generate key pair | Creates a new private and public key pair in the Vault. |
| 2 | Upload certificate | Uploads a certificate file. |
| 3 | Valid from | Start of the certificate validity. TAS reads it from the file. |
| 4 | Valid to | End of the certificate validity. Use it to identify certificates that need to be renewed. |
The other columns are Name, Description and Inserted by. The row menu contains the Show and Delete actions. As with secrets, only the person who added the item and the superadministrator can see them. A certificate cannot be edited. Upload a new version under the same name.
Uploading a certificate
- Click Upload certificate.
- Use the Choose file button to select a file with the .pem, .cer, .crt or .der extension.
- Check the name. TAS prefills it from the file name without the extension.
- Optionally add a description and click Upload.
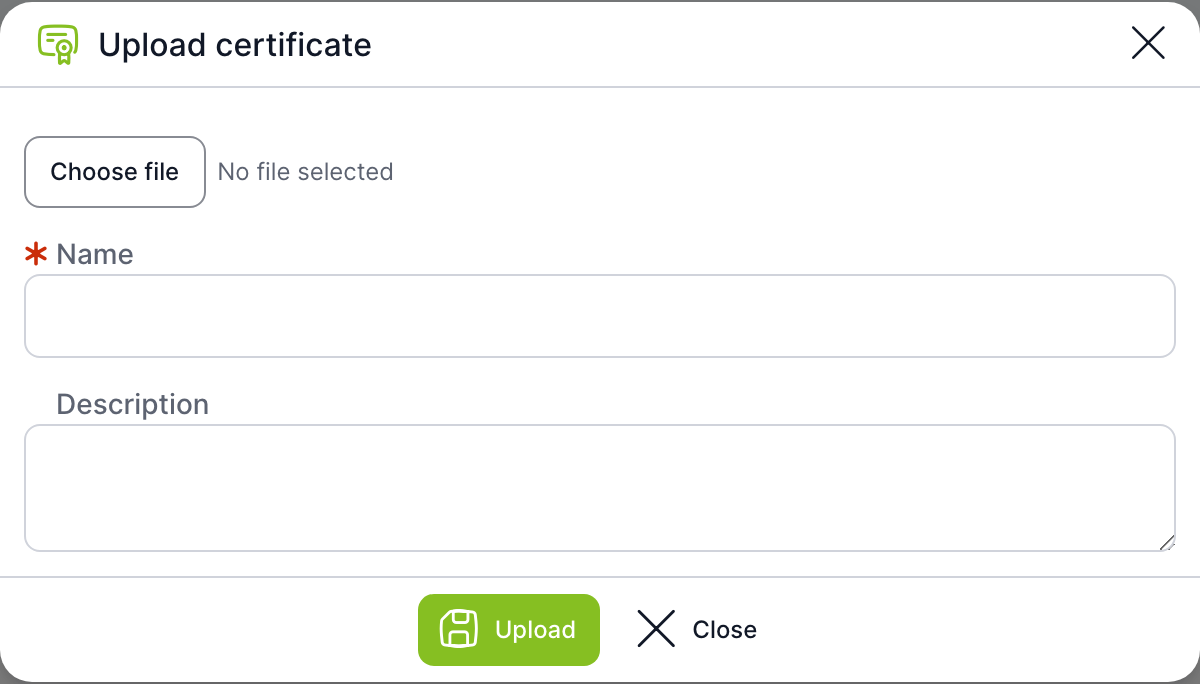
| Field | Purpose |
|---|---|
| Choose file | Selects an X.509 certificate file in PEM or DER format. The name of the selected file is shown next to the button. Without a file, TAS reports that no certificate is selected. |
| Name | Required. The name you use to refer to the certificate. If a certificate with the same name already exists, TAS replaces it with the new one. |
| Description | Optional. TAS automatically appends the certificate issuer and subject to the description. |
If the file does not contain a valid X.509 certificate, TAS rejects it and does not save the certificate.
Generating a key pair
A key pair is useful for integrations that work with signing or encryption. The private key stays in the Vault; you hand the public key over to the other party.
- Click Generate key pair.
- Enter a name and choose the algorithm and format.
- Click Generate key pair.
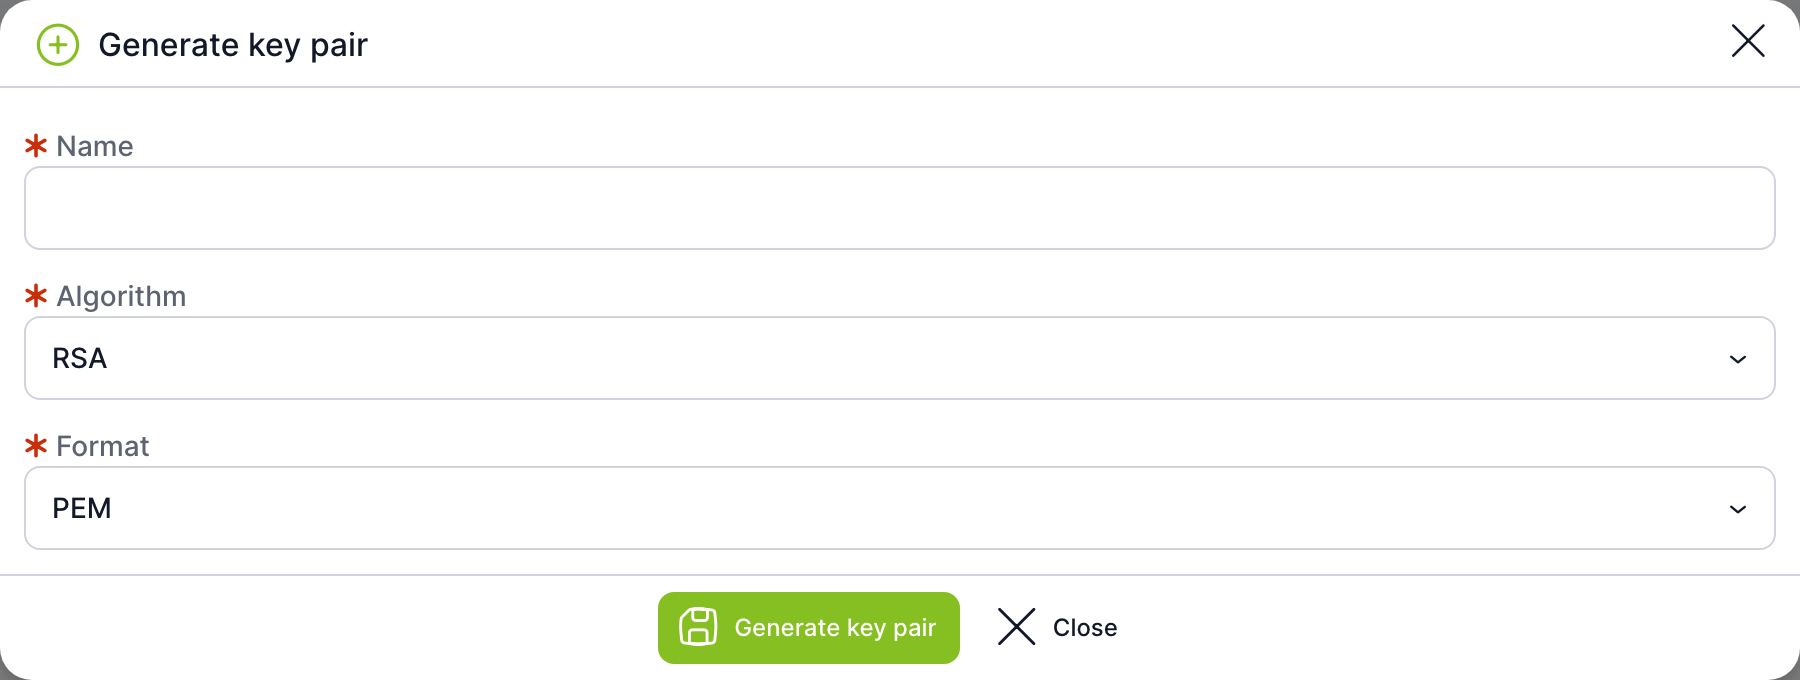
| Field | Purpose |
|---|---|
| Name | Required. The base name of both keys. TAS saves the private key with the suffix .private and the public key with the suffix .public, for example signing.private and signing.public. If either of these names already exists, generation fails with an error. |
| Algorithm | RSA (default) or ECDSA. |
| Format | PEM (default) or JWK. |
After generation, the dialog stays open and shows the names of both saved keys and the public key value with a copy button. The private key is not displayed in the dialog. Close the dialog with the Close button. You will then find both keys in the list of certificates.
External sources
Only the superadministrator can see the External sources tab. It contains secrets that are not stored in the database but are set by the server administrator in environment variables in the form TAS_SECRET_<NÁZEV>. The secret name is the part after the prefix. The list shows only the name; the superadministrator can display the value with the Show action. Secrets from external sources cannot be created, changed or deleted in TAS. In calculations and smart events, they are used in the same way as other secrets.
The screenshots show an administrator without the superadministrator role, which is why the External sources tab is missing.
Related: API access, Authentication, Smart events, Calculations.