Solving a task
You solve a task in the task form: you fill in the fields, attach documents if needed and complete the task. Open the form from the task list with the Solve action or by double-clicking a row, from the dashboard, or via a link in an e-mail. This article describes the whole task screen. How to fill in the individual field types is described in the article Form fields.
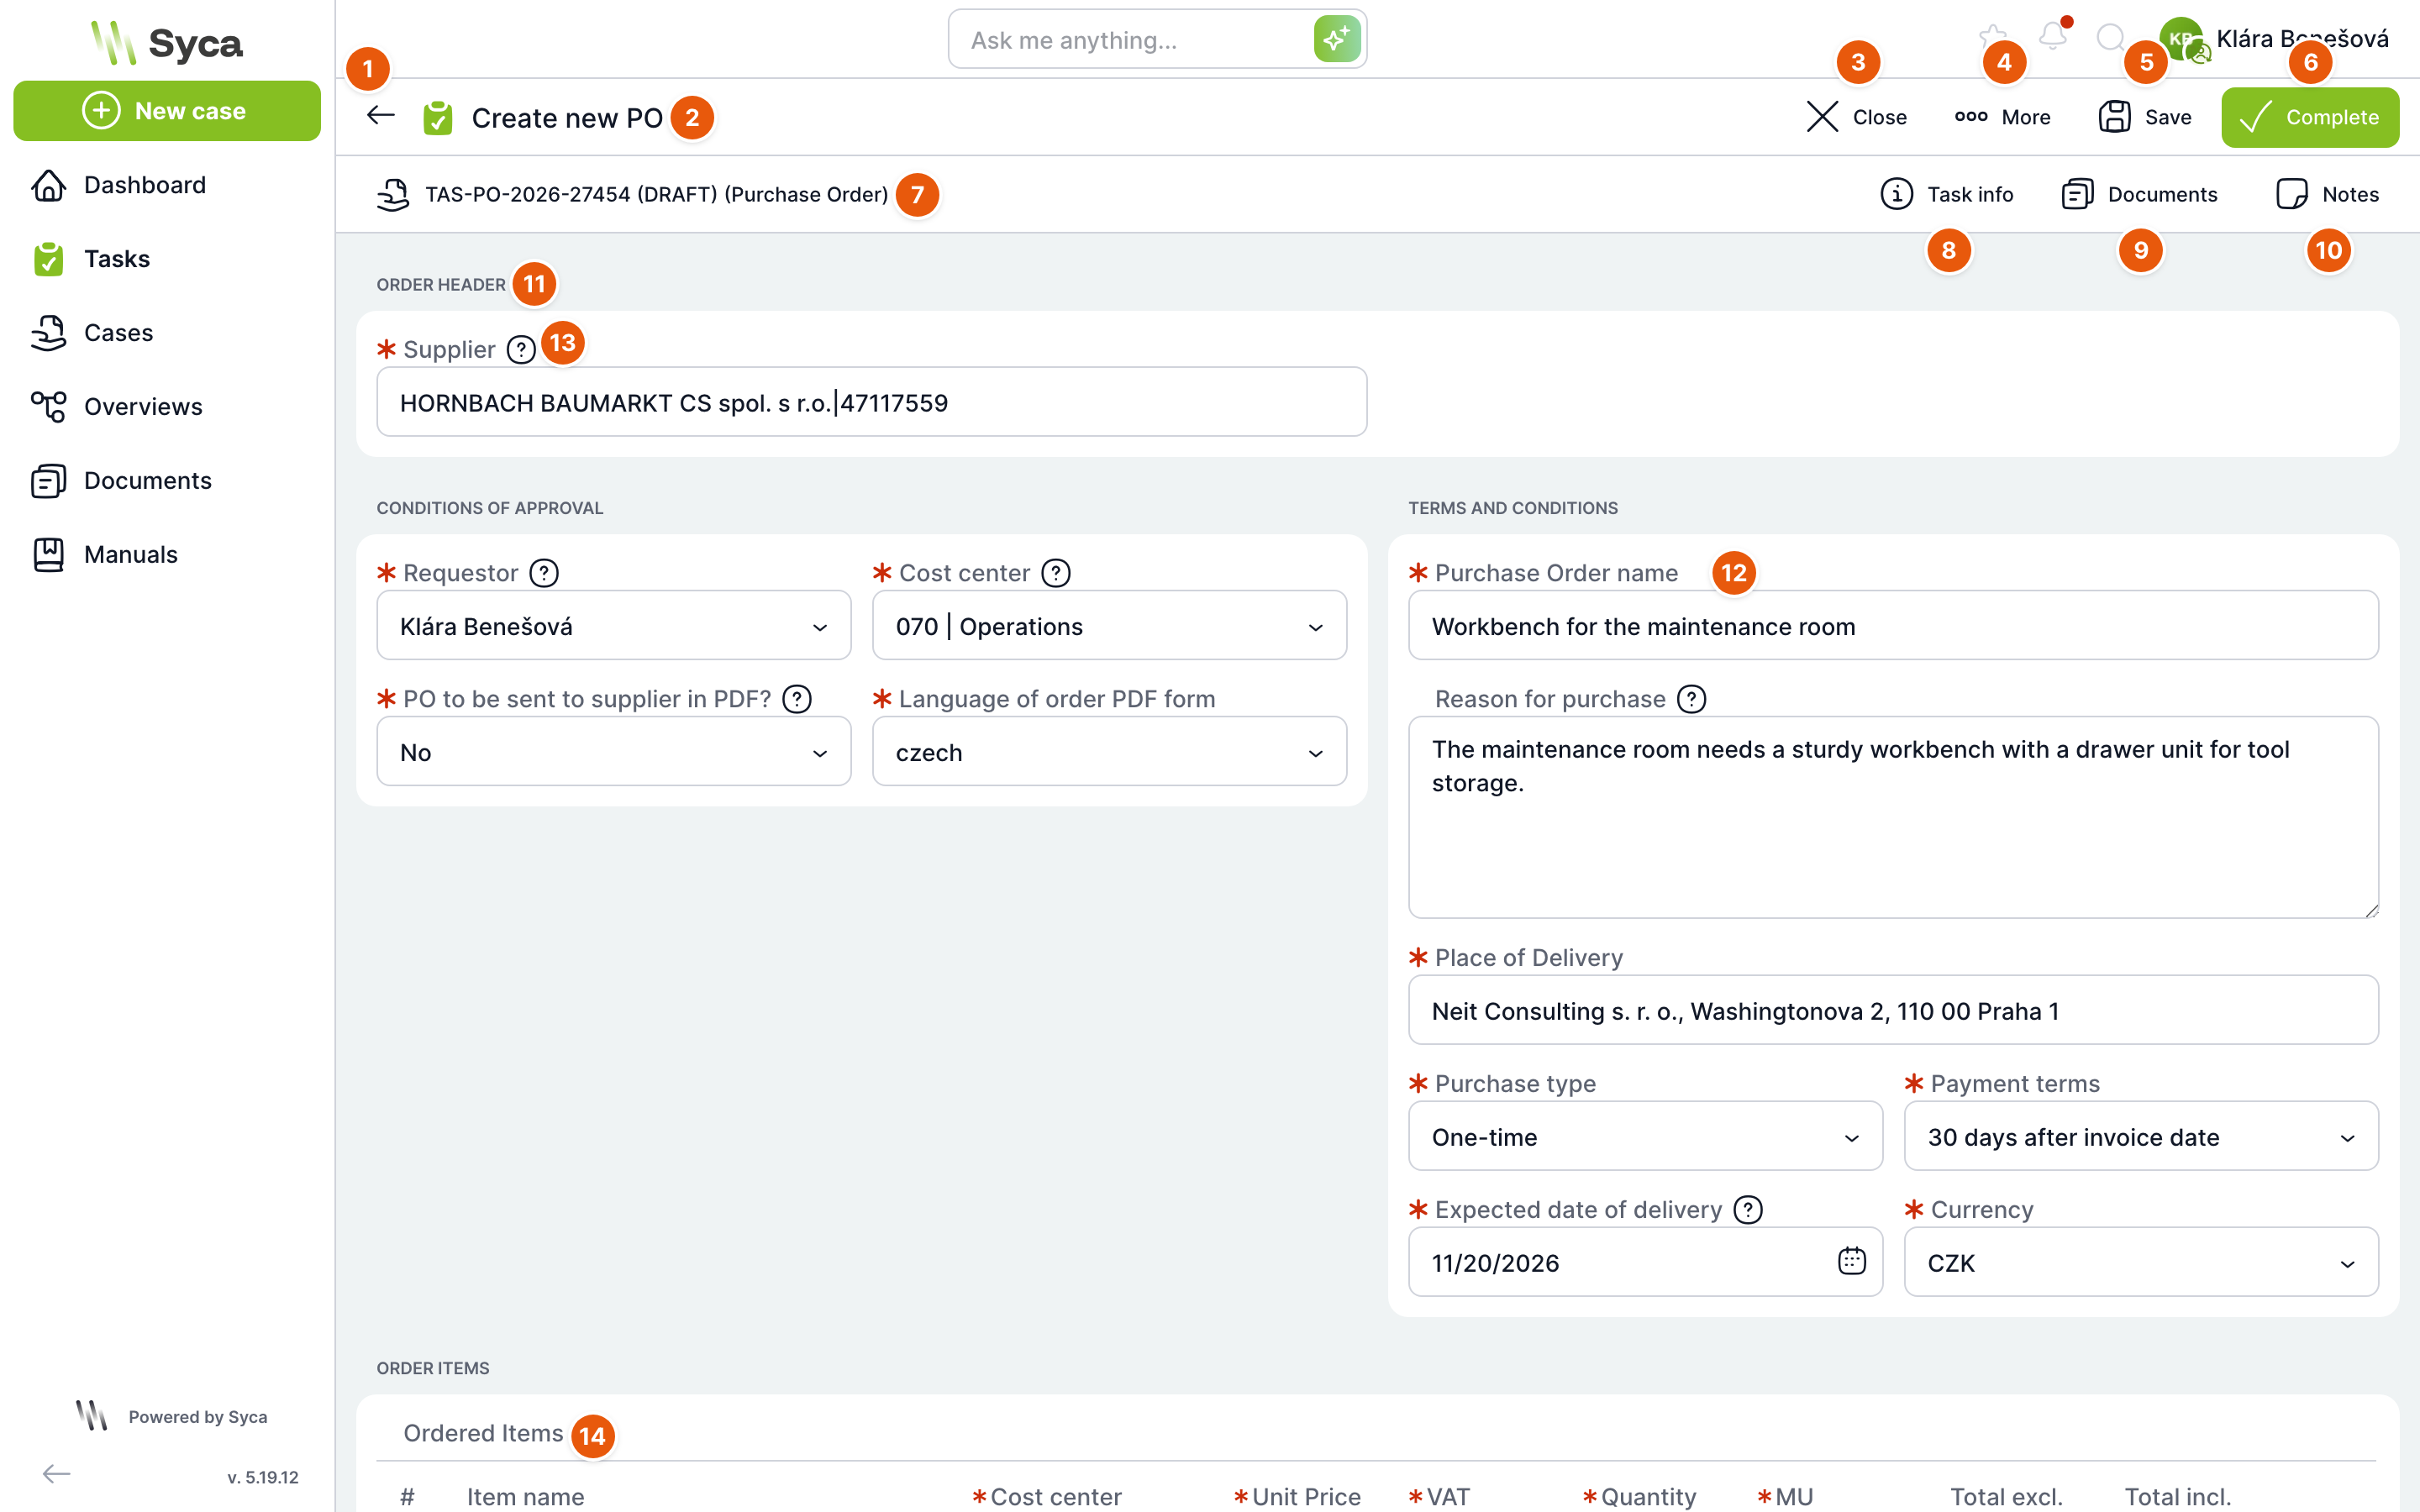
| No. | Element | Purpose |
|---|---|---|
| 1 | Back | Closes the task and returns you to where you opened it from. |
| 2 | Task name | Name of the task. When you hover over the name, an icon for copying the name appears. A completed task has a Finished label next to its name. |
| 3 | Close | Same as Back. On mobile and tablet, the header shows a Copy link button instead, which copies the task address. |
| 4 | More | Menu with further actions, see below. |
| 5 | Save | Saves the form in progress. The task stays with you and you can return to it. The button is active only when you have unsaved changes. |
| 6 | Complete | Checks the form, saves it and completes the task. The case then continues with the next step. |
| 7 | Case | Case name, with the process name in brackets. Click to open the case. |
| 8 | Task information | Who is solving the task, when it started, the deadline and other details. |
| 9 | Documents | Task documents. The number on the button shows how many there are. |
| 10 | Notes | Notes on the case. The number shows how many notes there are. |
| 11 | Section | Heading of a group of fields. The form layout is prepared by the template author. |
| 12 | Required field | A red asterisk means you cannot complete the task without filling in the field. |
| 13 | Help | Question mark next to a field. When you hover over it, help for the field is displayed. |
| 14 | Table | A field with multiple rows, for example order items. See the article Form fields. |
Task instructions prepared by the template author may appear above the form. Longer instructions are shortened; display them in full with the More link (and collapse them with Less). If an administrator has published a news item for this task, you will also see it above the form.
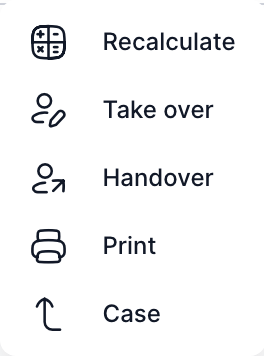
More menu
| Item | Purpose |
|---|---|
| Recalculate | Saves the form and runs the calculations set up for the task in the template. Then reloads the task. It is active only if the task has any calculations. |
| Take over | Takes the task over to you. Active only for users who are allowed to hand over the task, for example the case owner or the supervisor. |
| Hand over | Opens a window for handing the task over to another user. See the article Handover, takeover and subscribed tasks. |
| Opens the print window. You select a print report and the print method. | |
| Case | Opens the case the task belongs to. |
Administrators and users with the Power user role additionally see the Variable assignment item, which opens the form settings in the template. The Entity change item is visible only to the main administrator.
Task information
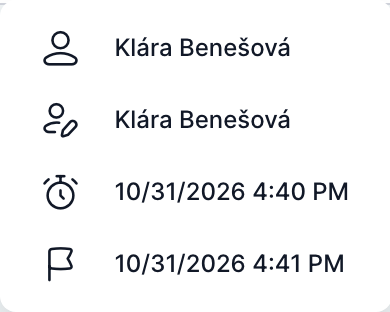
The window shows only the details that are filled in for the task, in this order. When you hover over a row, the name of the detail and an icon for copying it are displayed.
| Detail | Meaning |
|---|---|
| Case owner | Who created or owns the case. |
| Solver | Who the task is currently assigned to. |
| Completed by | Who completed the task. Only for a finished task. |
| Actual start | When the task started. |
| Deadline | By when the task should be completed. |
| End | When the task was completed. |
| Task description | Description from the template. The full text is displayed when you hover over the row. |
Documents
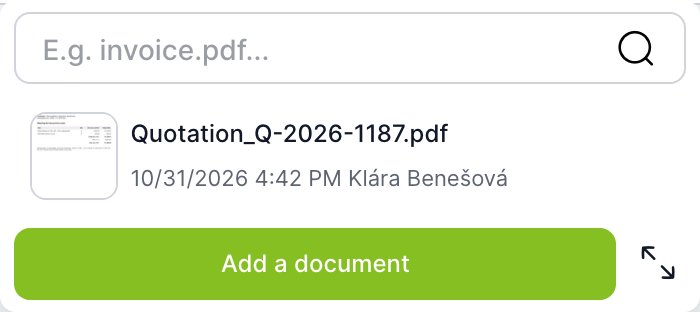
The window shows the task documents. Use the field at the top to search by name. The Add document button uploads a new file. The arrows icon in the bottom right opens a large window with all documents and their properties. Working with documents is described in detail in the Documents section.
Uploading by drag and drop
You can also upload a file to the task by dragging it from your computer anywhere onto the task form. While dragging, a bar Drag and drop to upload a file. appears at the top. When you release it, the file is saved among the task and case documents.
Drag and drop does not work in a finished case (except for document managers) or when the connection to the server is interrupted.
Notes
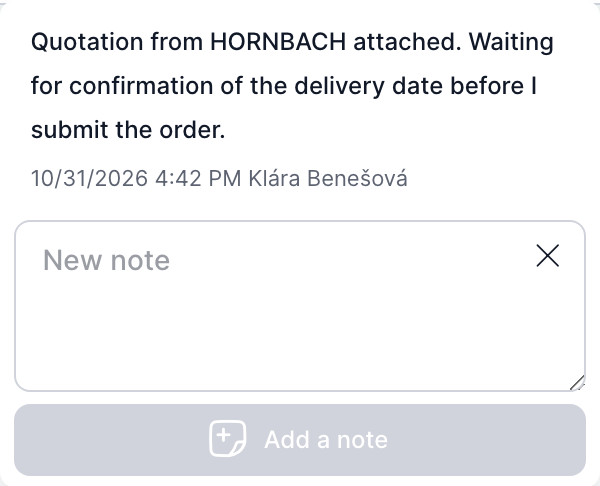
Notes belong to the whole case. Everyone working on the case sees them in all of its tasks.
- Click Notes.
- Type the text into the New note field.
- Click Add note.
Your own notes have two icons:
- Pencil opens the note for editing. Save the edit with the Edit note button.
- Eye hides the note. A hidden note is not displayed to others. If the case contains hidden notes, a Show hidden notes switch appears. Hidden notes have a Hidden label, and you can show them again with the same icon.
You cannot edit or hide other users' notes.
Saving and completing
Save
The Save button saves what you have filled in, even if required fields are still missing. The task remains in your list. Saving is confirmed by the message Task saved!.
If you want to close the task and have unsaved changes, TAS asks:
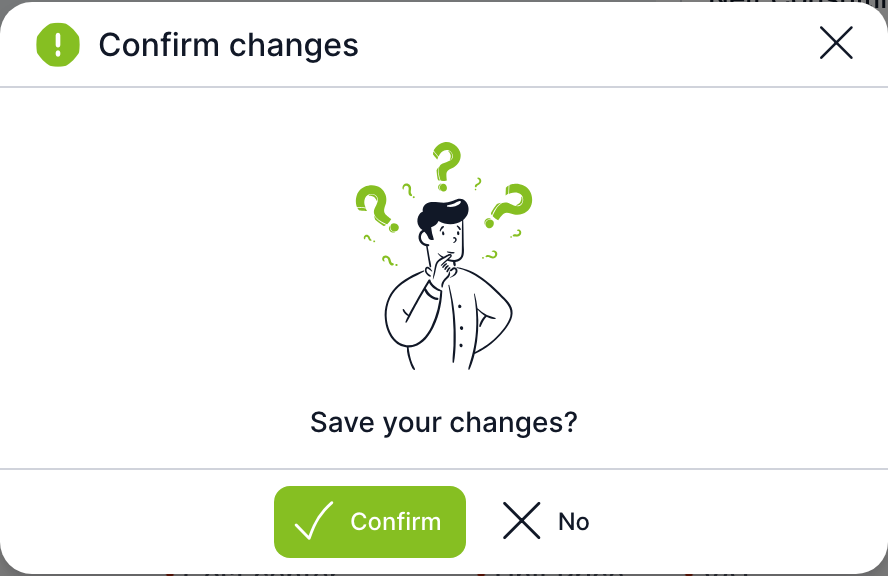
Confirm saves the changes and closes the task. No closes the task without saving. The cross in the window header returns you to the task.
Complete
- Fill in all required fields (marked with a red asterisk).
- Click Complete.
- TAS checks the form. If something is missing, it does not complete the task, marks the missing fields in red and scrolls the page to the first of them. A message is displayed at the bottom:

- If the form is valid, TAS saves it, completes the task and returns you to the list. The message Task saved and completed! confirms success.
The case continues with the next step according to the template. If the next task is assigned to you again, TAS opens it right away and shows the message The next task was opened. If several follow-up tasks are waiting for you at once, a Task queue button appears in the header, giving you an overview so you can solve them one by one.
The message Please fill in the data in the correct format. means that a field contains a value the form does not accept, for example text in a number field. The field is marked in red and a description of the error is shown below it.
If completion fails on the server, the error message contains a link to the task, so you can easily return to it.
Finished task
A finished task opens as read-only. It has a Finished label, it has no Save and Complete buttons and the fields cannot be changed. The Documents and Notes buttons are not displayed for a finished task. The More menu is available only for a finished e-mail task and contains the Resend e-mail item, which sends the e-mail again.

| No. | Element | Purpose |
|---|---|---|
| 1 | Finished | Label of a completed task. |
| 2 | Values switch | When the switch is off (Historical values), it shows the field values as they were at the moment the task was completed. When the switch is on (Current values), it shows the current values in the case. |
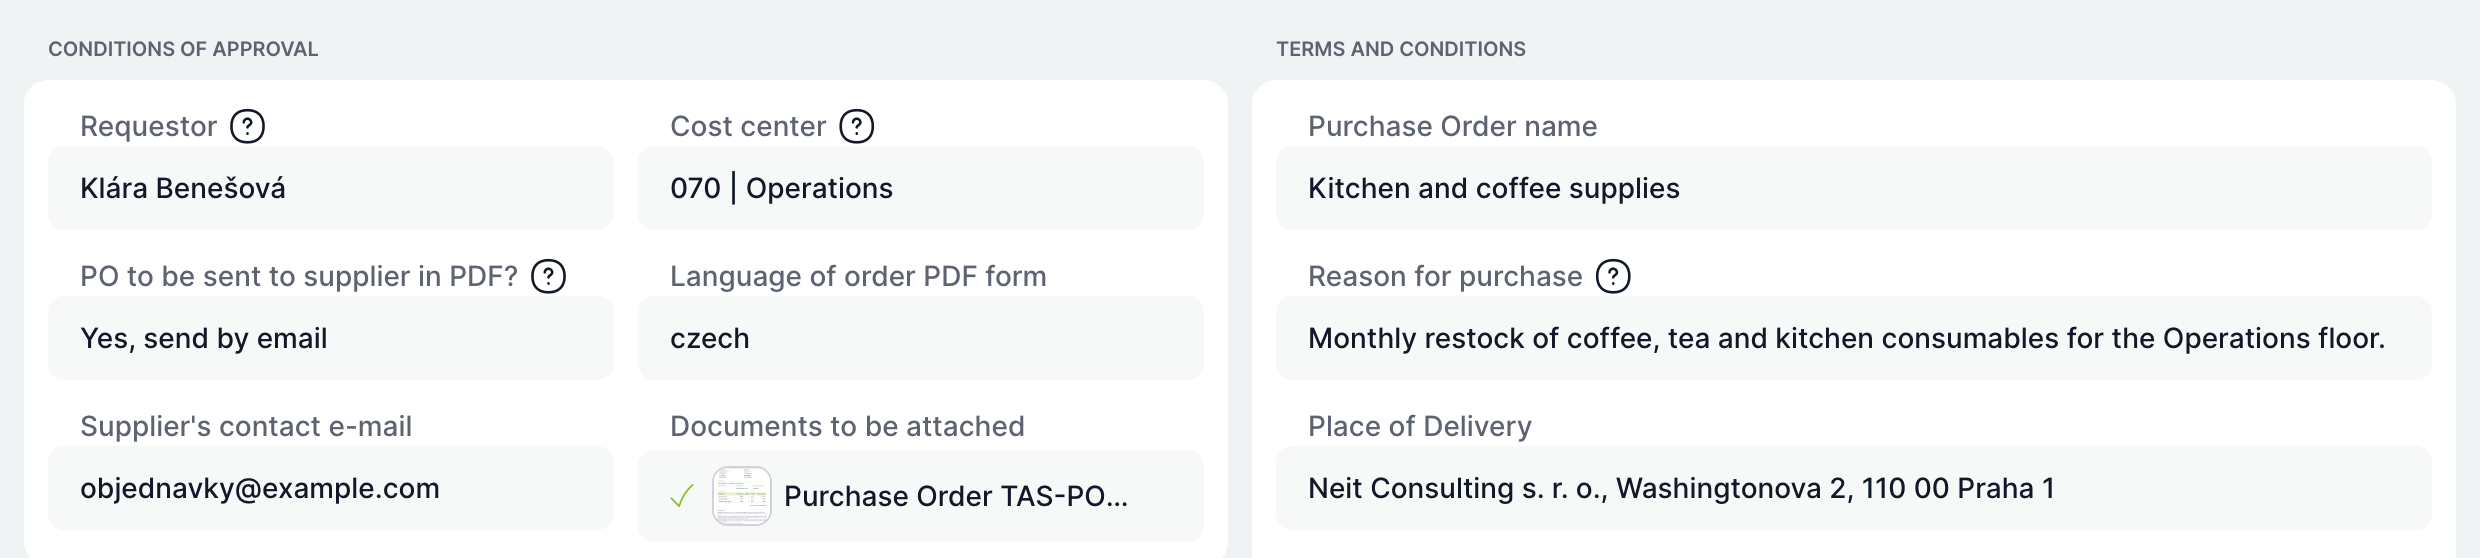
The switch is useful when you want to find out exactly what the solver filled in at the time and what has changed in the case since.
Selecting a solver
Some tasks in the template have no solver determined in advance. The solver is selected by a user specified by the template, usually the task supervisor. When that user opens such a task, the heading starts with Select the user to assign the task to:.
- In the User field, select who will solve the task. The list contains only users that the template allows for the task. Administrators and global supervisors can select anyone.
- The form below the field is for information only.
- Click Done. The task is assigned to the selected user and appears in their list.
Related: Task list, Form fields, Handover, takeover and subscribed tasks.