User guide
Quick Start Guide
Case notes
Table component
FAQ
Search
Dashboard
Deleted Documents and Access Log
Solving a task
AI Assistant
Manuals
Substitution and Vacation
Suspending, resuming, archiving and deleting a case
Case variables, history and graph
Basic Terms
Uploading Documents, Folders and Revisions
News
Favorites
Navigating the interface
Dashboard widgets
Case Detail
News/Announcements in Team assistant
Case list
Logging In and Out
Account Settings
Task List
Mobile app settings
Reports and Charts
Searching and Listing Documents
Handing Over, Taking Over and Tasks to Pull
Bulk Tasks
Printing a Case
Creating and Editing an Overview
What Is TAS
Form Fields
Tablet Interface and NFC
Overviews
Creating a New Case
Case Events
Case Permissions
Subscribing to an overview by email
Administrator Guide
Platform guide
Administration
Crons
Authentication and Synchronization
SMTP OAuth authentication
LDAP, SAML, Entra ID and NFC: Settings
Configuring authentication modules
Authentication
Vault
DMS attributes
Service Operations
Mobile App Setup for Your Environment
Scheme
XML Process Import
HR agenda and agenda handover
Logs
Archiving
Scripts
Sequences
System Status
News Management
Migrations
Configuration
Plugins
Email Queue
Service Console
AI monitoring
Shared Files
Settings
CSP Headers
CSV Files
Scheduled Tasks
Processing Queues
Maintenance
Administration Menu
Licenses
Dynamic Tables
Usage Statistics
Access Token Settings & Session Expiration
Visual Identity
Template
Prints
Tasks
Task calculations
Automatic task completion and cancellation
Email Task and Notifications
Task types
Smart Event task
Instructions, Sections and Testing a Task
General task settings and solver
Multi-instance
Planning: start, branching and due date
Dynamic conditions: builder
Variable assignment and sections
Variables
Class diagram, object state import and alias candidates
Document list
Text and Multiline text
Checkbox
Number
Variables: overview and common settings
Lists (texts, numbers, dates)
Dynamic Rows
Date
Dynamic list
Sequence
Dynamic Table
Shredding Process
Template graph
Template Tab
Template List
Importing, Exporting and Copying a Template
Template Headers
Case statuses
Roles
Connecting to a different database
Diagnosing services
Hyper-V: Isolated NAT Network with Port Forwarding
Users
Translations
NFC Integration
Events and Rules
AXIOS API
Plans
Axios with Vault
Users
Axios with SSL Certificate
User Detail
Calculations & Functions
Form condition
Other dynamic conditions
Optimization of API calls on dynamic conditions
Filtering in a dynamic sheet using dynamic conditions
Dynamic Conditions: Script
Dynamic Rows: Script
Calculations
Dynamic Tables
Printing and File Generation
Documents in Calculations — Complete Guide
Printing and File Generation in Calculations
DOCX document creation
Other Calculations
How and when calculations run
Calculations API reference: the lib library
Calculations API reference: variables and case
Global Scripts and React Scripts
Integrations
MS Graph
MS Graph - cron configuration
MS Graph v2 (from v5.7.102)
MS Graph - preparing the mailbox
MS Graph (email)
ISDOC.PDF
DocuSign
TAS call module - TAS 2 TAS (process creation via API)
DB View
DocuSign and electronic signatures
ERP and other integrations
Smart Events for Integrations
TAS Forms
TAS Forms
Activating the module on the environment
TAS Forms - secret creation guide for Docker Swarm
Advanced Features & Tips
Filtering in a dynamic sheet using a URL parameter (static)
Optimizing Overviews with a Large Number of Cases
API Documentation
Product
Technical Changelog
Business Changelog
Version Upgrade Guide
Upgrade to v5.19
Upgrade to TAS 5.19 - Key Changes and Removed Features
Upgrading TAS 5.17 to 5.19 – Technical Part (DevOps)
Upgrate to v5.17
Upgrade to TAS 5.17 - Key Changes and Removed Features
Asset Migration from FE to Backend (5.17 Upgrade) — DevOps
Upgrading to v5.7
Lodash upgrade v4.17.x (>v5.5)
Main changes and deprecated features (v5.3 > v5.7)
Highlighting variables in Read-only status (>v5.7.58)
Upgrading to 5.3
Dynamic conditions migration
PDF printing adjustment
Editing Task Description vs Task Instructions
Transpiling forEach to a for loop
Rendering HTML on Caseoverview
Differences between TAS4 and TAS5 - a complete overview
Best Practices for Upgrading from v4 to v5
Using validation functions
Technical details
Server prerequisites
Security and Data Protection
Security
TAS Operations Runbook
Technological architecture
News / Important information
Microsoft Disabling Basic Auth for SMTP
End of EWS support and transition to Microsoft Graph
Adjustment in EWS after MS Exchange update (29.04.2025)
Security notices
Getting Started
Users
On the Users page you create and manage the accounts of everyone who works in TAS: you set their username, password, organizational unit, roles and preferences, and you lock or delete users. Only an administrator can see the page (role $Administrator or $SuperAdministrator). Open it from the main menu by selecting Users.
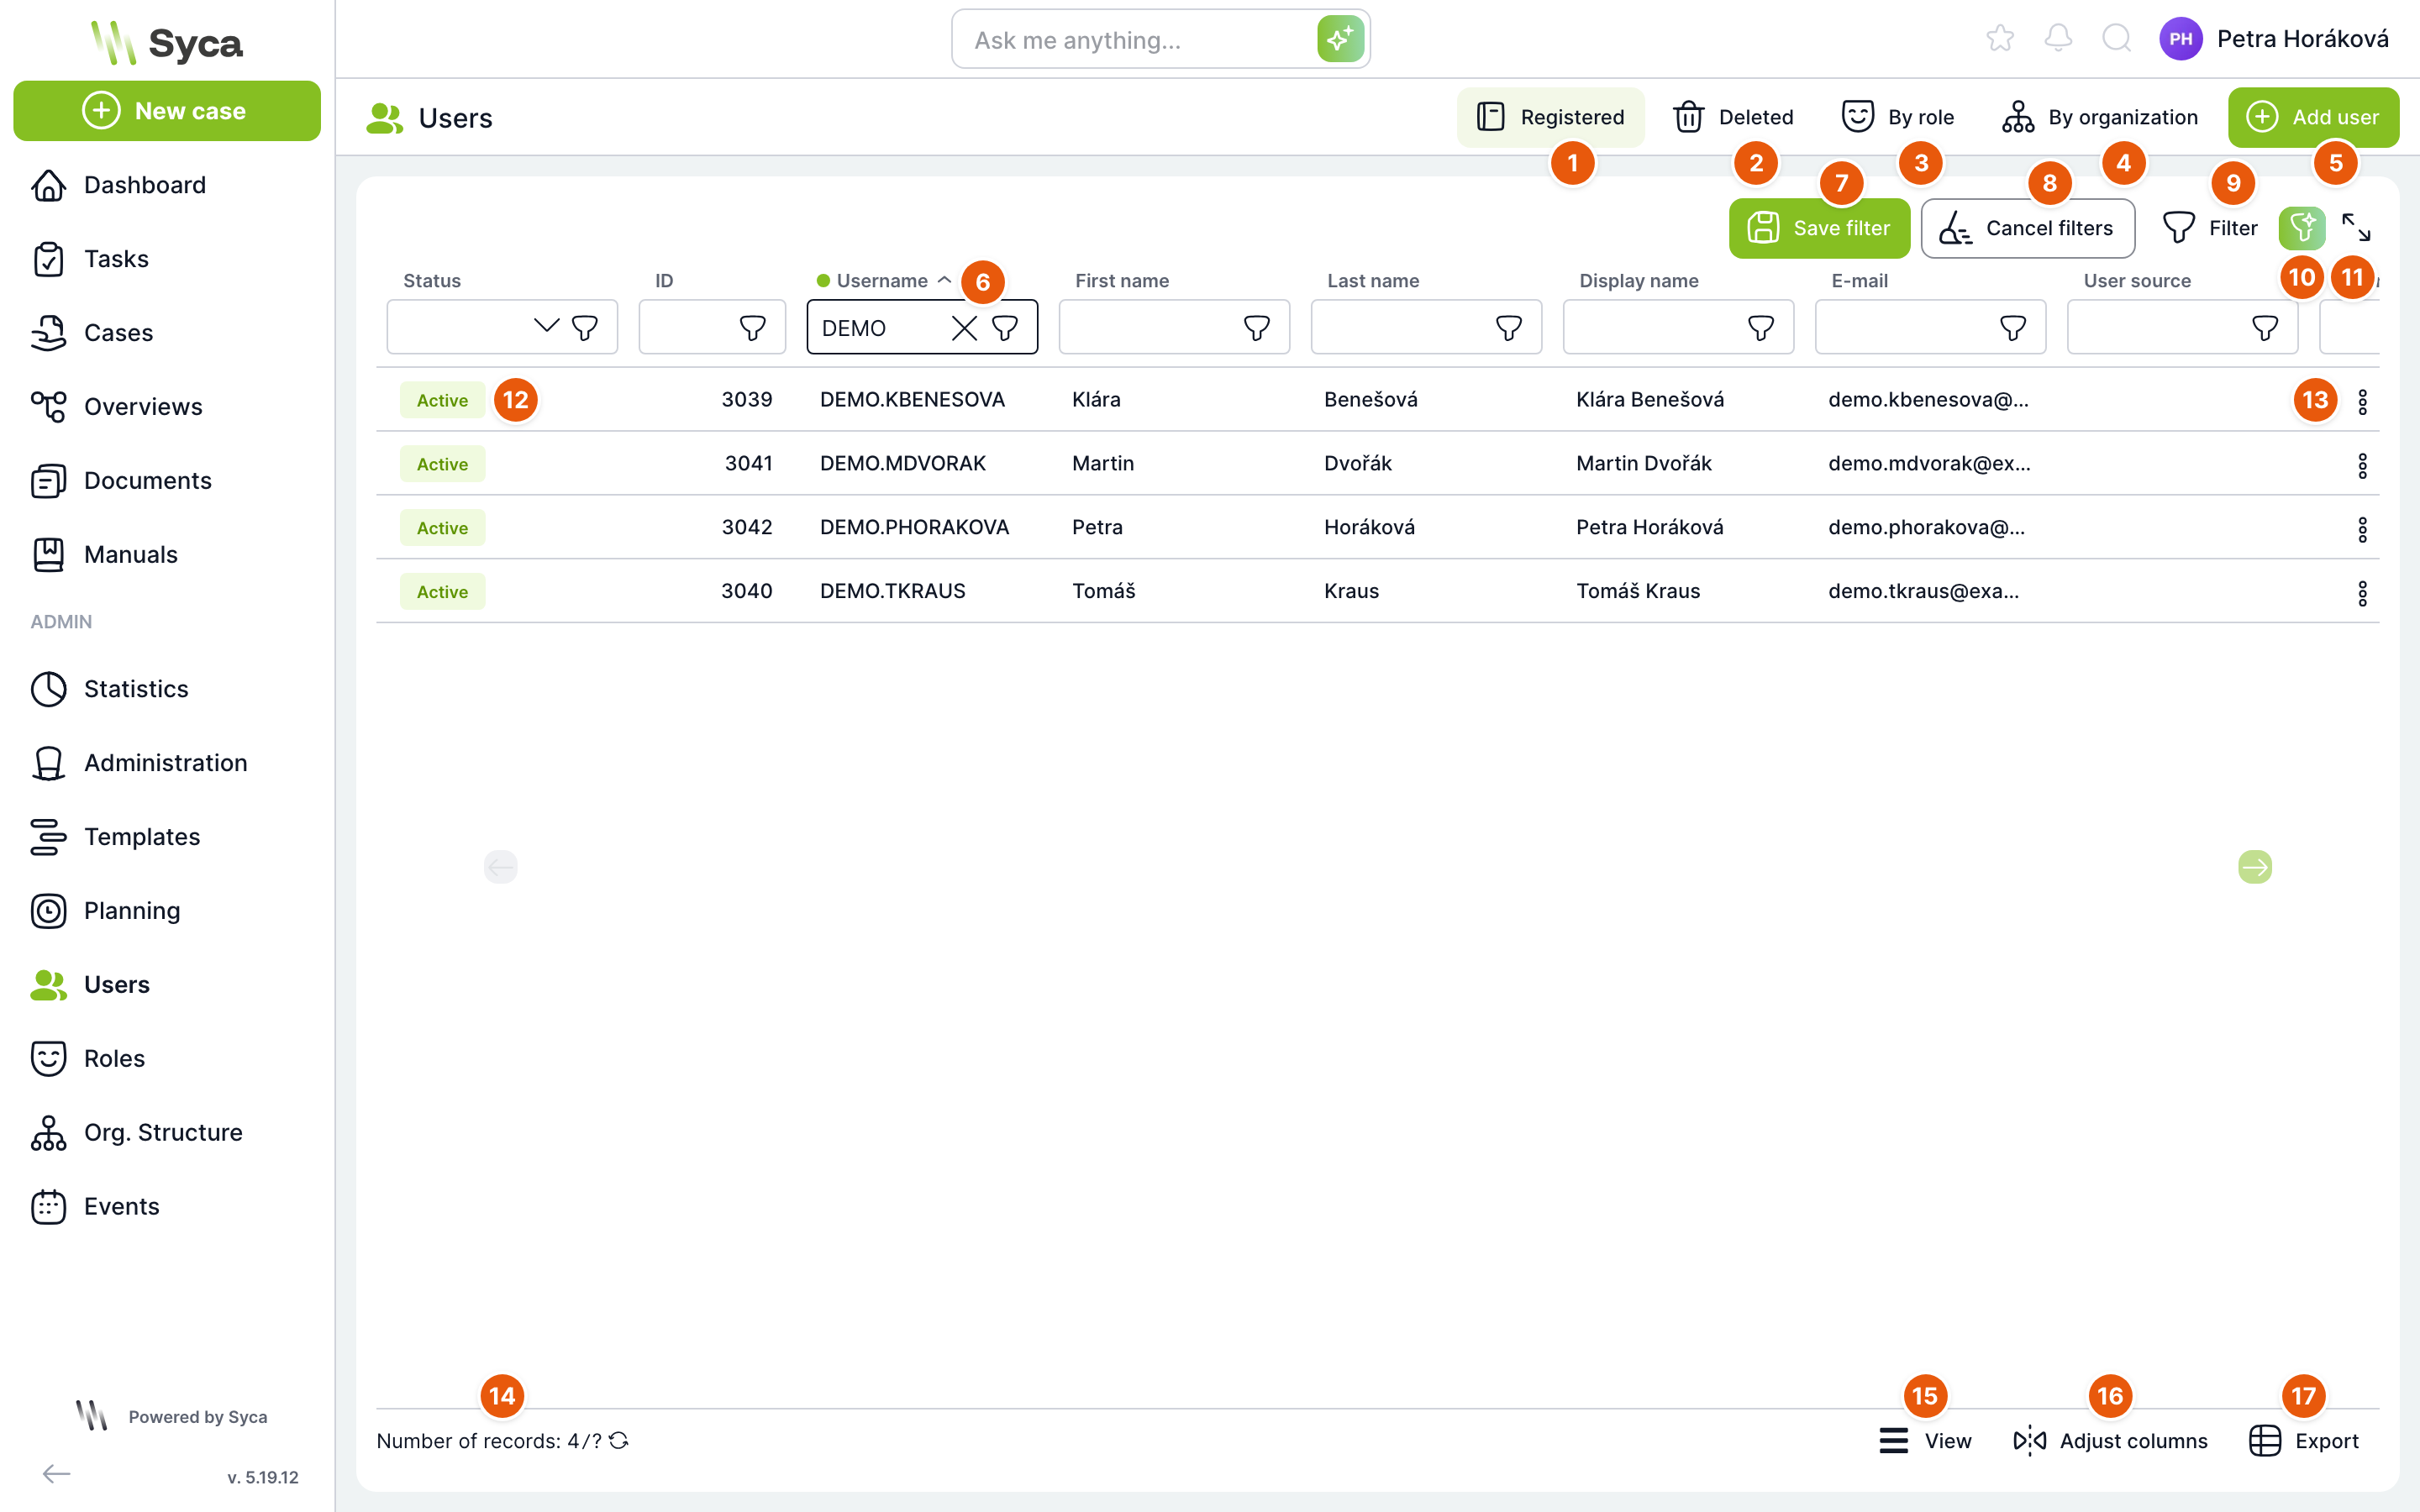
| No. | Element | Purpose |
|---|---|---|
| 1 | Registered | Active and locked users. The default tab. |
| 2 | Deleted | Users who have been deleted. Read-only. |
| 3 | By roles | Role tree on the left, users of the selected role in the table. |
| 4 | By organization | Organizational structure tree on the left, users of the selected unit in the table. |
| 5 | Add user | Opens the New user window. |
| 6 | Column filter | The field below each column name. Type text and press Enter; the table shows only matching rows. Click a column name to sort. |
| 7 | Save filter | Saves the current combination of filters so you can reuse it later. Shown only when a filter is filled in. |
| 8 | Clear filters | Clears all column filters. |
| 9 | Filter | Opens saved filters and advanced filtering. |
| 10 | AI filter | A filter entered as a natural-language sentence, for example “locked users without an email”. Shown only when AI is enabled. |
| 11 | Full screen | Expands the table to fill the whole window. |
| 12 | Status | Active or Locked label. A locked user cannot log in. |
| 13 | Row actions | The Edit, Lock and Delete menu (see below). |
| 14 | Number of records | How many rows the table shows. Use the arrow to refresh the data. |
| 15 | View | Choice of table row density. |
| 16 | Customize columns | Hiding, showing and ordering columns. |
| 17 | Export | Downloads the table to an Excel or CSV file. |
The table has the columns Status, ID, Username, First name, Last name, Display name, Email, User source, External ID and System user. User source and External ID are filled in by synchronization with the company directory (for example LDAP or Entra ID) and cannot be changed manually. By default, the table is sorted by username.
Double-click a row to open the user detail. Click it with the middle mouse button to open it in a new browser tab.
Row actions
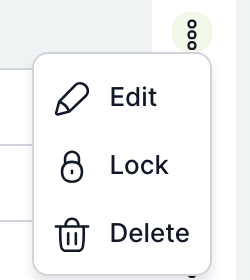
| Action | Purpose |
|---|---|
| Edit | Opens the user detail. |
| Lock | Switches the user between Active and Locked. Before the change, TAS asks “Do you really want to change the status of the user…?”. |
| Delete | Deletes the user after confirmation. The Delete key on a selected row works the same way. |
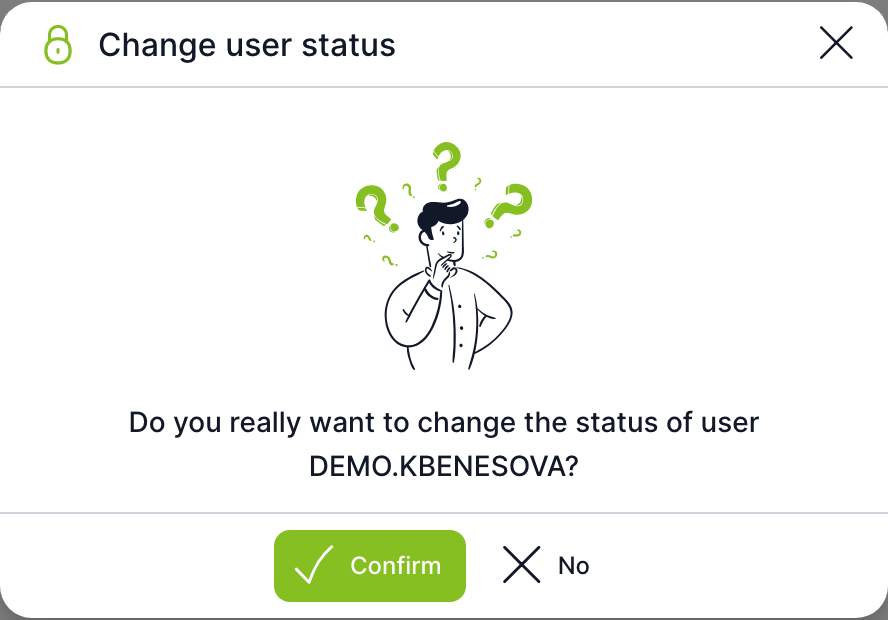
Locking blocks login immediately. If the user is currently logged in, the change takes effect on their next request to the server. Their tasks, cases and roles do not change. When a user with a filled-in email is unlocked, they receive a notification that their account has been activated.
Deleting moves the user to the Deleted tab. Their tasks, cases, roles and substitutions are not handed over to anyone. A deleted user cannot be restored in the application, but you can use their username for a new account.
Neither locking nor deleting hands over tasks and cases to another user. If a person is leaving, first hand over their agenda in the HR agenda and only then lock them.
For a system user, a regular administrator sees only Detail instead of these actions, in which they cannot change anything. System users can be edited and deleted only by a super administrator.
Deleted tab
Shows users in the deleted state with the same columns, only without the Status column and without actions. The detail cannot be opened from here. It serves as an overview of who has been in the system.
By roles tab
On the left is the role tree divided into categories, with a search field at the top. After you click a role, the table shows only its users. If you click Add user in this view, the new user will have the selected role pre-filled.
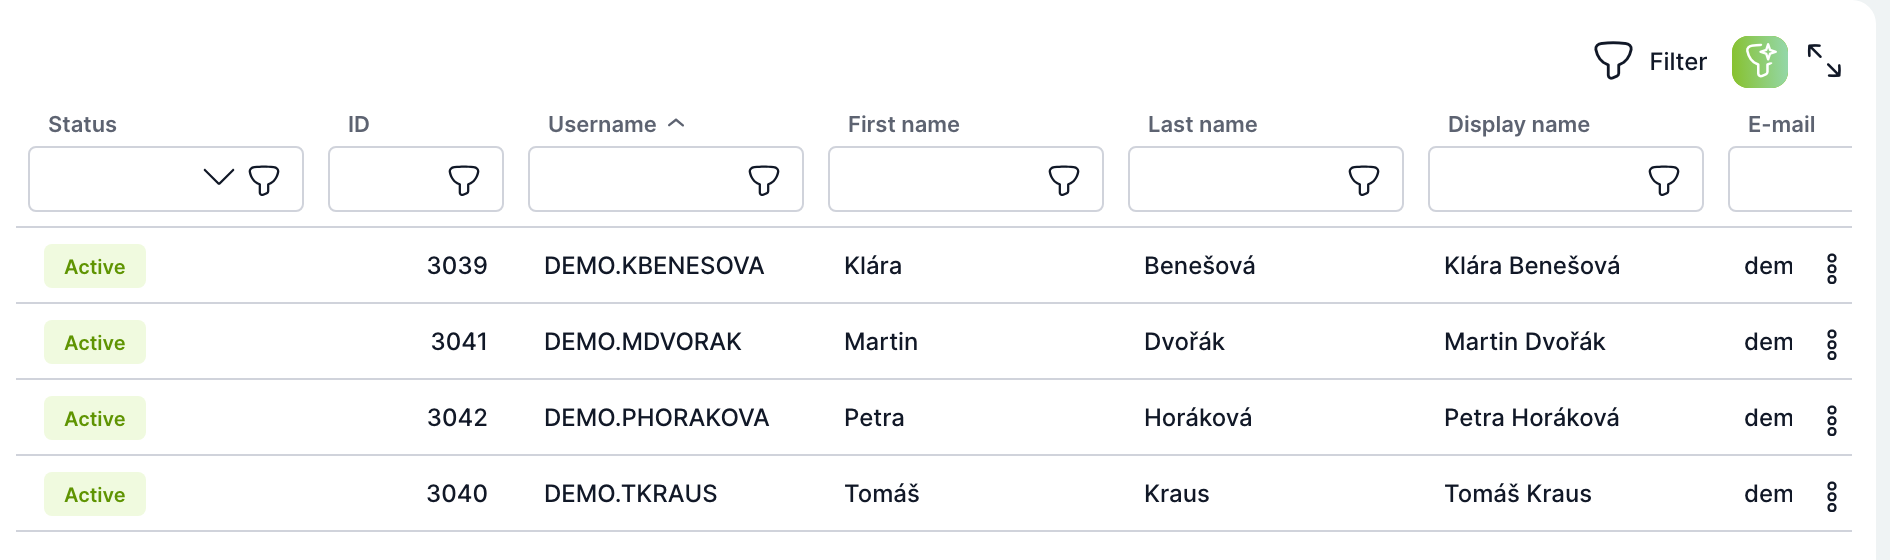
By organization tab
On the left is the organizational structure tree; the root is labeled “/”. After you click a unit, the table shows the users who belong to it. A new user created from this view will have the selected unit pre-filled.
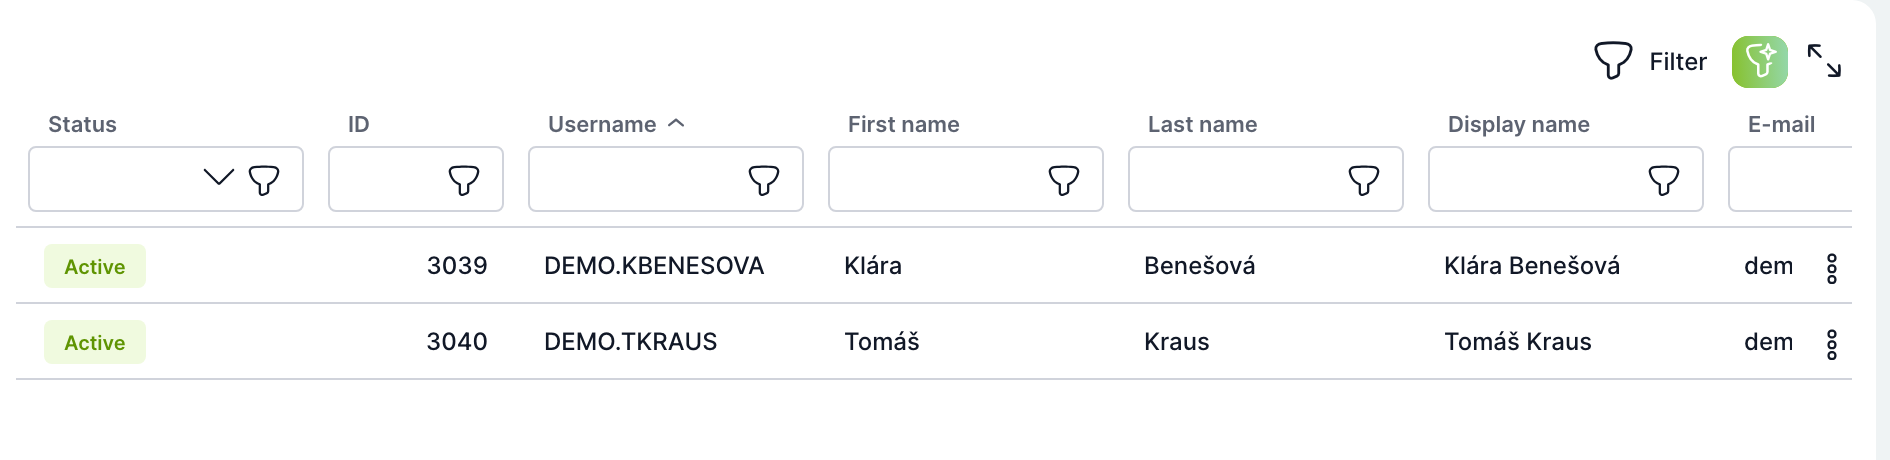
Adding a user
The Add user button opens the New user window. It has the same sections as the user detail: User information, Password, User preferences and Roles. The tabs at the top take you to the corresponding section.
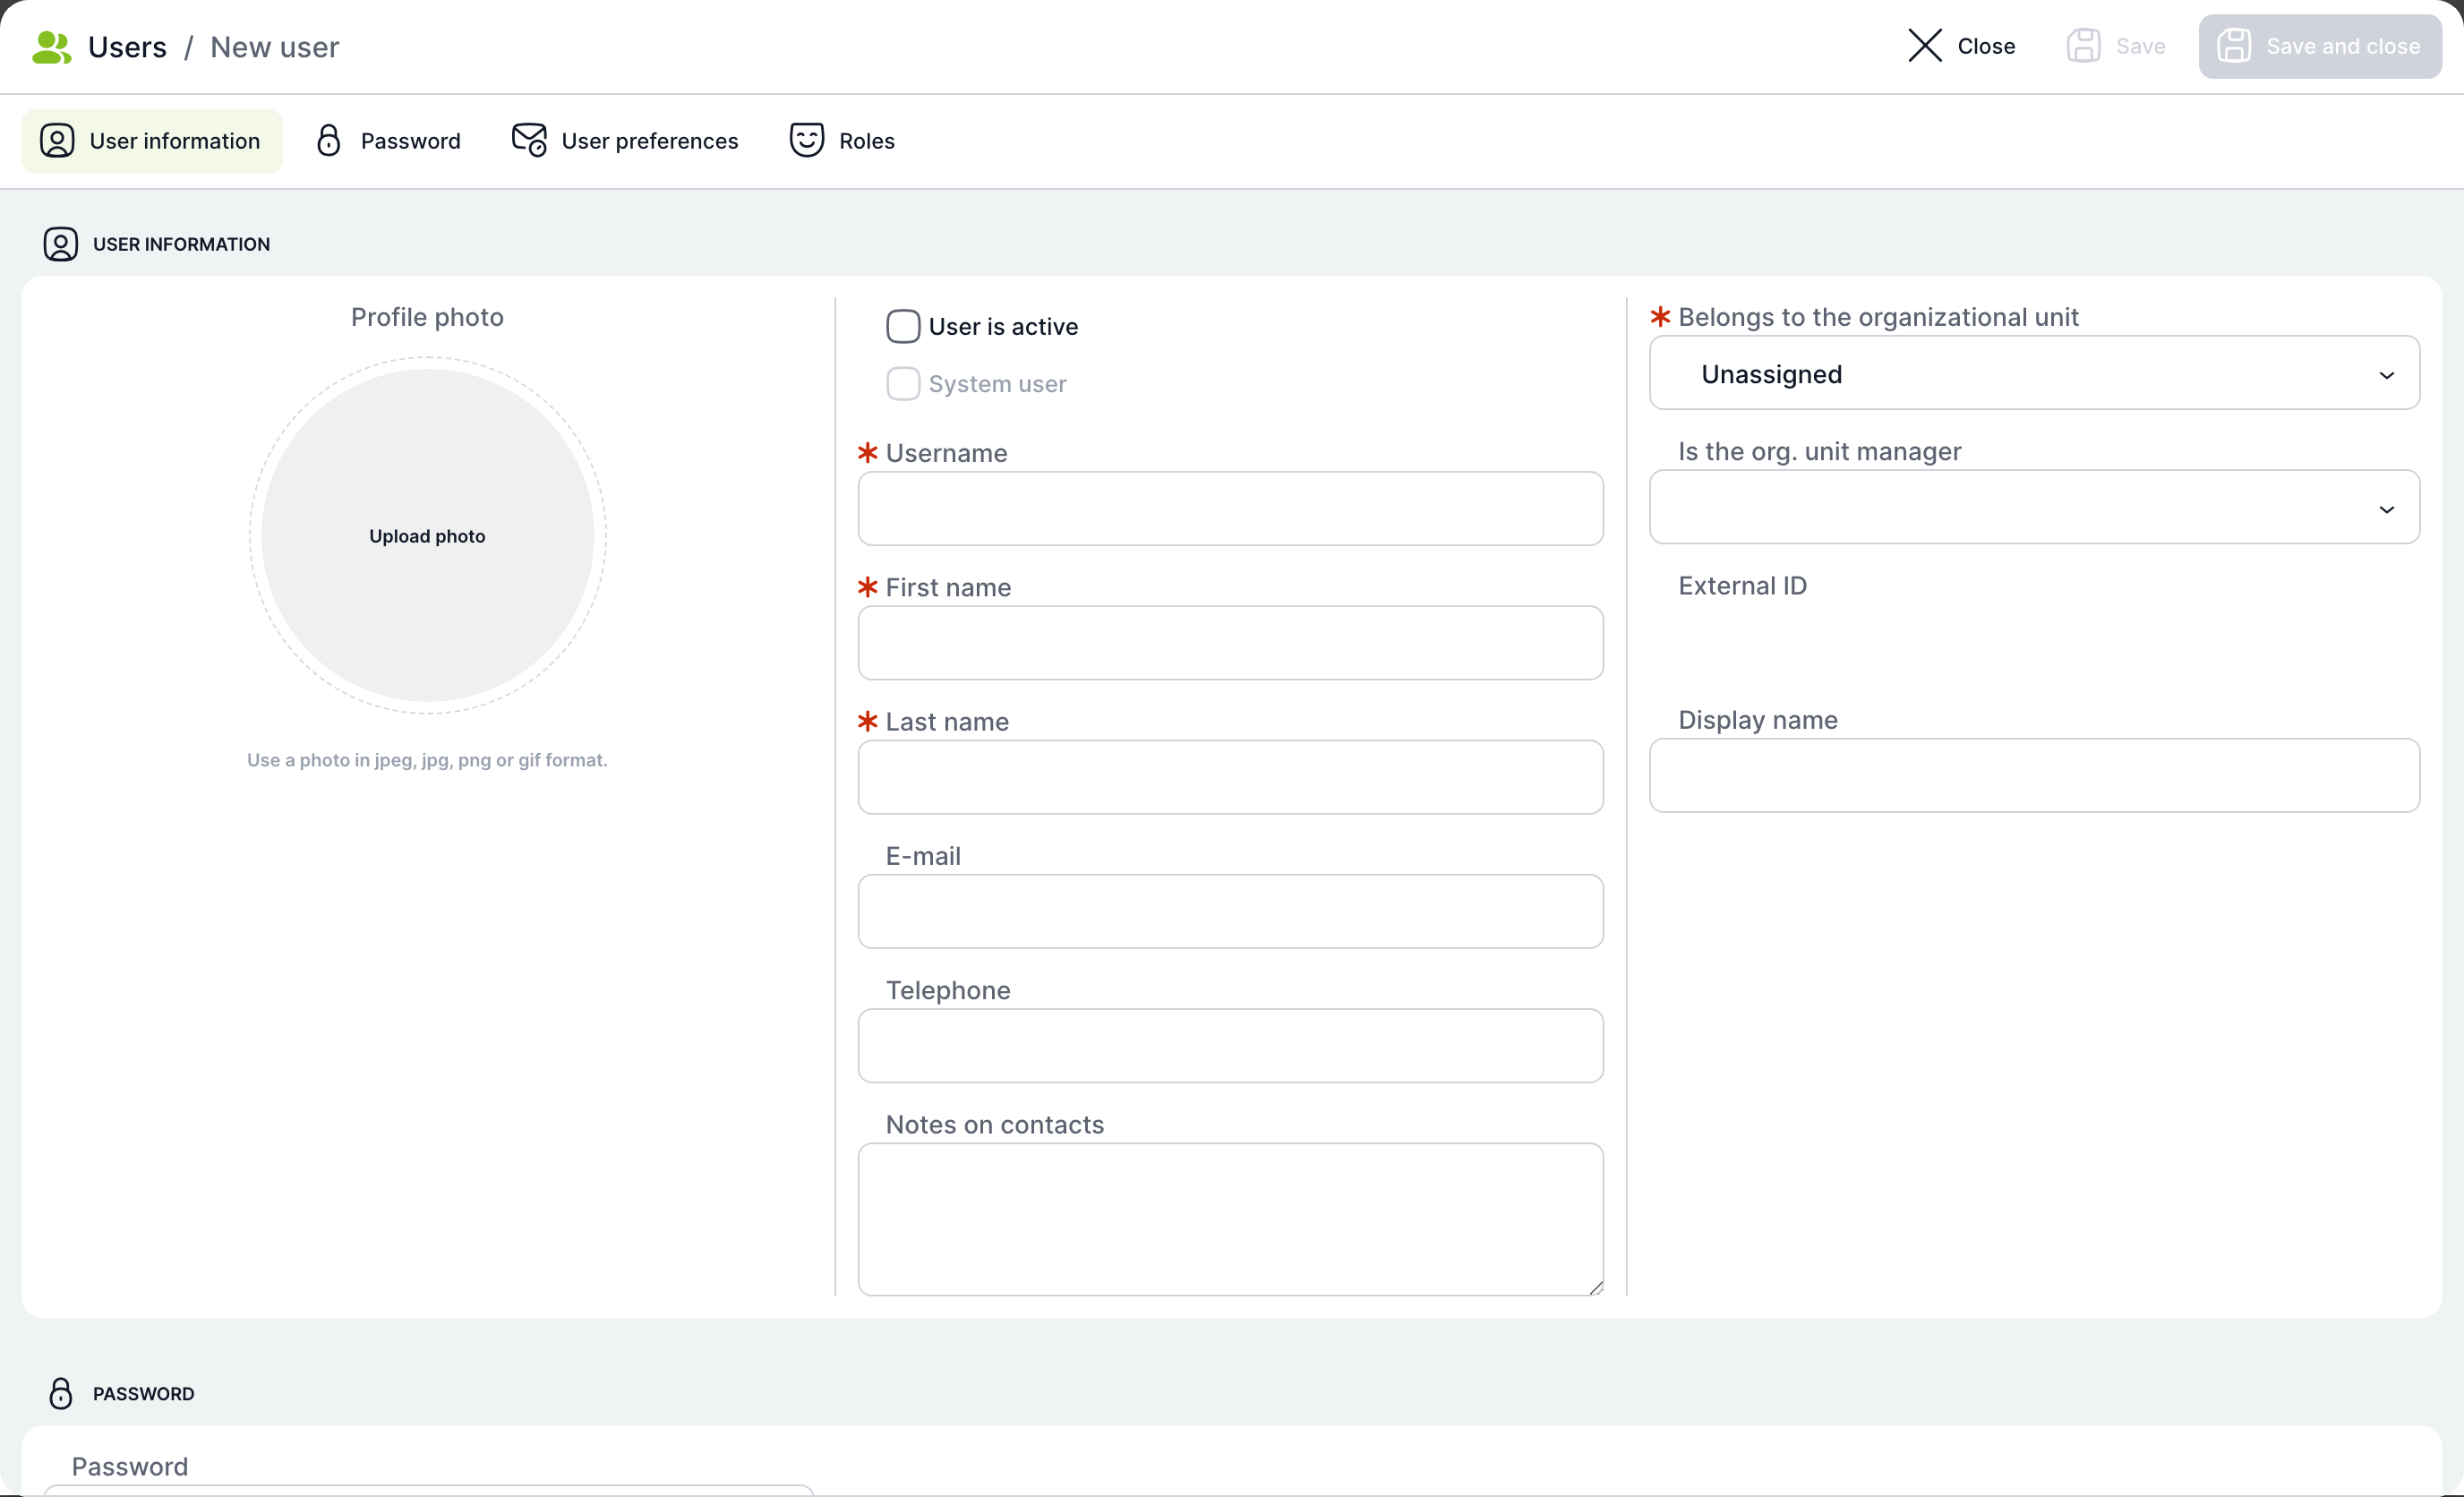
| Field | Purpose |
|---|---|
| Profile photo | Click Upload photo to select a JPEG, JPG, PNG or GIF image. It is uploaded after the user is saved. |
| User is active | When checked, the user can log in. It is unchecked by default, so if you do not check it, the user is created as locked. |
| System user | A technical account that does not log in to the application, for example an account for an API token. Only a super administrator can check it; for others the field is disabled. |
| Username | Required. The name used to log in. TAS stores it in uppercase, and it must be unique among active and locked users. |
| First name, Last name | Required. |
| Address for notifications from TAS. The format is not validated. | |
| Phone, Contact notes | Optional contact details. |
| Belongs to organizational unit | Required. The department the user belongs to. A user always belongs to only one unit. The default is the Unassigned unit, or the unit selected on the By organization tab. |
| Is manager of org. units | Units the user manages. The user becomes their manager, i.e. the superior of their members. |
| External ID | Read-only. Filled in by synchronization with the company directory. |
| Display name | The name under which other users see the user. If you leave it empty, TAS fills it in as “Last name First name”. |
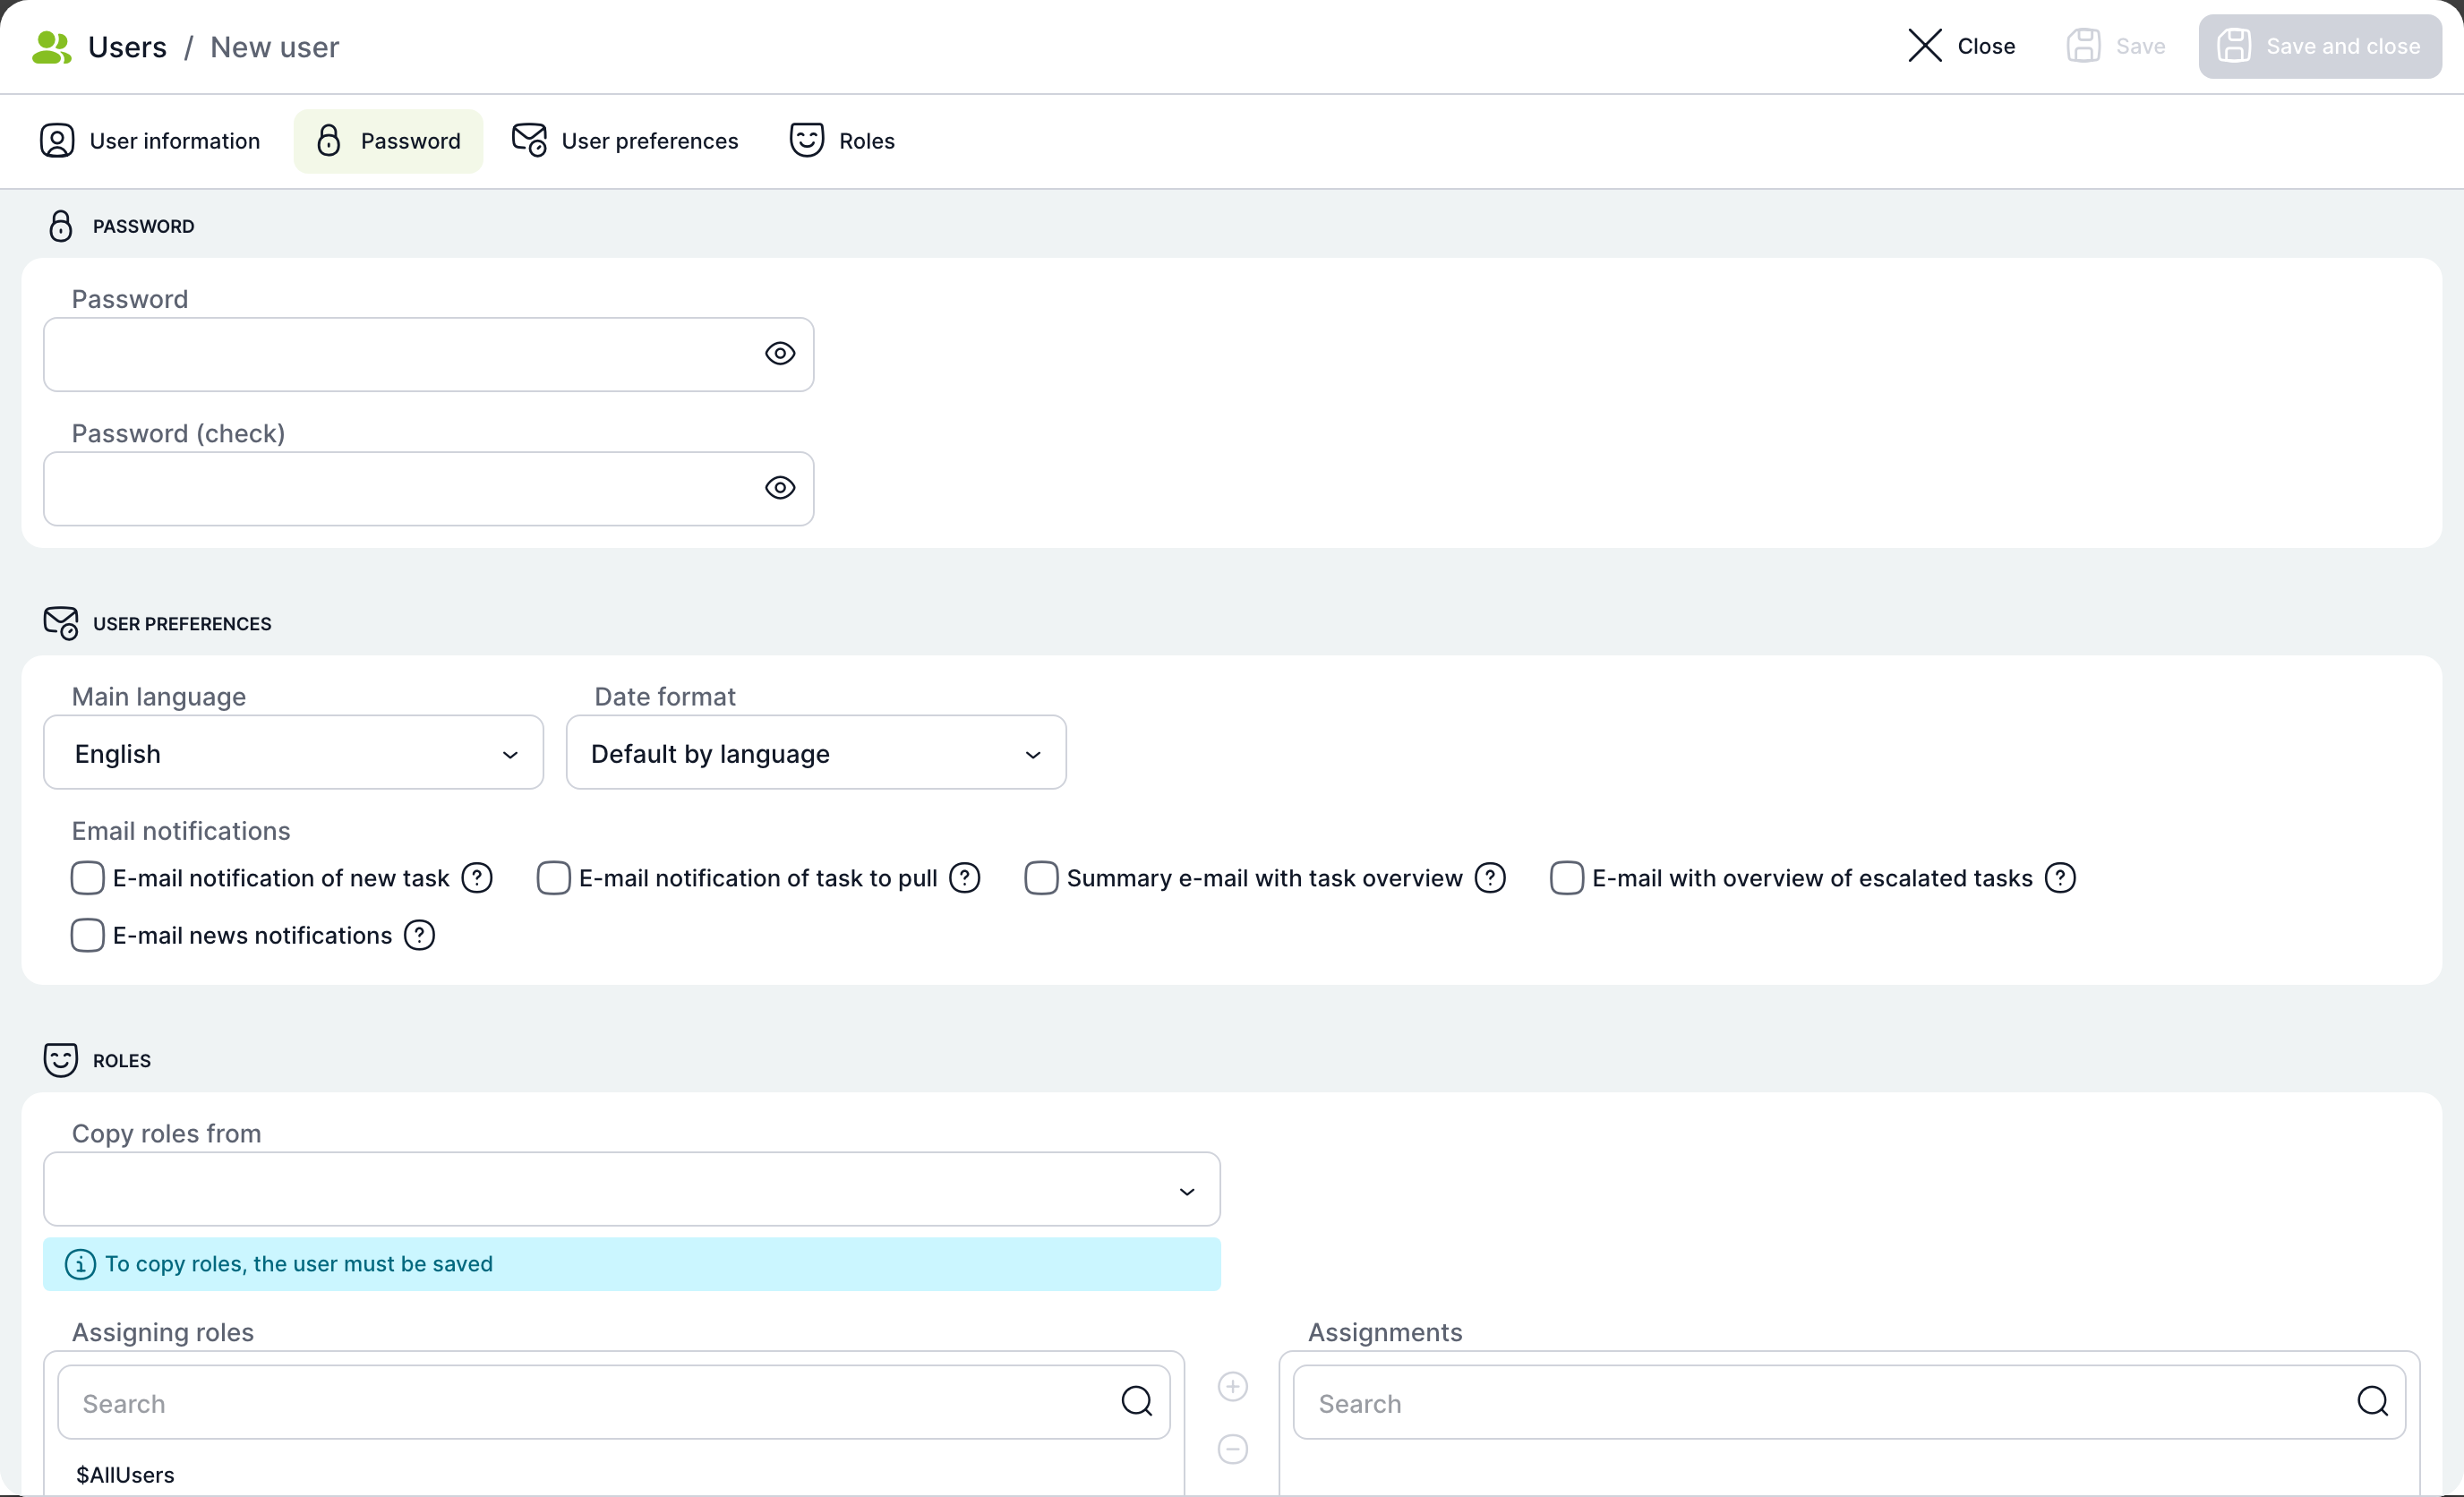
| Field | Purpose |
|---|---|
| Password, Password (confirmation) | Optional. If you fill in a password, it must meet the password rules set in Configuration, and both fields must match. Click the eye icon to show the entered text. A user who logs in with a company identity does not need a password. |
| User preferences | Main language, date format and email notifications. See the User detail article for a description. |
| Roles | Roles of the new user. Copying roles from another user is available only after the first save. |
When you click Save, TAS creates the user and keeps the window open. The Change password button and the Competences section then appear, and if the mobile application is enabled, also the Mobile application section. Save and close saves the user and closes the window. Every new user automatically receives the $AllUsers role and the default dashboard.
How to create a user
- Click Add user.
- Check User is active.
- Fill in the username, first name, last name and email.
- Select the organizational unit.
- If the user logs in to TAS with a password, fill in the password and its confirmation.
- In the Roles section, move the required roles to the right-hand list.
- Click Save and close.
The minimum and maximum password length and the number of uppercase letters, digits and special characters are set by the administrator in Configuration using the keys
security.password.min, security.password.max, security.password.uppercase, security.password.digits and security.password.symbols. The default is at least 6 characters, one uppercase letter and one digit.Related: User detail, Roles, competences and competence rules, Organizational structure, HR agenda and agenda handover.