Authentication
On the Authentication page you set how users log in to TAS: with their own password, via LDAP / Active Directory, via Microsoft Entra ID, SAML, Kerberos, an external service or an NFC card. Each method is one authentication module. Only an administrator can see this page. Open it in Administration → Security → Authentication.
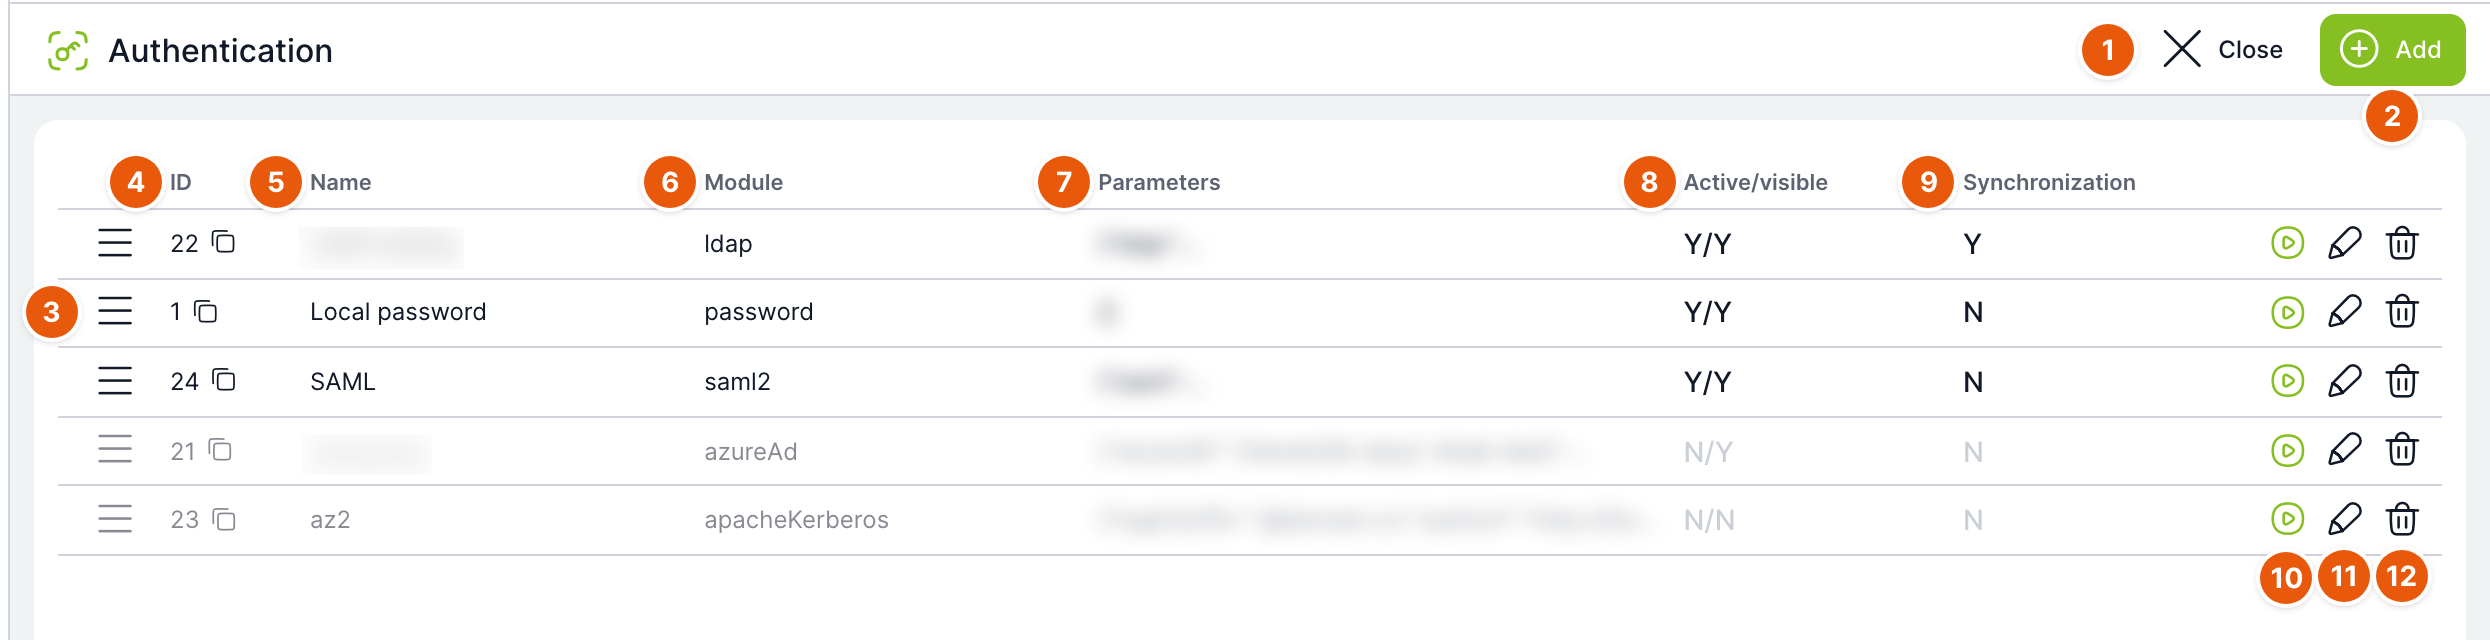
| No. | Element | Purpose |
|---|---|---|
| 1 | Close | Takes you back to the Administration menu. |
| 2 | Add | Opens the window for a new authentication module. |
| 3 | Row handle | Drag it to change the order of modules. The order is saved as soon as you release the row. If there is only one module in the list, dragging is not possible. |
| 4 | ID | The module number. Use the icon next to it to copy it to the clipboard. |
| 5 | Name | The module name. For modules that log in with a button, it is also the button text on the login page. |
| 6 | Module | Authentication type: password, ldap, azureAd, saml2, apacheKerberos, foreign or nfc. |
| 7 | Parameters | A shortened preview of the module settings in JSON format. |
| 8 | Active/visible | Two Y/N values. The first says whether the module is enabled, the second whether its button is shown on the login page. Disabled modules are greyed out in the list. |
| 9 | Synchronization | Y means users are synchronized from the module. Relevant only for the LDAP module. |
| 10 | Test | Tests the module and shows the result in the Test window. |
| 11 | Edit | Opens the module settings. |
| 12 | Delete | Permanently deletes the module after confirmation. |
TAS does not prevent you from deleting or disabling the module everyone uses to log in. Before you delete a module, make sure users have another working way to log in. Deletion cannot be undone.
How TAS selects a module at login
- The login page shows a form with user name and password if at least one
passwordorldapmodule is active. TAS tries to log the user in with the activepasswordandldapmodules in the order they appear in the list. If the first one fails, it tries the next. - Other active modules are shown as separate buttons with the module name, but only if Visible is checked. The button color is set by Login button color.
- The
nfcmodule is offered on the login page only when the NFC reader is enabled in Configuration (featureFlag.nfcReaderEnabled). Without it, you cannot even save a new NFC module. - The ADMIN account always logs in via the
passwordmodule, even if that module is disabled. This way you can get into TAS even if external login stops working.
Authentication module window
The window opens with the Add or Edit button. For a new module the title shows New; for an existing one it shows its name, module type and ID.
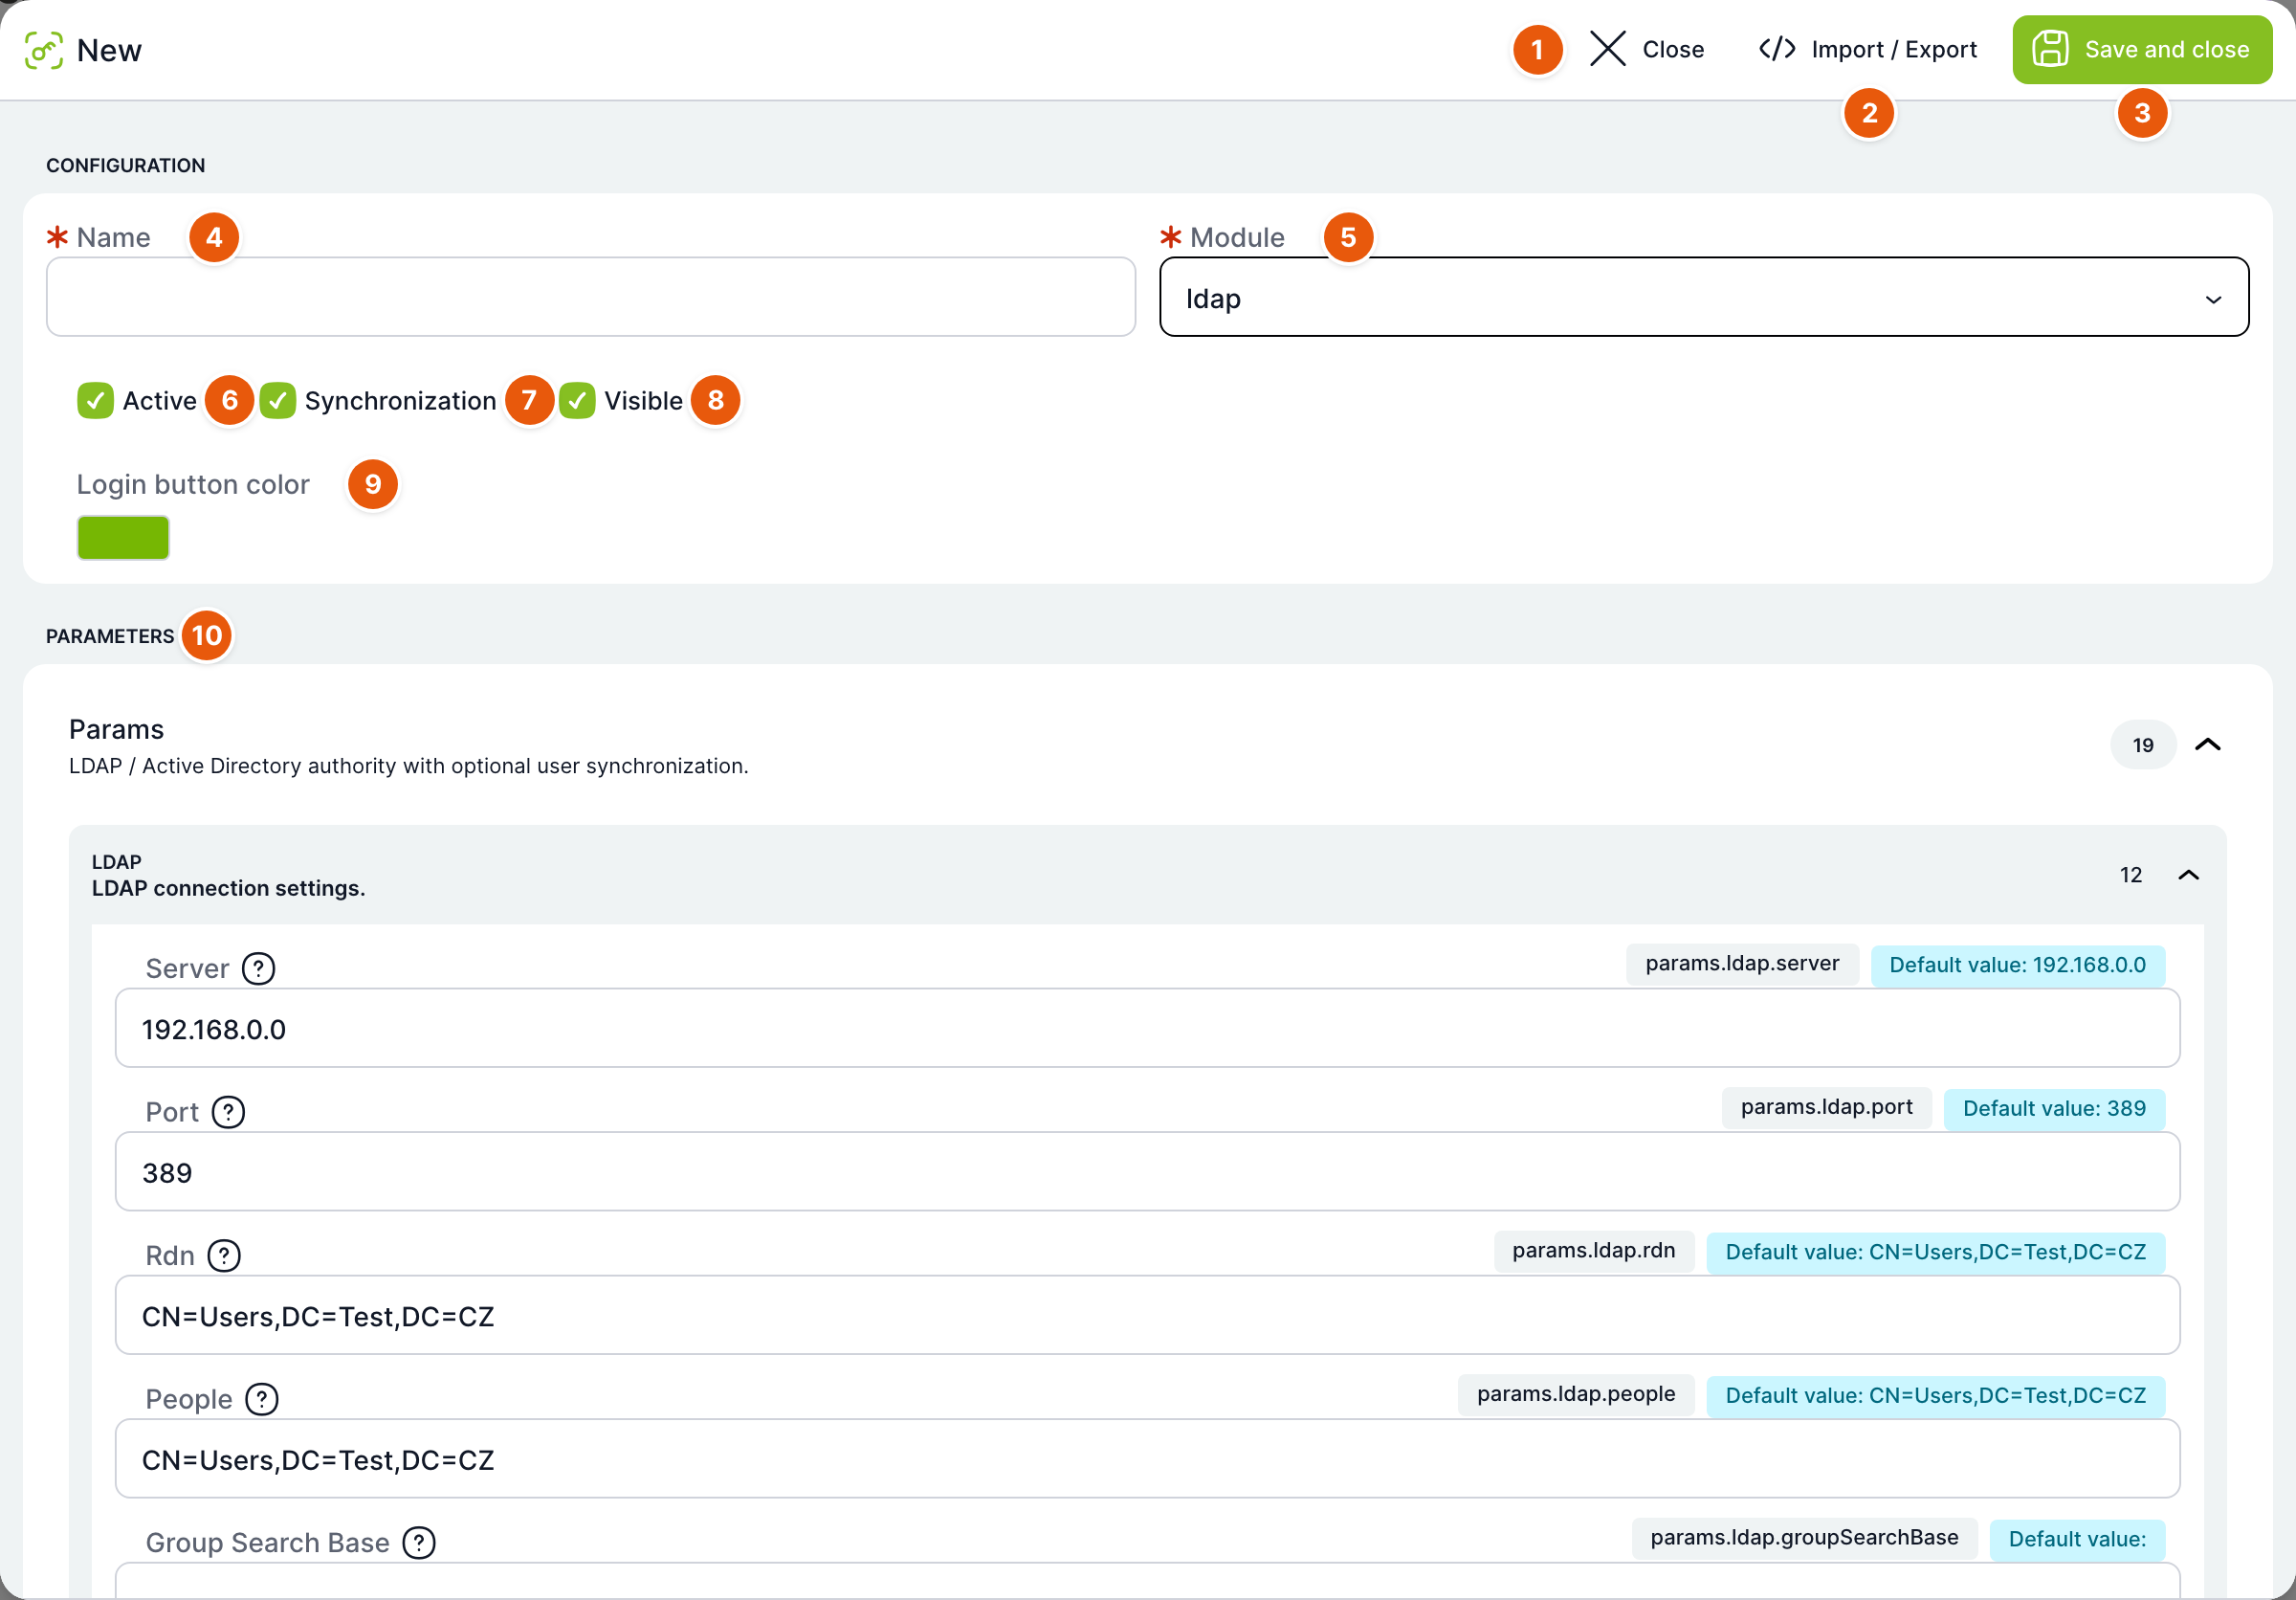
| No. | Element | Purpose |
|---|---|---|
| 1 | Close | Closes the window. If you changed anything, TAS asks whether to save the changes. |
| 2 | Import / Export | Opens the complete module settings as JSON. Useful for transferring settings between environments. |
| 3 | Save and close | Validates the parameters, saves the module and closes the window. |
| 4 | Name | Required. The module name and the login button text. |
| 5 | Module | Required. Authentication type. After you change the type, the parameters are reset to the defaults of the new type. |
| 6 | Active | The module may be used for login. Checked for a new module. |
| 7 | Synchronization | For the LDAP module, enables regular user synchronization. Checked for a new module. |
| 8 | Visible | The module button is shown on the login page. The password and ldap modules have no button; they use the user name and password form. |
| 9 | Login button color | Color of the module button on the login page. Default is green #76b703. |
| 10 | Parameters | Settings depending on the module type, see below. |
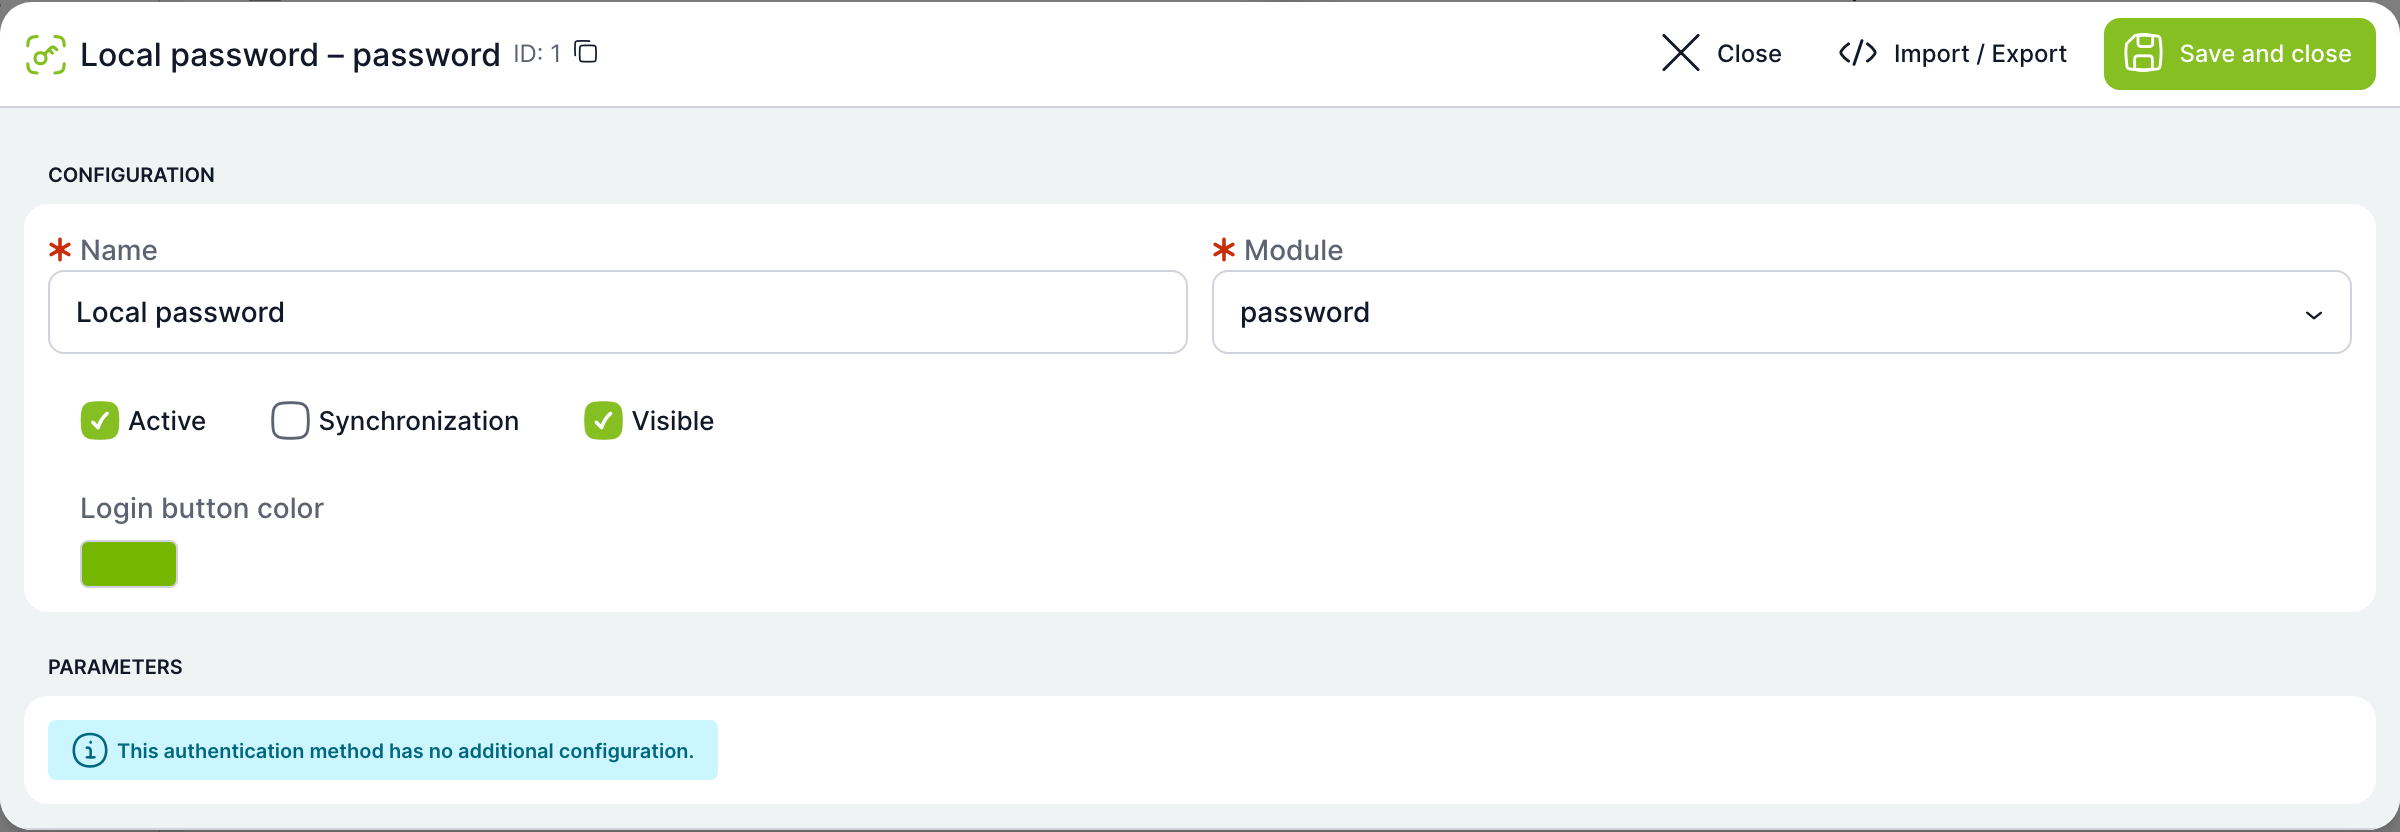
For an existing module the window looks the same. The title additionally contains the ID with a copy button.
Parameters
Parameters are shown as a form based on the selected module type. Each field has a question mark with help, the technical parameter name and the default value. Required fields are marked with an asterisk. Code fields (for example Post Auth Instructions) are editors for a server-side script that finds or creates the TAS user from the login data.
Form errors are shown only on the first attempt to save. If the parameters are not valid, TAS does not save the module, shows the warning Configuration validation failed and moves you to the first invalid field.
Default values of a new module are only examples (for example server 192.168.0.0 or password pass). Always replace them with the real data of your environment.
Password (password)
Login with a user name and password stored in TAS. The module has no parameters; the window only shows the message This authentication method has no additional configuration.
LDAP / Active Directory (ldap)
Verifies the user name and password against a directory service and optionally synchronizes users from it.
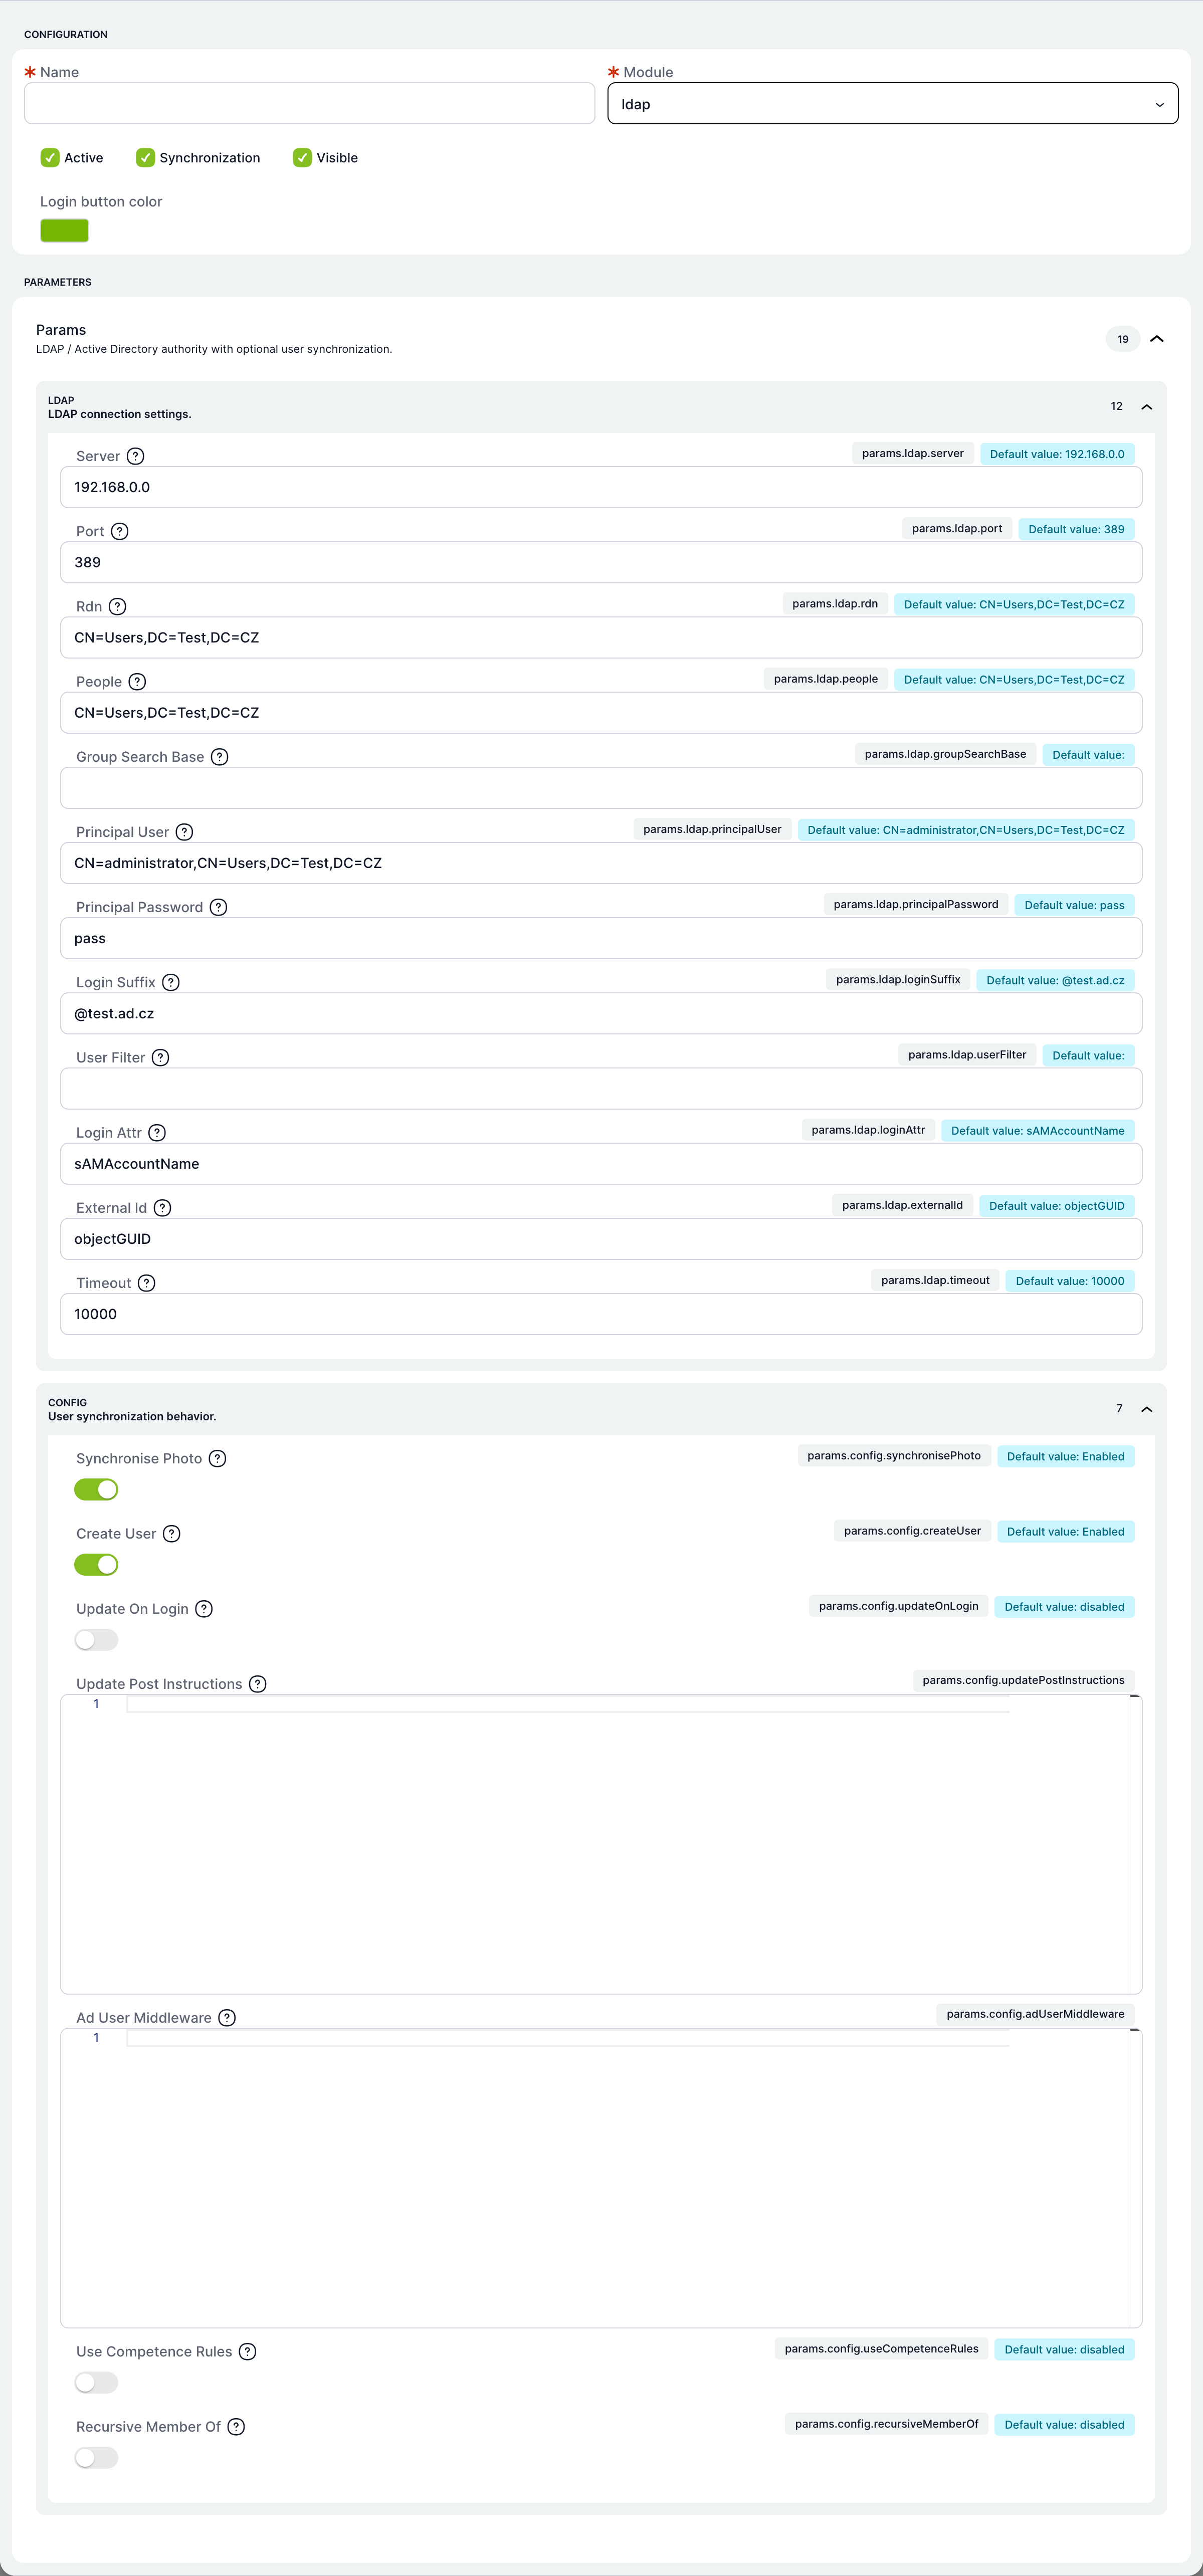
LDAP section (directory connection):
| Field | Purpose |
|---|---|
| Server | Address or URL of the LDAP server. |
| Port | Server port, default 389. |
| Rdn | Base distinguished name (DN). |
| People | Directory branch in which users are searched. |
| Group Search Base | Branch for searching groups with recursive membership. Optional. |
| Principal User | Account (DN) TAS uses to connect to the directory. |
| Principal Password | Password of this account. |
| Login Suffix | Suffix TAS appends to the user name at login, for example @firma.local. |
| User Filter | Additional LDAP filter for searching users. |
| Login Attr | Attribute the login name is compared with. Default sAMAccountName. |
| External Id | Attribute used as the user's external ID. Default objectGUID. |
| Timeout | Connection timeout in milliseconds. Default 10000. |
Config section (user synchronization):
| Field | Purpose |
|---|---|
| Synchronise Photo | Transfers the user's photo from the directory. Enabled by default. |
| Create User | Creates a user missing in TAS at login or during synchronization. Enabled by default. |
| Update On Login | Updates the user's data at every login. Disabled by default. |
| Update Post Instructions | Script that runs after a user is created or updated. |
| Ad User Middleware | Script that modifies the directory record before it is converted to a TAS user. |
| Use Competence Rules | Applies competence rules based on group membership. Disabled by default. |
| Recursive Member Of | Also resolves nested group memberships. Disabled by default. |
User synchronization is performed by the AdSyncCron cron (Administration → Crons). It synchronizes all ldap modules that have Synchronization checked.
Microsoft Entra ID (azureAd)
Login with a Microsoft account (Azure Active Directory / Entra ID) via OpenID Connect. The user clicks the module button and signs in with Microsoft.
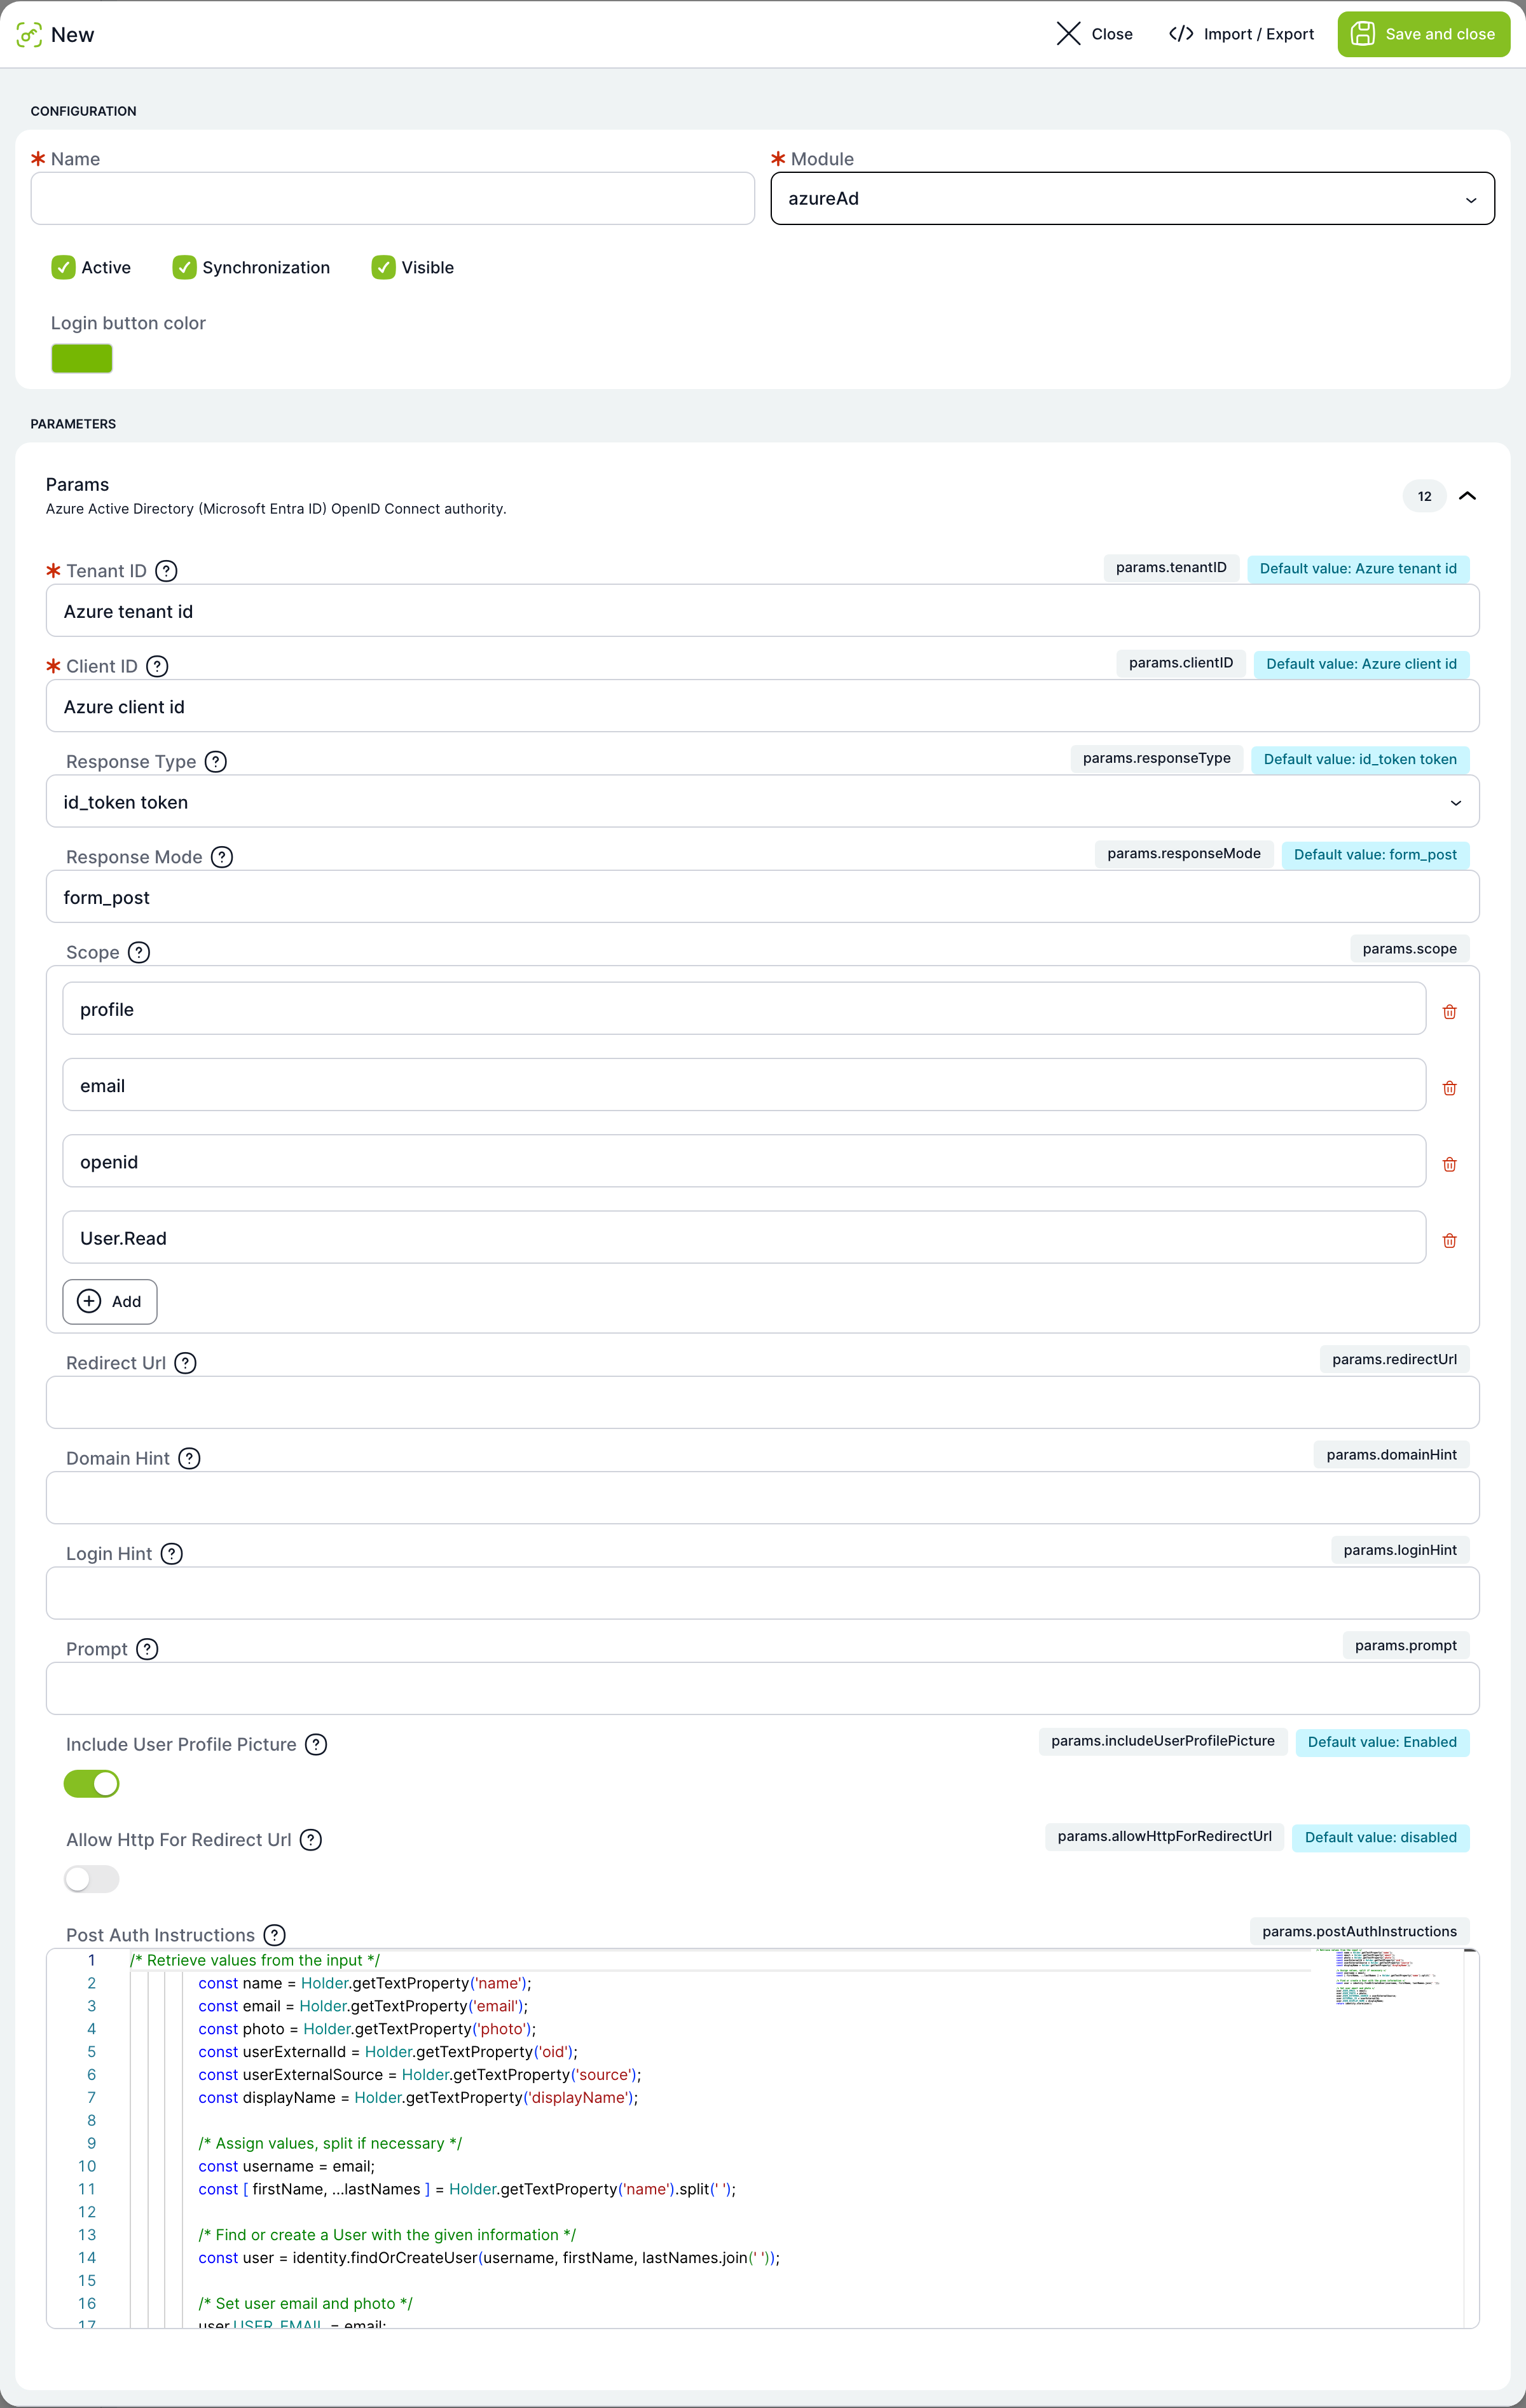
| Field | Purpose |
|---|---|
| Tenant ID | Required. Tenant ID in Entra ID. |
| Client ID | Required. ID of the application (client ID) registered in Entra ID. |
| Response Type | What Microsoft returns. id_token returns only the user's identity, id_token token additionally returns an access token for Microsoft Graph. Default id_token token. |
| Response Mode | How the response is delivered. Only the value form_post is supported. |
| Scope | Requested permissions. Default profile, email, openid, User.Read. Use the Add button to add more and the bin to remove them. User.Read is required to load the photo. |
| Redirect Url | Custom return address after login. If empty, the address TAS prepares for the module itself is used. |
| Domain Hint | Optional domain hint passed to Microsoft. |
| Login Hint | Optional login name hint passed to Microsoft. |
| Prompt | Optional prompt parameter passed to Microsoft. |
| Include User Profile Picture | Loads the user's photo from Microsoft Graph. Works only with the id_token token response type and the User.Read permission; otherwise the photo is skipped and login continues. Enabled by default. |
| Allow Http For Redirect Url | Allows a return address without HTTPS. For development only. Disabled by default. |
| Post Auth Instructions | Script that finds or creates the TAS user from the data received from Microsoft. The default script uses the e-mail as the login name and fills in the name, e-mail, photo and external ID. |
SAML (saml2)
Single sign-on (SSO) via an identity provider according to the SAML 2.0 standard.
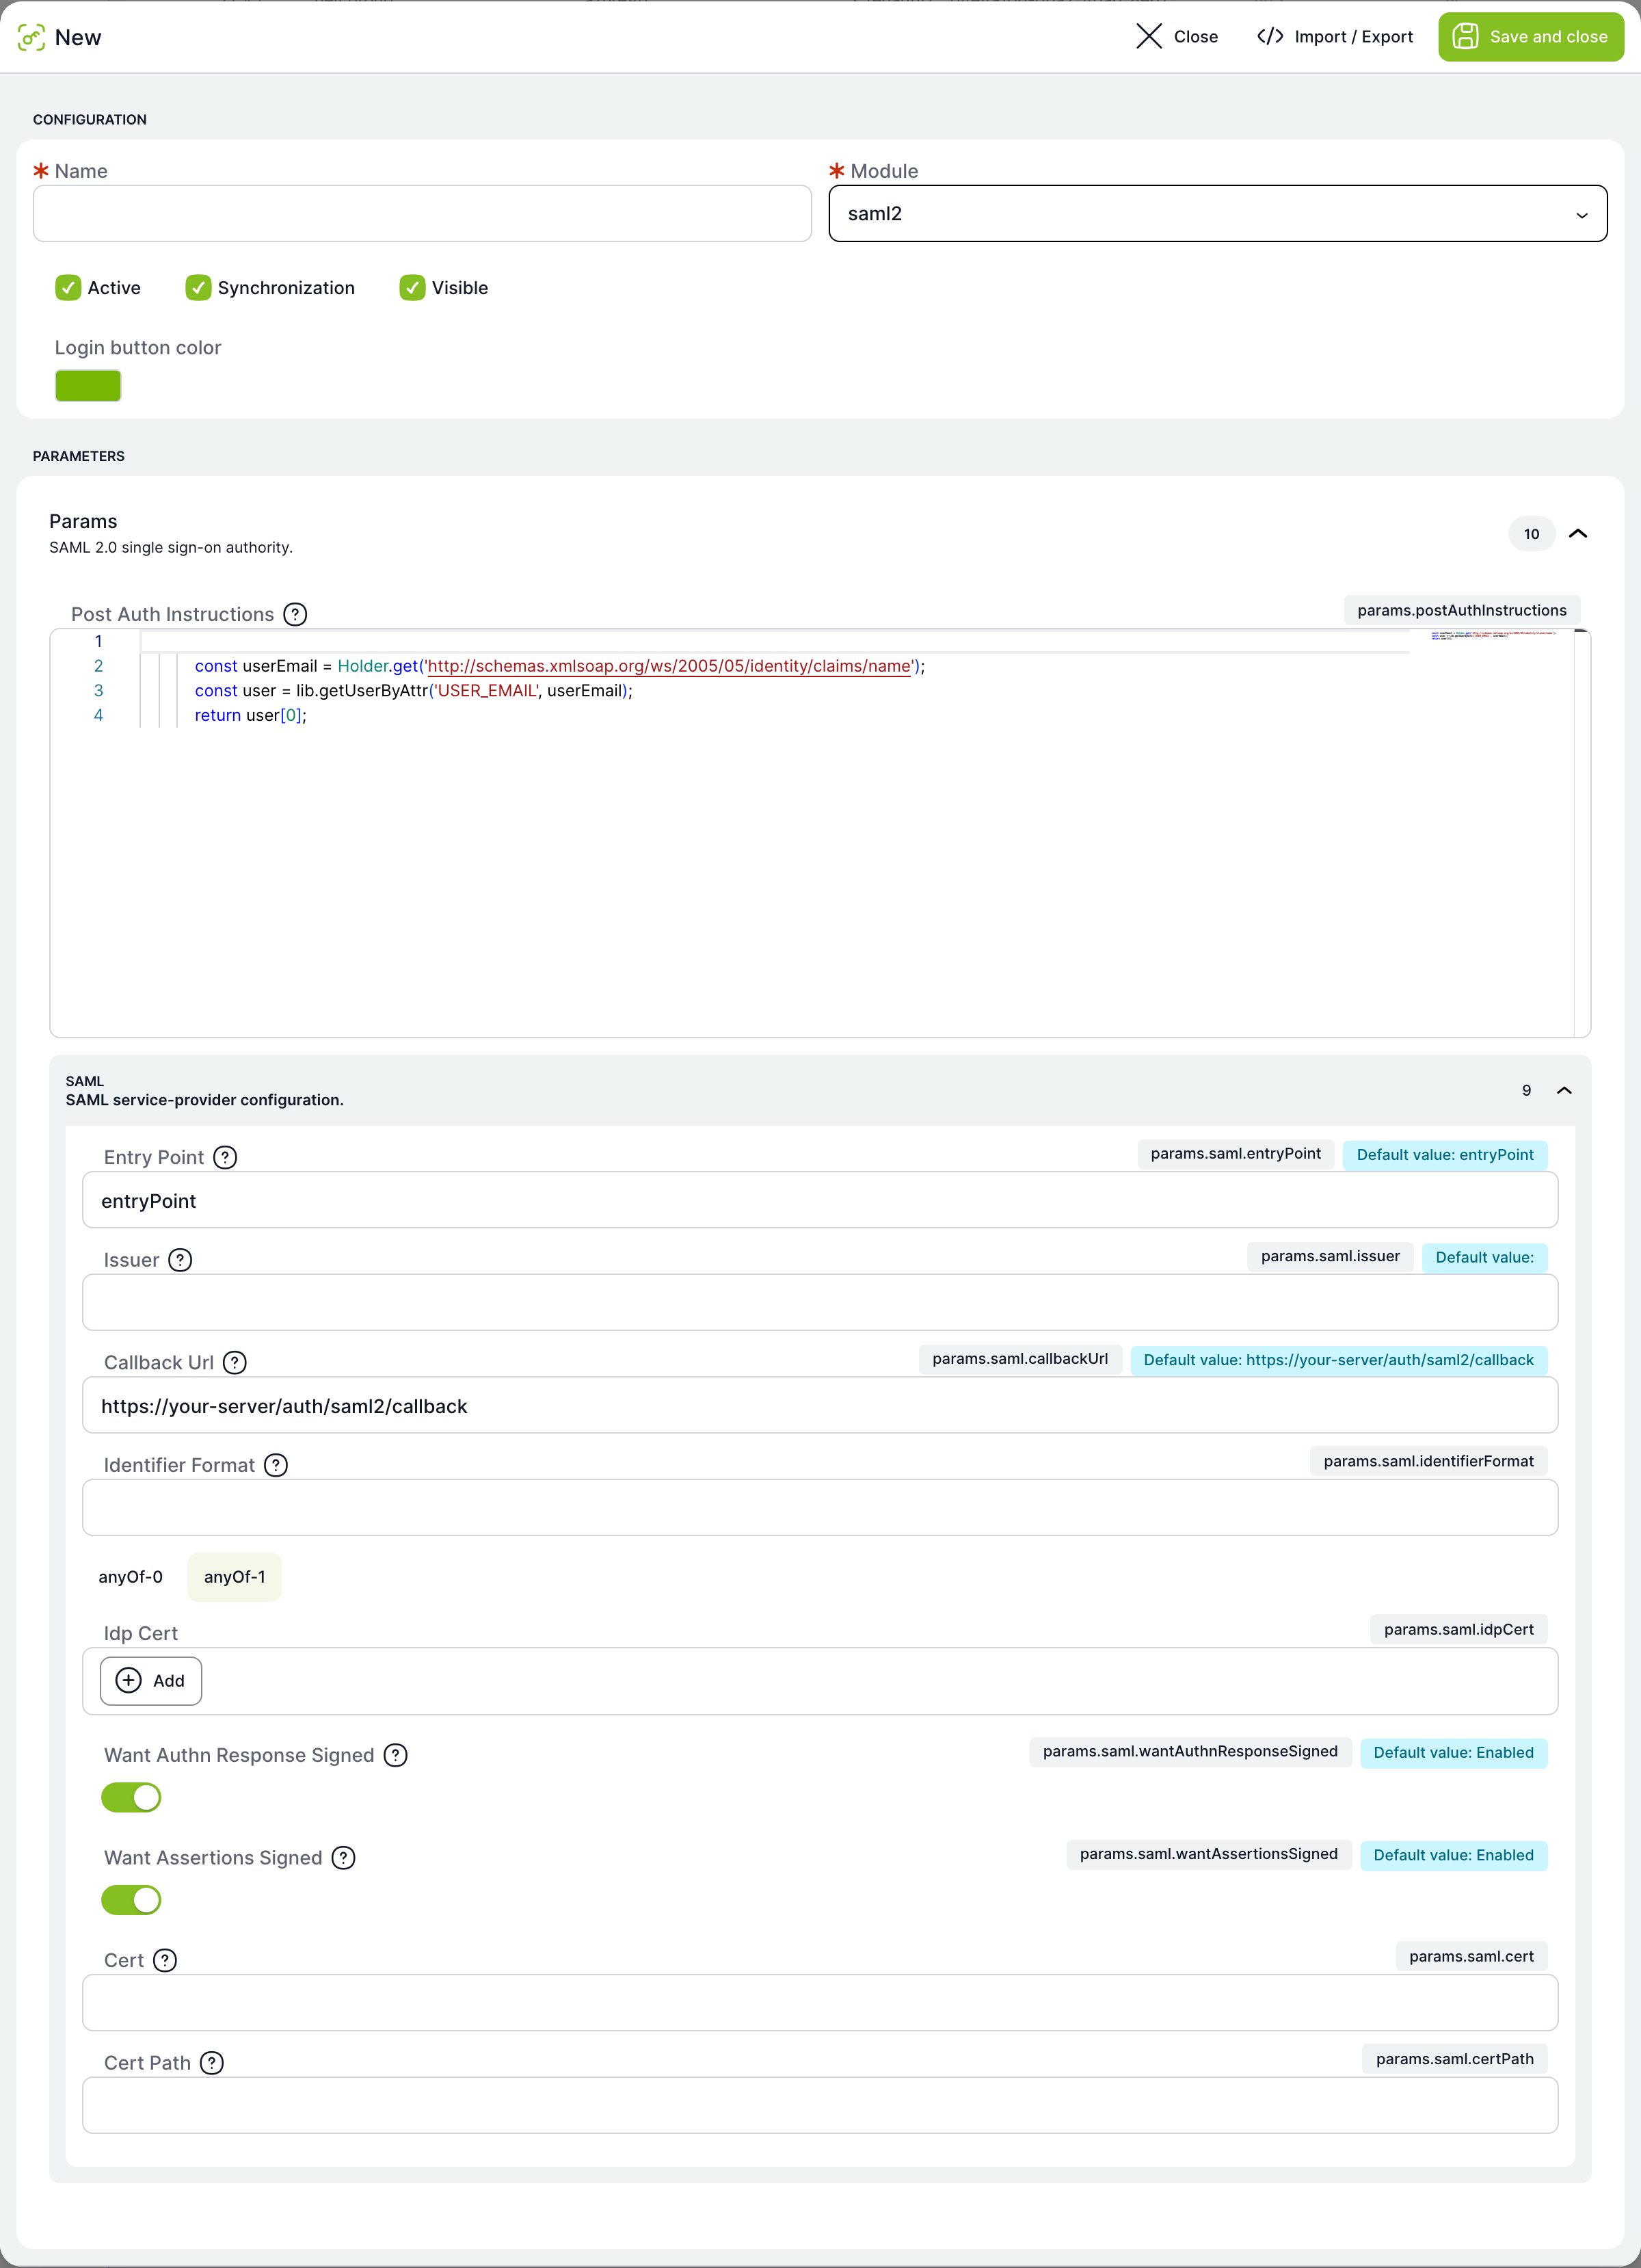
| Field | Purpose |
|---|---|
| Post Auth Instructions | Script that finds the TAS user from the identity provider's response. The default script looks up the user by e-mail. |
| Entry Point | Required. Login (SSO) address at the identity provider. |
| Issuer | Required. Identifier of TAS as the service provider (entity ID). |
| Callback Url | Required. Address to which the identity provider returns the response. Example: https://your-server/auth/saml2/callback. |
| Identifier Format | Requested NameID format. Optional. |
| Idp Cert | Required. Signing certificate of the identity provider, or multiple certificates, or a metadata address from which the certificate is loaded. Use the tabs above the field to choose the form in which you enter the certificate. |
| Want Authn Response Signed | Requires a signed response. Enabled by default. |
| Want Assertions Signed | Requires signed assertions. Enabled by default. |
| Cert | Certificate or XML metadata address from which Idp Cert is loaded. Optional. |
| Cert Path | Path to the certificate file from which Idp Cert is loaded. Optional. |
Kerberos (apacheKerberos)
Login via Kerberos on an Apache or NGINX reverse proxy that passes the name of the logged-in user to TAS.
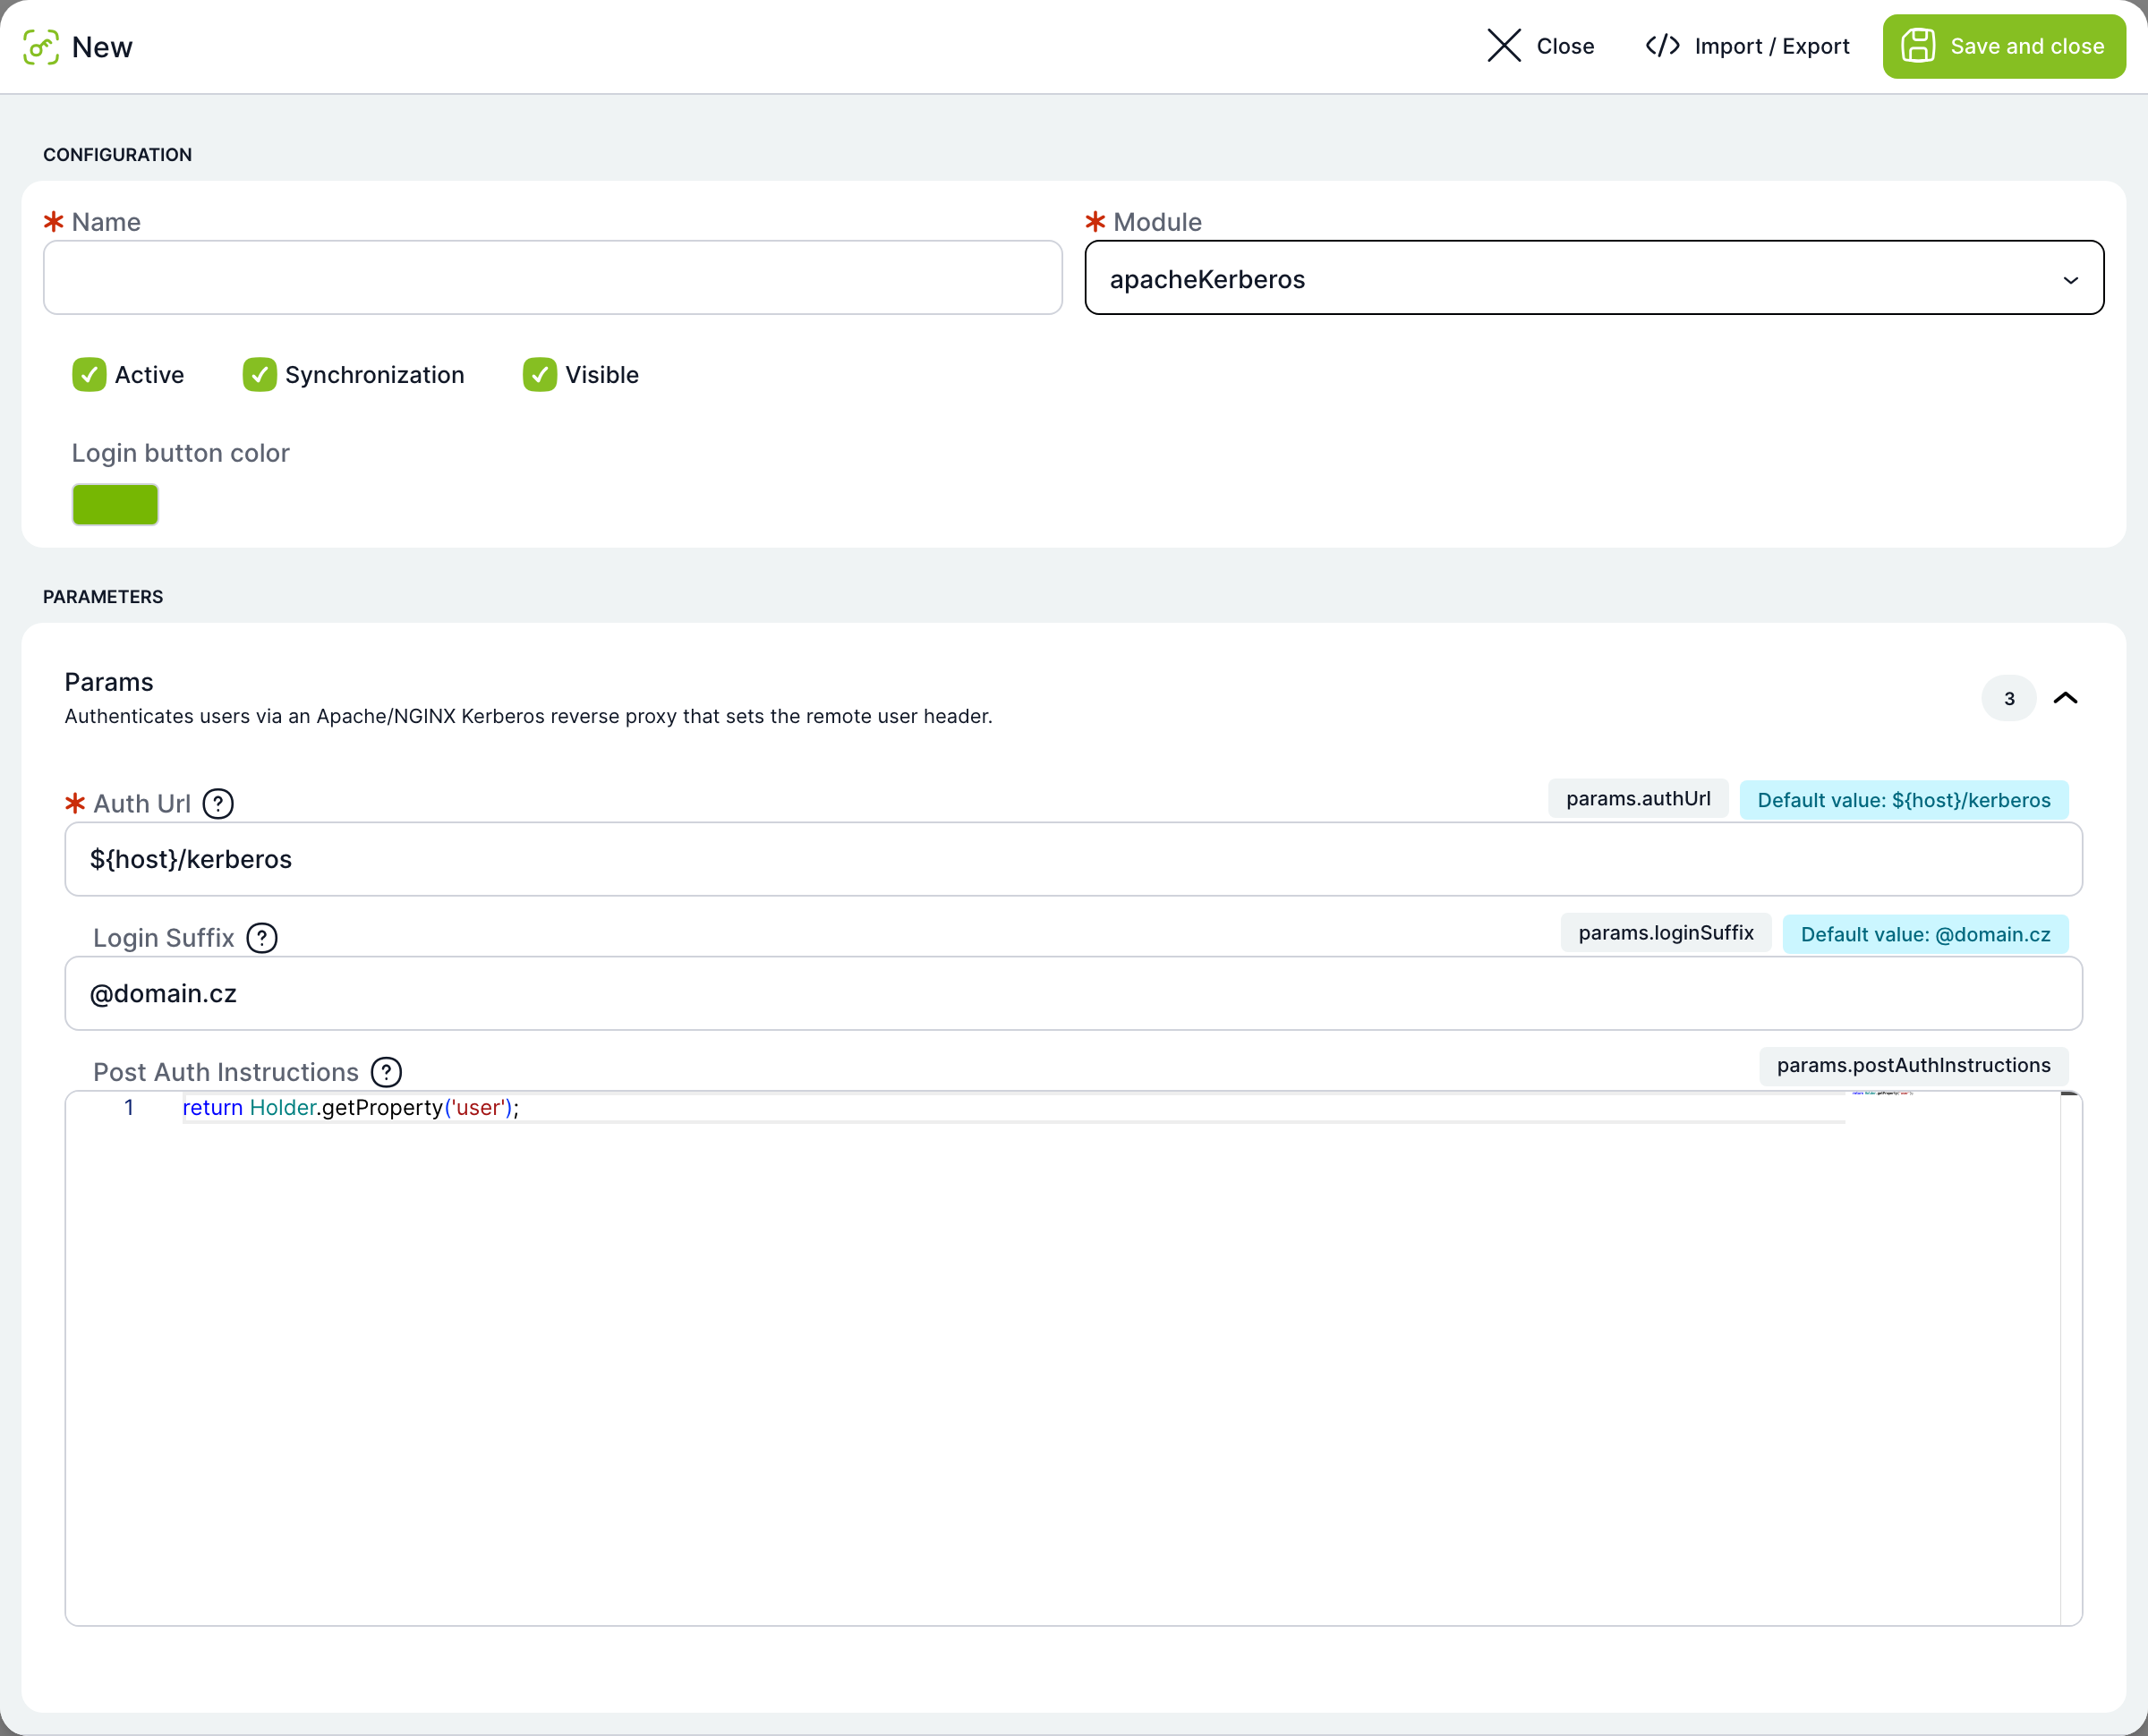
| Field | Purpose |
|---|---|
| Auth Url | Required. Kerberos-protected address to which TAS redirects the user. Default ${host}/kerberos. |
| Login Suffix | Domain suffix TAS removes from the name passed by the proxy to obtain the login name. |
| Post Auth Instructions | Script that determines the TAS user. The default script returns the user passed by the proxy. |
External authority (foreign)
Redirects the user to an external login service.
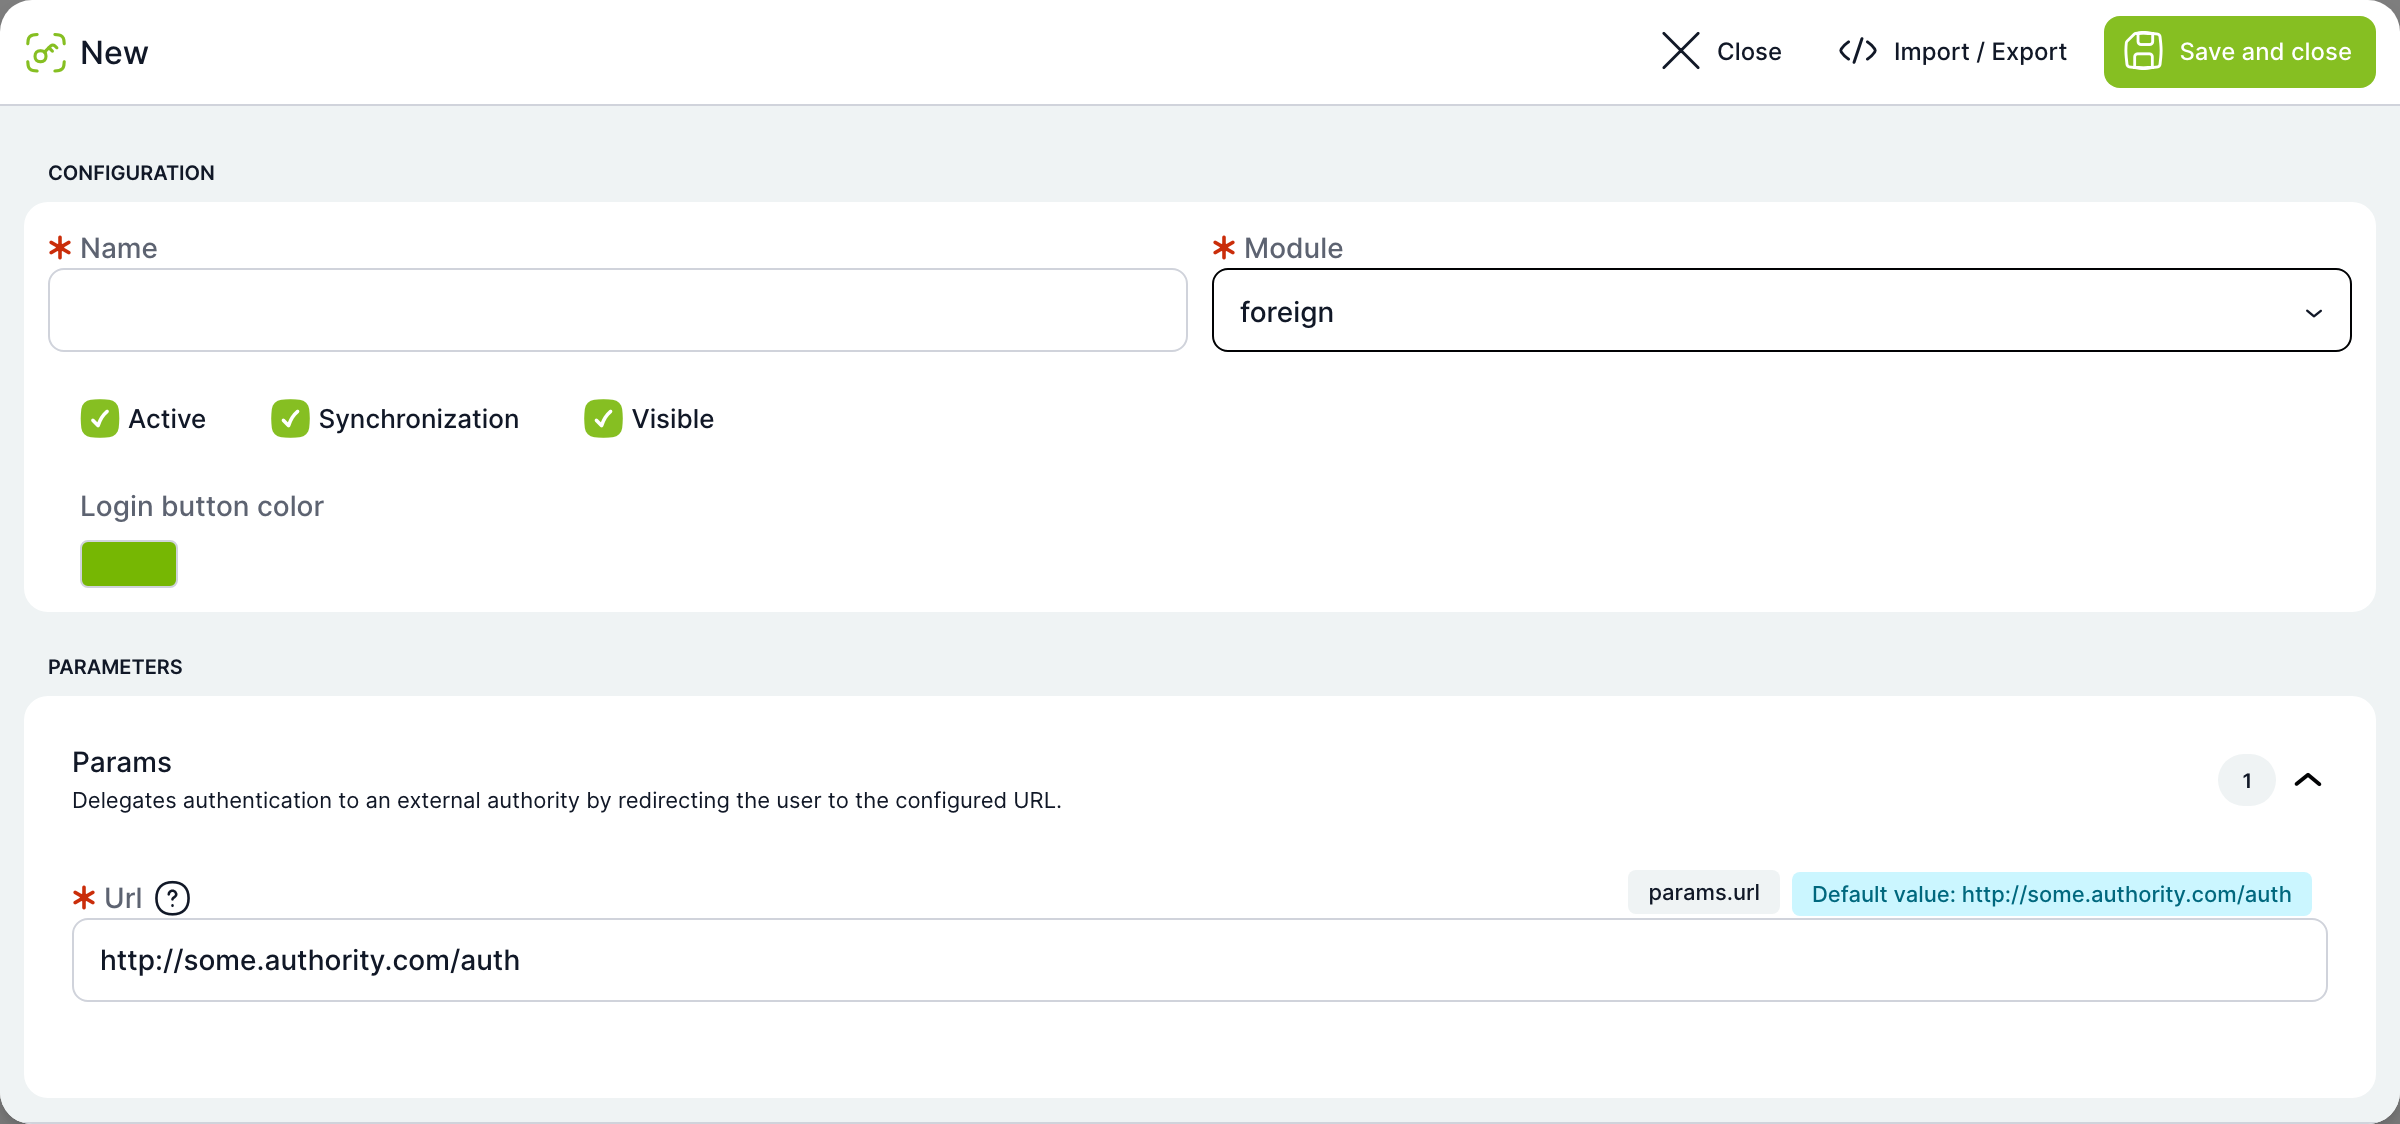
| Field | Purpose |
|---|---|
| Url | Required. Address of the external service to which the user is redirected. |
NFC (nfc)
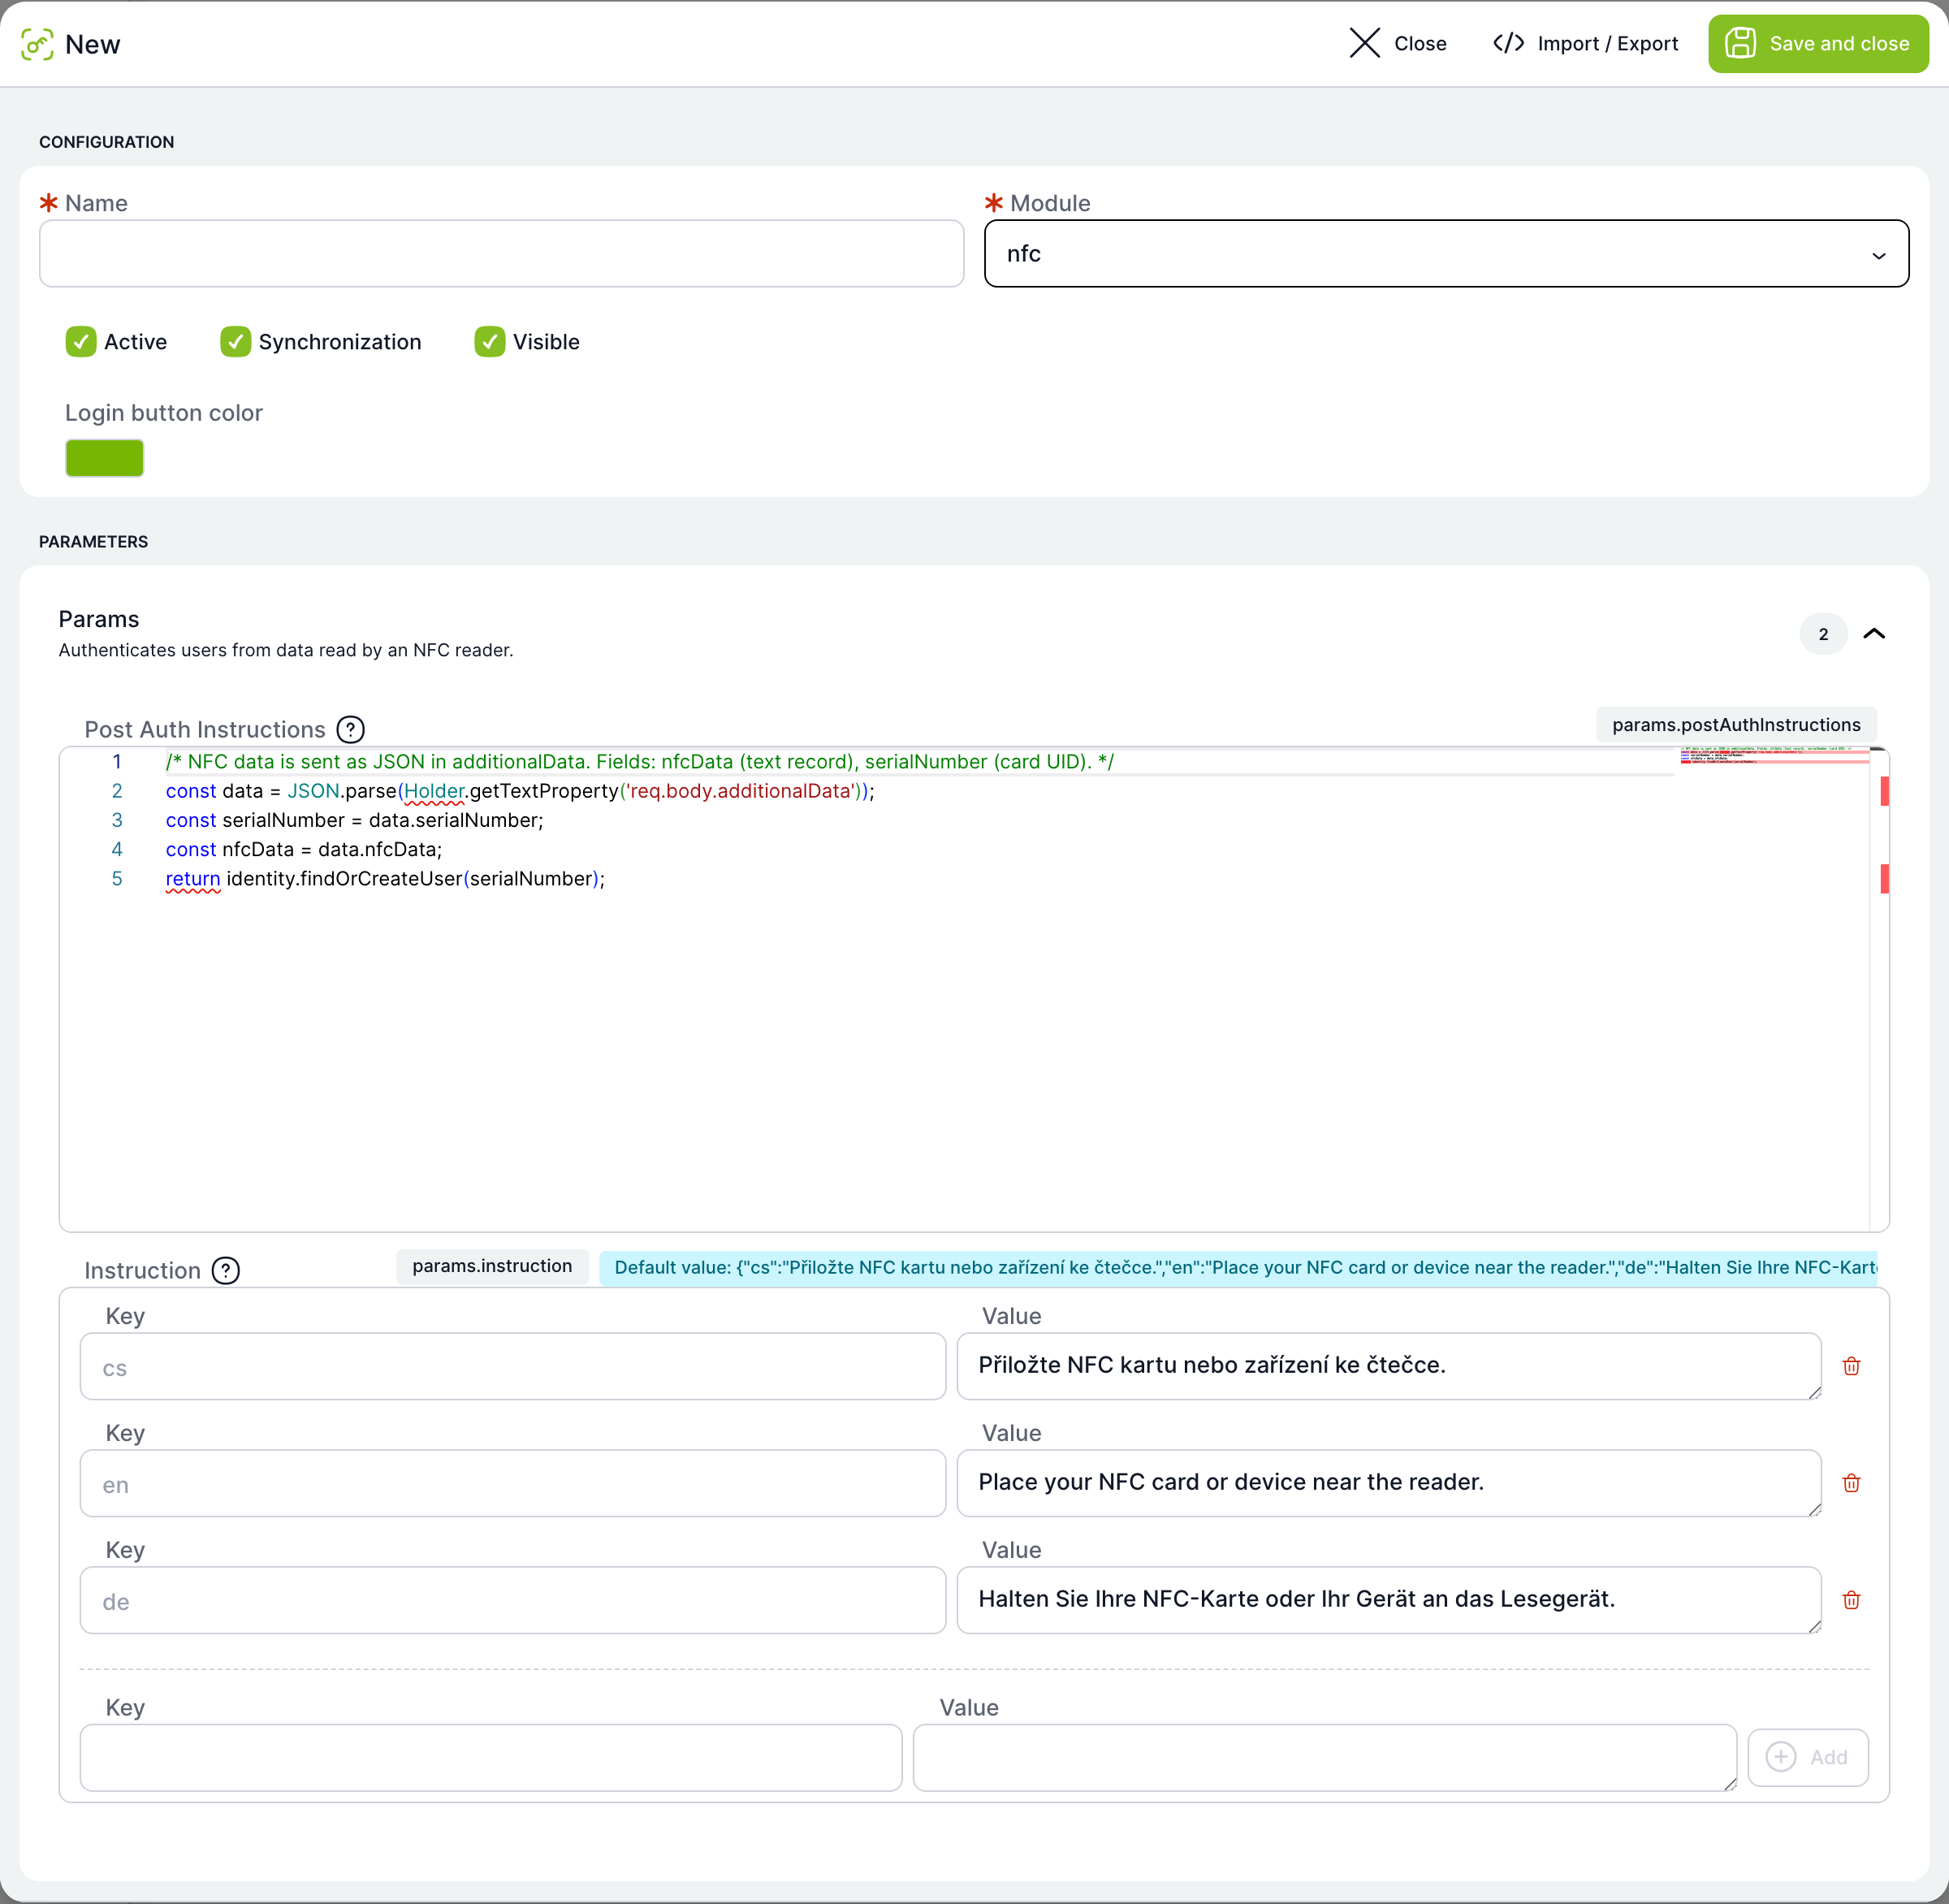
Login by holding an NFC card or device to a reader. The module can be saved only when the NFC reader is enabled in Configuration (featureFlag.nfcReaderEnabled).
| Field | Purpose |
|---|---|
| Post Auth Instructions | Required. Script that finds or creates the user from the card data. It receives the card serial number (UID) and the text record from the card. The default script looks up the user by serial number. |
| Instruction | Prompt the user sees at the reader, separately for each language. The key is the language code (cs, en, de…), the value is the text. Add rows with the Add button and remove them with the bin. |
Import / Export
The Import / Export button in the module window shows the complete current module settings (name, type, checkboxes, color and parameters) as JSON.
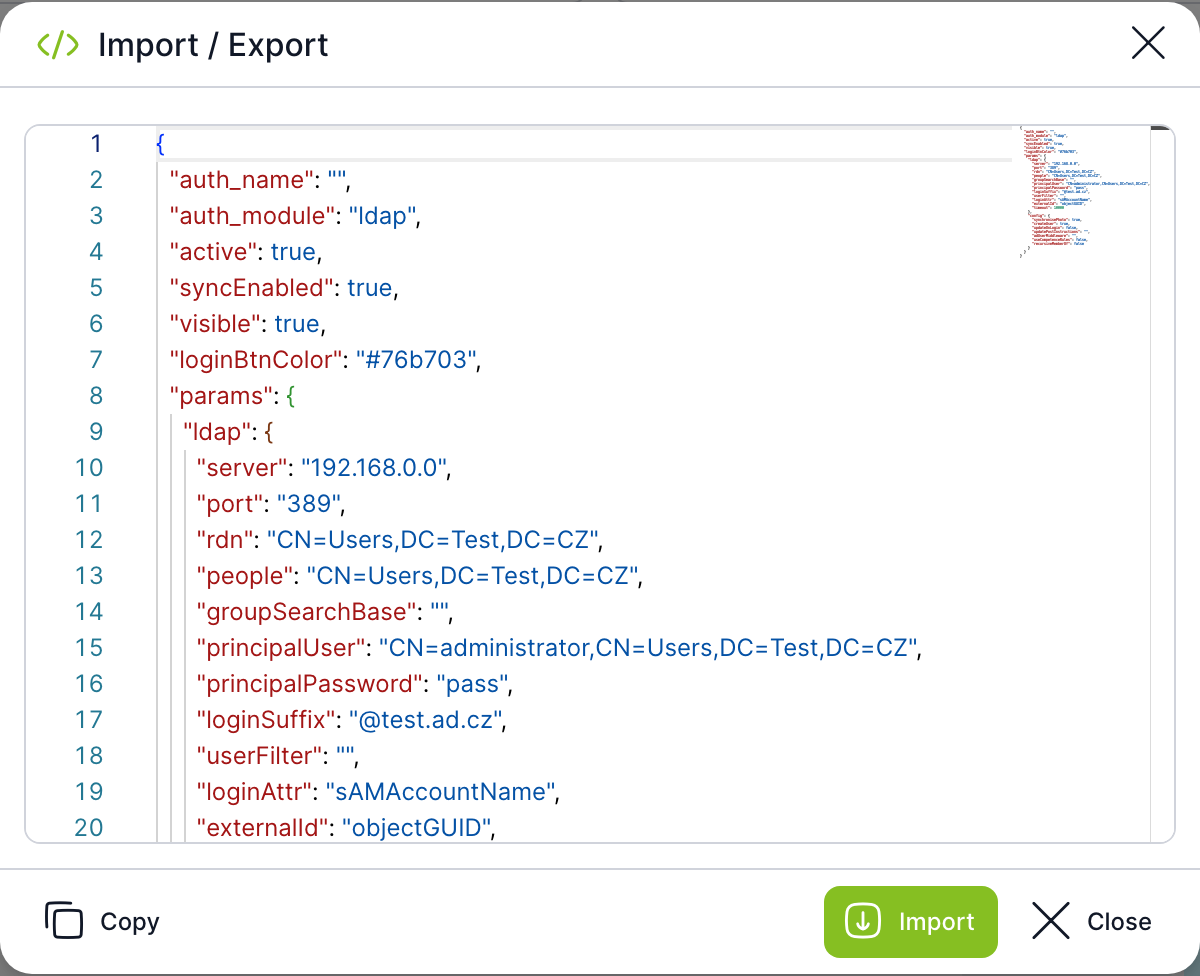
- Copy copies the JSON to the clipboard.
- Import loads the edited or pasted JSON back into the module window. Nothing is saved by this; you save the settings only with the Save and close button. TAS rejects invalid JSON with the message Invalid JSON format.
- Close closes the window without changes.
The JSON contains all parameters, including passwords and secret values (for example the LDAP account password). Do not send it by e-mail or store it anywhere without protection.
Closing without saving
When you close the window with unsaved changes, TAS asks Save changes?
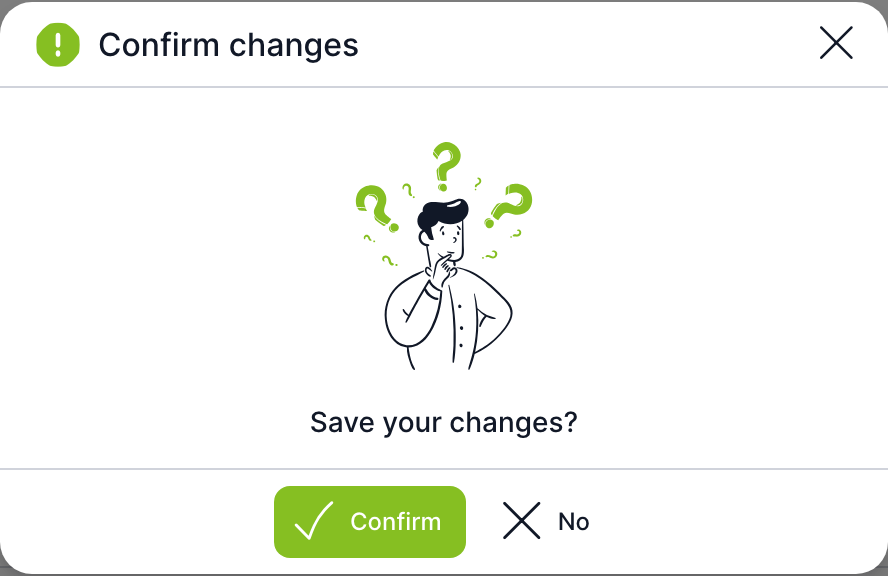
Confirm saves the changes, No closes the window and discards the changes.
Testing a module
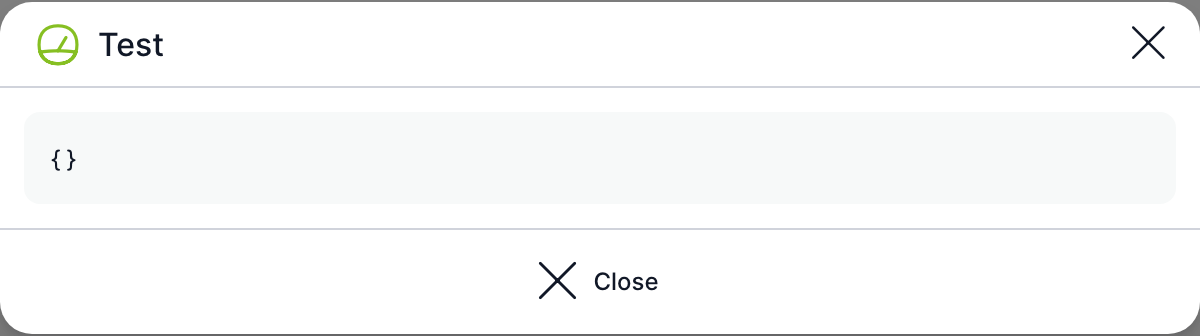
The Test button in the module row tests the module and shows the response in the Test window.
| Module | What the test shows |
|---|---|
| password, nfc, apacheKerberos | An empty response {}. The test does not verify anything for these modules. |
| ldap | Connects to the directory and shows the number of users found, the list of attributes and a sample of one directory record. This verifies both the connection and the search settings. |
| azureAd, saml2, foreign | The address to which the user would be redirected at login. |
If the test fails, the window shows an error message, for example an unreachable LDAP server.
The LDAP test result contains data of a real user from the directory. Do not share it.
How to add an authentication module
- Click Add.
- Fill in Name. For modules with a button, this is the button text on the login page.
- Select Module.
- Set Active, Visible and, if needed, Synchronization and Login button color.
- Fill in the parameters. Replace the default example values with real ones.
- Click Save and close. The new module is added to the end of the list.
- Click Test next to the module and verify the settings.
- Drag the row to set the order.
Related: License, Vault, API Access, Configuration, Crons, Login and logout